1. Welcome to Tacoma World!

    You are currently viewing as a guest! To get full-access, you need to register for a FREE account.

    As a registered member, you’ll be able to:
    • Participate in all Tacoma discussion topics
    • Communicate privately with other Tacoma owners from around the world
    • Post your own photos in our Members Gallery
    • Access all special features of the site

How To: Spark Plug Change (1 GR-FE)

Discussion in 'Technical Chat' started by chris4x4, Mar 16, 2009.

  1. Aug 11, 2013 at 1:25 AM
    #1161
    cleveland48

    cleveland48 Well-Known Member

    Joined:
    Jun 24, 2012
    Member:
    #81241
    Messages:
    195
    Gender:
    Male
    First Name:
    Andrew
    Belmont, Mississippi
    Vehicle:
    2012 TRD Off Road
    5100's set at 1.75, 1.5 in. AAL, 265/75/16 Cooper ST tires.
    Ok guys I changed my plugs last week and everything ran fine. Now I noticed when I back up and turn the wheel full lock to the right I have bad vibration/ rattling sound. At first thought my tires were rubbing so I checked everything at full lock and no where near touching. So I'm lost anyone have this kinda thing happen before? Like maybe I didn't tighten something back good? Just in case truck has 5100's on front at 1.75 and 1.5 AAL in back. With 265/75/16 cooper st's. it only does this in reverse though any help would be appreciated
     
  2. Aug 11, 2013 at 1:26 AM
    #1162
    650H1

    650H1 Well-Known Member

    Joined:
    Jan 3, 2011
    Member:
    #48689
    Messages:
    8,641
    Gender:
    Male
    First Name:
    Michael
    VA
    Vehicle:
    2020 (Cement) TRD O/R
    doesnt sound like anything that has to do with spark plugs :confused:
     
    TacomaCZman likes this.
  3. Aug 11, 2013 at 6:53 AM
    #1163
    Agent Smith

    Agent Smith Always outnumbered, never outgunned

    Joined:
    Oct 4, 2010
    Member:
    #44197
    Messages:
    1,018
    Gender:
    Male
    Vehicle:
    05 TRD Offroad Ivan Stewart Edition
    Toytec lift,FJ Anthracite wheels wrapped in BFG A/T 265/75/16's,WAAG Brush Guard, IPF 868's,sleeved fog lights
    Coincidental. Maybe a bad bushing on your steering rack?
     
  4. Aug 11, 2013 at 6:53 AM
    #1164
    JimROCDS

    JimROCDS Well-Known Member

    Joined:
    May 6, 2010
    Member:
    #36640
    Messages:
    84
    Gender:
    Male
    First Name:
    Jim
    Massachusetts
    Vehicle:
    Tacoma

    Sounds like something in your front end differential.


    Jim
     
  5. Aug 11, 2013 at 11:42 AM
    #1165
    cleveland48

    cleveland48 Well-Known Member

    Joined:
    Jun 24, 2012
    Member:
    #81241
    Messages:
    195
    Gender:
    Male
    First Name:
    Andrew
    Belmont, Mississippi
    Vehicle:
    2012 TRD Off Road
    5100's set at 1.75, 1.5 in. AAL, 265/75/16 Cooper ST tires.
    My last tacoma I had to replace drivers side front wheel bearing and passenger side cv axle. It doesn't sound anything like them just like a bad vibration cause I've not rubbing
     
  6. Aug 11, 2013 at 1:06 PM
    #1166
    geogecko

    geogecko Well-Known Member

    Joined:
    Jan 3, 2013
    Member:
    #94316
    Messages:
    210
    Gender:
    Male
    Broken Arrow, OK
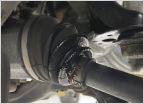
    When I put my 5100's on the front (0.85 setting on my 2005) I had bad vibrations but it was going forward (around 40mph). I had to replace the drivers' side front diff CV needle bearing with the East Coast Gear Supply bushing. Fixed it right up. You can check to see how bad the play is by getting under the front of the truck, reach up and push on the axel right where it goes into the front diff (inner CV joint housing). Check both sides, my drivers' side one was pretty bad after the strut change out.

    May not be your problem though, seems like its hit or miss if you get that vibration after lifting the front end or not. I thought I'd be okay with as minor of a lift that I did...
     
  7. Aug 11, 2013 at 3:34 PM
    #1167
    cleveland48

    cleveland48 Well-Known Member

    Joined:
    Jun 24, 2012
    Member:
    #81241
    Messages:
    195
    Gender:
    Male
    First Name:
    Andrew
    Belmont, Mississippi
    Vehicle:
    2012 TRD Off Road
    5100's set at 1.75, 1.5 in. AAL, 265/75/16 Cooper ST tires.
    Ok thanks I knew some people on here had a bad vibe in the front sometimes. I could not think of what people used to fix that, but when u said east coast gear supply I remembered lol. Thanks for the info though guys I'll see what I can figure out
     
  8. Aug 11, 2013 at 8:23 PM
    #1168
    geogecko

    geogecko Well-Known Member

    Joined:
    Jan 3, 2013
    Member:
    #94316
    Messages:
    210
    Gender:
    Male
    Broken Arrow, OK
    Good luck on your quest, hope you can sort it out.

    I took advantage of some time I had today, and did the old spark plug change out (125k miles), oil change, air filter change, MAF sensor clean, and throttle body clean. Took about 3 hours to do all that, but figured while I had everything apart, it would be a good time to do the other cleaning. I've done the MAF/TB clean before, maybe 90k miles, and they didn't seem that dirty this time, but still got some deposits off.

    Love this write up. Moving that bar on the fuel rail was a life saver. Still really tough to get to the connector on the drivers' side front sparker though. So glad I used anti-siege and a torque wrench on the plugs when I've done them. They all came out rather easily. Only one that made me a little nervous, a little squeaky coming out. May not have had enough anti-siege on it. Really coated all threads well this time.
     
  9. Aug 15, 2013 at 10:30 AM
    #1169
    brewster7

    brewster7 New Member

    Joined:
    Aug 15, 2013
    Member:
    #110502
    Messages:
    1
    Gender:
    Male
    First Name:
    Roger
    Gulf Breeze, Fl
    Vehicle:
    2011 Tacoma DC 4X4
    Thanks and subscribed!
     
  10. Aug 17, 2013 at 9:00 AM
    #1170
    FFMast

    FFMast Custom Dude

    Joined:
    Jun 23, 2011
    Member:
    #58728
    Messages:
    77
    Gender:
    Male
    North Florida
    Vehicle:
    13 TRD Off Road 4x4
    Bilstein 5100's . Add-a-Leaf. Interior LED's. Husky floor mats. Thule rack. Various little things...
    Changed mine this morning. Took about an hour and a half. Its been a while since I did it last but after changing one plug, I got in to the groove and...done. Thanks for the write-up.
     
  11. Aug 18, 2013 at 9:12 AM
    #1171
    T Fades

    T Fades Well-Known Member

    Joined:
    Aug 17, 2011
    Member:
    #61862
    Messages:
    2,709
    Gender:
    Male
    Simi Valley, CA
    Vehicle:
    '11 PreRunner V6 2wd DCLB
    Satoshi, debadged, rear view mirror bracket, tail gate hose clamps, trimmed mud flaps.
    Great write up Chris! Couldn't be easier.

    Nothing better than spending a Saturday morning wrenching on the Taco.
     
  12. Aug 18, 2013 at 3:21 PM
    #1172
    JMLdawg

    JMLdawg Member

    Joined:
    Apr 25, 2010
    Member:
    #35989
    Messages:
    21
    Gender:
    Male
    Suwanee
    Vehicle:
    2006 PreRunner SR5
    This post helped me out greatly! Replaced my plugs today with OE replacement and it took me about an hour and a half. Not bad. I thought the toughest actually was the front driver side plug.
     
  13. Sep 8, 2013 at 3:29 AM
    #1173
    empty hull

    empty hull Active Member

    Joined:
    Feb 17, 2013
    Member:
    #97721
    Messages:
    38
    Gender:
    Male
    First Name:
    Tim
    Baton Rouge, La
    Vehicle:
    Prerunner V6 SR5 TRD Off Road
    I changed mine yesterday and was very easy using this thread to refer to. Thanks to chris 4x4 for this thread. Tim
     
  14. Sep 9, 2013 at 12:19 AM
    #1174
    m_yota

    m_yota Well-Known Member

    Joined:
    Nov 26, 2008
    Member:
    #11050
    Messages:
    289
    Gender:
    Male
    Paradise
    Vehicle:
    08 4x4 dbl cab
    K&N airfilter, HID conversion for headlights/fogs. Wet Okole Seat covers, Kove Aphex processor Kenwood comp 6.5" and 6.5"coaxial 5100 billy shocks 2.5", 1.5" fabtech AAL,Epicenter and MTX Sub, debadged, tinted, kenwood dnx812, black mesh grill, led ext/int.
    Great write up, just changed mines this pass weekend. And boy am I lucky reading this thread prior to attempting this! :cool::cool::D
     
  15. Sep 14, 2013 at 5:16 PM
    #1175
    othater

    othater Well-Known Member

    Joined:
    Aug 22, 2009
    Member:
    #21558
    Messages:
    354
    Gender:
    Male
    SoCal-Walnut
    Vehicle:
    06 Prerunner SR5 TRD Sport
    Second time using this how to as a reference. Much easier this time.
    Thanks Chris4X4
     
  16. Sep 15, 2013 at 6:52 PM
    #1176
    RyanK1

    RyanK1 Well-Known Member

    Joined:
    Mar 11, 2011
    Member:
    #52799
    Messages:
    136
    Gender:
    Male
    First Name:
    Ryan
    Penticton, British Columbia
    Vehicle:
    2006 Tacoma TRD Sport
    Bilstein 5100's @ 2.5, TSB rear with block spacer, Procomp ES9000's, CBI Moab 2.0 front bumper, swaybar removed, DIY HiLift mount, Rear diff breather mod, ABS Kill Switch, Flowmaster 40 series muffler, Superwinch 8500
    Great write up! Did mine this weekend. One word of advice, make sure not to over tighten the bolts holding the coil packs in. I made this mistake and had the bolt break off inside on the drivers side. So a fairly simple job turned into a slightly larger one. Had to remove the intake assembly to get the right angle to drill the bolt and extract it. 2 hour job turned into almost 5.
     
  17. Sep 18, 2013 at 2:19 AM
    #1177
    Gene563

    Gene563 Well-Known Member

    Joined:
    Jul 27, 2008
    Member:
    #8171
    Messages:
    290
    Gender:
    Male
    First Name:
    Eugene
    Lanoka Harbor, NJ
    Vehicle:
    08 Double Cab, LB, TRD Sport
    TRD catback exhaust, Undercover hard tonneau, Vent visors, Husky liners, customized seat covers, front license plate bracket, rear suspension TSB, Eibach springs w 5100s@0, & General Grabber AT2 (265.70.17).
    I finally got around to doing this; not a difficult job at all. Excellent write-up Chris!
    One tip that I found ... on the driver's side, I used the long needle-nosed pliers as suggested, however with my left hand, squeezed the connector clip with the pliers, and pushed the connector off with my right hand. I was being careful not to damage the clip. Once off, the plugs were easy to get to. Socket extensions are a must! I started the truck in between sides to verify no problems halfway through.
    My old plugs (Denso & NGK) looked normal, but with gaps ranging from .047 - .053.
    The truck runs much smoother now.
     
  18. Sep 28, 2013 at 5:13 PM
    #1178
    1TUFFTRD

    1TUFFTRD WTF

    Joined:
    Feb 4, 2010
    Member:
    #30721
    Messages:
    2,122
    Gender:
    Male
    out and about building powerlines
    Vehicle:
    06 AC with a skewp
    06 With a Skewp.
    Just finished and it was time! Just got a new to me 2006 with 98, 000. Following this thread made it super easy!
     
  19. Oct 6, 2013 at 10:46 AM
    #1179
    Viridian

    Viridian Member

    Joined:
    Jul 6, 2012
    Member:
    #82067
    Messages:
    7
    Gender:
    Male
    NoVA
    Vehicle:
    2011 V6 access 6 speed 4wd
    Thanks for the instructions! Just finished changing my plugs a few minutes ago and had no problems. The dealer wanted $275 to change them and I just laughed. Even dropping $70 on a torque wrench (I know I could have just winged it, but I've been looking for an excuse to buy one anyway) I came out way ahead.

    The dealer also wanted $75 to change the cabin air filter. $6 on Amazon.
     
  20. Oct 11, 2013 at 12:52 PM
    #1180
    Randy0223

    Randy0223 New Member

    Joined:
    Aug 15, 2011
    Member:
    #61736
    Messages:
    1
    Gender:
    Male
    Minnesota
    Vehicle:
    Tacoma PreRunner
    Adding my thanks to Chris4x4 as well. Just finished changing plugs on my 2009 PreRunner (31,000 miles, mostly 25-mile plus trips, no off-road, no towing). Would have figured this out but this write up made clear what needed to be removed to gain access. And just as important, what wasn't needed for access.

    A few additions:

    1) The front driver's side electrical clip can be easily removed with the use of two long screwdrivers. Use one to hold down the release and the other to pry the clip. Make sure the release is fully engaged so as not to break anything.

    2) The specified gap for new plugs is 0.039-to-0.043. I measured the removed plugs and they were consistently gaped at 0.045. Truck was running fine prior to changing with no noticeable change in performance with the new plugs. Still, peace-of-mind is worth the minor expense and 2-hours of time. Assuming equivalent driving/trips, I plan the next plug change will be after adding ~50,000 miles. Still don't understand why Toyota doesn't recommend the use of iridium plugs. Even more confused by the factory installed Denso brand plugs on the passenger side and the NGK on the driver side. What's with that???

    Finally, I noticed the previous poster was quoted $275 by his dealer. Yikes - $275 is a bit much for a job that is really quite simple. My Minneapolis dealer quoted $175 which seems a fair price.
     

Products Discussed in

To Top