

-
Welcome to Tacoma World!
You are currently viewing as a guest! To get full-access, you need to register for a FREE account.
As a registered member, you’ll be able to:- Participate in all Tacoma discussion topics
- Communicate privately with other Tacoma owners from around the world
- Post your own photos in our Members Gallery
- Access all special features of the site
 Oil Change
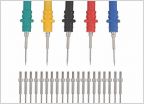 Sensor code but sensor tests good
 OEM Connectors and Pigtails
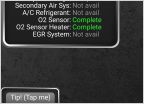 5VZ-FE, 3.4L V6, Detailed Post on Performance Problem. Please, PLEASE Offer Informed Input
 OBD2 that reads detailed engine stats
OBA pressure switch location
Discussion in 'Technical Chat' started by MuttTruck, Jul 12, 2014.


