

-
Welcome to Tacoma World!
You are currently viewing as a guest! To get full-access, you need to register for a FREE account.
As a registered member, you’ll be able to:- Participate in all Tacoma discussion topics
- Communicate privately with other Tacoma owners from around the world
- Post your own photos in our Members Gallery
- Access all special features of the site
 Sumo Springs Review
 Towing 5000-6000lbs with a 2018
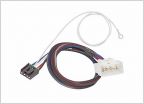 2019 Brake Controller Hookup
 Transmission cooler
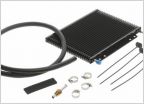 Towing advice...tranny cooler or no
 Upgrading TRD Trans cooler
PICS - Class III Hitch Install - Basic
Discussion in 'Towing' started by TacoBow, May 13, 2013.


