1. Welcome to Tacoma World!

    You are currently viewing as a guest! To get full-access, you need to register for a FREE account.

    As a registered member, you’ll be able to:
    • Participate in all Tacoma discussion topics
    • Communicate privately with other Tacoma owners from around the world
    • Post your own photos in our Members Gallery
    • Access all special features of the site

Tekonsha P3 install below HVAC 2013 Tacoma

Discussion in 'Towing' started by Amanda Rae, May 13, 2013.

  1. May 13, 2013 at 7:03 PM
    #1
    Amanda Rae

    Amanda Rae [OP] Rocky Mountain Member

    Joined:
    Nov 26, 2012
    Member:
    #91875
    Messages:
    19
    Gender:
    Female
    First Name:
    Amanda
    Kentucky
    Vehicle:
    2013 TRD Sport
    De-badged 3" Toyo Lift TRD Bronze Wheels 4 - 170 Striker LightForce Lights
    Hi Fellas, I researched pretty heavily a few installation of brake controllers before I tackled mine. Didn't want it at my knees as the left side is prone for bumping and the right is already occupied, and I didn't want it in the little pocket to the right of the steering wheel because I was worried about being able to use the manual override on the controller (and I was afraid of my keys hitting it) so I decided on the storage area just infront of the shifter. I hadn't seen anyone else post that they had mounted on here so I thought I would share.

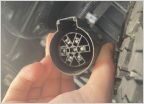
    I have the factory 7-way hookup so I had the brake harness already run into the cab. Like everyone else it took a bit of detective work to find the factory connector and it was indeed finally found via feel instead of sight...even tho I was laying in the floorboard with my head on the break pedal and there was a bit of skin left from my wrist when it was all said and done, but I think it was worth it.

    I took this time being under my dash to relocate my LightForce light switch to the empty slots under the HVAC (I was pretty scared to mount it here because quite a bit of dremeling had to be done to fit but I like it much better than on the left of the steering wheel...my knee kept hitting it there) As you will notice my factory USB/AUX imput is missing...because I mounted my iPhone with the PanaVise and Proclip mount I made this a dedicated port and tucked it behind the dash to keep everything clean with no wires exposed and leaving me 3 more slots for Aux switches! :)

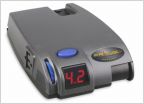
    For my brake controller install I purchased the Tekonsha P3 and ordered the 2013 Tacoma Pigtail with it. I connected the little pigtail to the factory connector and run it as far toward the passenger side as it would reach making sure not to allow it to rub up against any of those sharp edges under the dash and made sure my steering wheel column didn't come in contact with it when it was moved then I cut off the end that plugs into the P3. At this point I went to the storage area that I mounted the P3 in and drilled a hole just big enough for the 4 wires that come out of the P3 harness. (after verifying that nothing was directly behind this location by peaking thru the holes after my toggle switch blanks were removed) At this end I used the P3 harness that came with the controller...fished it thru the little hole and connected about where the little pocket is on the right hand side of the steering wheel.

    Sorry I don't have any more photos...wasn't really planning on writing anything up but thought others might have the same idea as I did and I know how much confidence it gives you to know its been done before.

    BrakeController_d1b19131e765c0ba1ebe1e12510137ced9136284.jpg

    LightForce_53c83569e93f34817297d64d323a1be647ba6b7b.jpg
     
    DistortedAxis likes this.
  2. May 16, 2013 at 8:21 AM
    #2
    andyt11

    andyt11 Tiny Member

    Joined:
    May 3, 2013
    Member:
    #103405
    Messages:
    43
    Gender:
    Male
    Central Canada
    Vehicle:
    '13 TRD 6spd Dbl cab Leather
    Tekonsha P3
    This is what I'm thinking of doing once the truck arrives. Looks like a good spot for it.

    How did you drill the holes in the underside of the storage area? A right angle drill?

    Also, did the truck note come with a pigtail from Toyota when you took delivery? I'm expecting mine to but I guess I'll find out.

    How do you like the P3?
     
  3. May 17, 2013 at 7:24 AM
    #3
    Amanda Rae

    Amanda Rae [OP] Rocky Mountain Member

    Joined:
    Nov 26, 2012
    Member:
    #91875
    Messages:
    19
    Gender:
    Female
    First Name:
    Amanda
    Kentucky
    Vehicle:
    2013 TRD Sport
    De-badged 3" Toyo Lift TRD Bronze Wheels 4 - 170 Striker LightForce Lights
    I used a normal drill bit and drilled thru the back of the storage area...then used a $3 grabber tool I purchased from lowes to reach thru the rocker slots and grab the wires (lashed together at the end with elec. tape)
    Then from the underside of the dash on the drivers side I shined a light so that I can see where to route them out. I just fed a single 12ga wire thru first then tied my wires to the end of it to pull the 4 thru.

    Here is a pic of the empty compartment with the wire run. The hole I drilled is a little big for the 4 wires; as I was going to use a grommet back there, but that compartment is thicker than I thought! I just wrapped silicone tape around the wires to give it a snug fit when pushed back.

    There is no bend to the P3 wires going into the hole I drilled...it would take a pretty sharp bend to get them to go vertically if you wanted to go thru the top of the compartment. My wires go straight back allowing me to get the front of the P3 aligned nicely with the front of the compartment and light switches. I could actually mount it farther back than I did by maybe 10mm or so.

    I used the mounting hardware that came with my brake controller as well...used a small pick tool and poked a starter hole in the top of the compartment to start the self tapping screws provided. (the top of the compartment is thinner than the back, but it is still stable and no vibe is noticed with the P3)

    I haven't pulled my camper with the P3 installed yet (hopefully I will get to try it out this weekend) but I will say this...the menus in the P3 are very easy to navigate, it has 3 settings for display brightness and you have numerous colors to choose from for backlight. The controller is on all the time when the truck is on and it stays on for a little while after the your turn off your truck, but it eventually times out and shuts off.

    My Truck did have the factory harness run to the panel beside the e-brake. * It was quite hard to find. Before removing the side panel you will need to remove the seal plate and the little foot rest This opens your view up, but you still won't be able to get your eyes on that connector until you pull it loose.
    Your factory connector will NOT have a cap on it. I unwrapped one that looked like it might fit but It was incorrect...my best suggestion is to reach back there and feel around for the connector.

    Mine was zipped tied on the backside of a bunch of cables that were wrapped...it was kinda up high.

    Good Luck! I'll post up after I pull my trailer and try to get a few more photos...maybe with the controller removed. I have never used a eBrake controller before so I hope it won't be that difficult to set!

    BrakeControllerHole_97c252e323528c9f4e0aaa81484207d7cf8c4b4d.jpg
     
  4. May 17, 2013 at 7:48 AM
    #4
    andyt11

    andyt11 Tiny Member

    Joined:
    May 3, 2013
    Member:
    #103405
    Messages:
    43
    Gender:
    Male
    Central Canada
    Vehicle:
    '13 TRD 6spd Dbl cab Leather
    Tekonsha P3
    Thanks for the write up. So you used a pick to make a starter hole and a stubby screw driver to screw the bracket to the top of the compartment? Smart. Its a neat location.

    I've yet to take delivery of my truck yet, but I'm already thinking about things like this, I need to get a controller ordered up.

    So your truck came wired for a controller, just like mine. Am I right in thinking that when you buy the P3 it comes with a harness to plug straight into the truck's harness?

    If I re read your original post, it sounds like you bought a second harness. One to connect to the Tacoma, and one to connect to the P3, and then once through the hole in the storage compartment you must have soldered them together to make one, long and permanently installed harness? Am I reading that right? I take it one pigtail would not be long enough to make it? Or did you do that so you could keep the hole as small as possible?
     
  5. May 17, 2013 at 9:49 AM
    #5
    MARLANDO

    MARLANDO Marlin Hustler

    Joined:
    Mar 5, 2010
    Member:
    #32609
    Messages:
    53
    Gender:
    Male
    The OC, CA
    Vehicle:
    08 PreRunner TRD Sport
    LED Tail Lights, TSB Sup.Upgrade, 5100's set at 1.75"
    Here is mine, permanently attachment

    photo-16_zps73afa19f_afb73aef0009e72c3735c0455e6033f9450cef2a.jpg
     
  6. May 17, 2013 at 10:42 AM
    #6
    Amanda Rae

    Amanda Rae [OP] Rocky Mountain Member

    Joined:
    Nov 26, 2012
    Member:
    #91875
    Messages:
    19
    Gender:
    Female
    First Name:
    Amanda
    Kentucky
    Vehicle:
    2013 TRD Sport
    De-badged 3" Toyo Lift TRD Bronze Wheels 4 - 170 Striker LightForce Lights
    The P3 comes with a harness that is bare wires on one end and the plug for the back of the P3 on the other...

    I ordered the adapter 3040-P seperately http://www.etrailer.com/p-3040-P.html
    it is meant to plug directly into your existing Tacoma harness and then into the controller leaving the original harness that comes with the P3 unused.

    Like you assumed; I wanted to keep the hole small so I cut the controller connector end off the 3040-P and used butt connectors to link the cables that come with the controller to make one permanent install for the cables.
     
    Last edited: May 17, 2013
  7. May 17, 2013 at 10:49 AM
    #7
    Amanda Rae

    Amanda Rae [OP] Rocky Mountain Member

    Joined:
    Nov 26, 2012
    Member:
    #91875
    Messages:
    19
    Gender:
    Female
    First Name:
    Amanda
    Kentucky
    Vehicle:
    2013 TRD Sport
    De-badged 3" Toyo Lift TRD Bronze Wheels 4 - 170 Striker LightForce Lights
    Yep, that's what I did. Thanks


    Nice!
     
    Last edited: May 17, 2013
  8. May 17, 2013 at 12:19 PM
    #8
    andyt11

    andyt11 Tiny Member

    Joined:
    May 3, 2013
    Member:
    #103405
    Messages:
    43
    Gender:
    Male
    Central Canada
    Vehicle:
    '13 TRD 6spd Dbl cab Leather
    Tekonsha P3
    Thanks for clarifying. I'm going to copy exactly what you did. Thats a great website too. Lots of info. Thanks.
     
  9. Jun 3, 2013 at 1:41 PM
    #9
    romafern

    romafern Hug diz nuts

    Joined:
    Mar 15, 2010
    Member:
    #33279
    Messages:
    827
    Gender:
    Male
    First Name:
    Rob
    80918 Let's meet!
    Vehicle:
    Paid for and saving a shit ton of $$$$$
    Thinking of adding a second battery...
    Amanda Rae!

    Lovely name by the way....

    Your install looks good. I am curious on how you have that iPhone/iPod installed. Pics please?


    Thank you!


    Rob
     
  10. Jun 6, 2013 at 7:40 PM
    #10
    hellsbay

    hellsbay Well-Known Member

    Joined:
    May 21, 2013
    Member:
    #104653
    Messages:
    205
    Gender:
    Male
    SW Florida
    Vehicle:
    13 PreRunner TRD OR
    Thanks Amanda. I just did the 'Amanda Rae Brake Controller Mod' on mine. It took me a long time to thread that wire through but I finally got it.
     
  11. Jun 10, 2013 at 3:38 PM
    #11
    Amanda Rae

    Amanda Rae [OP] Rocky Mountain Member

    Joined:
    Nov 26, 2012
    Member:
    #91875
    Messages:
    19
    Gender:
    Female
    First Name:
    Amanda
    Kentucky
    Vehicle:
    2013 TRD Sport
    De-badged 3" Toyo Lift TRD Bronze Wheels 4 - 170 Striker LightForce Lights
    Thanks Rob, My iPhone is mounted via the Panavise Custom InDash Mount for Toyota Tacoma '05-07. Even tho my Truck is a 2013 it fit perfectly...here is the link I ordered it from on Amazon.

    http://www.amazon.com/gp/product/B000I7RUFI/ref=oh_details_o02_s00_i00?ie=UTF8&psc=1

    You just need to pop out the HVAC cluster to expose the mounting point. (I used a dogtag to slide up and under the plastic molding.) Ill try to get you some photos this week. I drilled two tiny holes to start the screws in because The bracket mounts with 2 screws that are hidden when the HVAC panel is re-installed. This was a really quick install...and Sturdy!

    Tho this is just the bracket only, I also ordered the Proclip Dock from http://www.proclipusa.com/
    I bought the one that plugs into USB and is molded to fit a iPhone 4 with a commuter case, which I don't use....I have a frogz case that I really like and it fits well...just a little loose which I don't mind (no rattle under normal driving). Its easy to dock and remove my phone. When 4wheeling I just add a little piece of foam behind it to keep it from rattling. :D
     
  12. Jun 10, 2013 at 3:41 PM
    #12
    Amanda Rae

    Amanda Rae [OP] Rocky Mountain Member

    Joined:
    Nov 26, 2012
    Member:
    #91875
    Messages:
    19
    Gender:
    Female
    First Name:
    Amanda
    Kentucky
    Vehicle:
    2013 TRD Sport
    De-badged 3" Toyo Lift TRD Bronze Wheels 4 - 170 Striker LightForce Lights
    :cheers: awesome!
    Tricky getting that wire routed huh? lol patience is a virtue here :)
     
  13. Jun 10, 2013 at 6:45 PM
    #13
    romafern

    romafern Hug diz nuts

    Joined:
    Mar 15, 2010
    Member:
    #33279
    Messages:
    827
    Gender:
    Male
    First Name:
    Rob
    80918 Let's meet!
    Vehicle:
    Paid for and saving a shit ton of $$$$$
    Thinking of adding a second battery...
    Thanks for the reply Amanda
     
  14. Jul 19, 2013 at 10:01 AM
    #14
    minameismud

    minameismud Well-Known Member

    Joined:
    Oct 26, 2011
    Member:
    #65875
    Messages:
    98
    Gender:
    Male
    Jacksonville, FL
    Vehicle:
    11 DC PreRunner SR5
    Fog light mod, clamped tailgate
    Dredging this thread up from the bowels...

    Amanda, what's that flashlight mount you've got? Where'd you get it?
     
  15. Jul 20, 2013 at 10:05 PM
    #15
    Amanda Rae

    Amanda Rae [OP] Rocky Mountain Member

    Joined:
    Nov 26, 2012
    Member:
    #91875
    Messages:
    19
    Gender:
    Female
    First Name:
    Amanda
    Kentucky
    Vehicle:
    2013 TRD Sport
    De-badged 3" Toyo Lift TRD Bronze Wheels 4 - 170 Striker LightForce Lights
    This site contains affiliate links for which the site may be compensated.
    #15
  16. Dec 5, 2013 at 8:19 PM
    #16
    BDBSoCal

    BDBSoCal The Safety Guy

    Joined:
    Jun 19, 2012
    Member:
    #80978
    Messages:
    197
    Gender:
    Male
    First Name:
    Brad
    SoCal
    Vehicle:
    Silver 2008 SR5 V6 4x4 TRD Sport
    Just starting...
    That looks like a good way to do it. I don't want to cut off my connector though - works great now. I might need to mount closer.
     

Products Discussed in

To Top