1. Welcome to Tacoma World!

    You are currently viewing as a guest! To get full-access, you need to register for a FREE account.

    As a registered member, you’ll be able to:
    • Participate in all Tacoma discussion topics
    • Communicate privately with other Tacoma owners from around the world
    • Post your own photos in our Members Gallery
    • Access all special features of the site

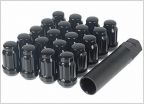
Dorman studs/ wheel stud install and sizing. (not happy with dorman)

Discussion in 'Wheels & Tires' started by xyourlocaldjx, Jun 19, 2012.

  1. Jun 19, 2012 at 3:18 PM
    #1
    xyourlocaldjx

    xyourlocaldjx [OP] Well-Known Member

    Joined:
    Dec 22, 2009
    Member:
    #27990
    Messages:
    428
    Gender:
    Male
    For those who plan on doing this mod... Do yourself a favor and get 2 huge nuts as spacers. Using your brake rotor as a spacer is BS and it doesnt even work since the new studs are so long.

    Not sure why no one mentioned this in the previous how to posts.

    took 4 hours to do 6 studs before i went and got the nuts. After i got the right spacers to torque the studs into place it took me around 1.5 hours to do 18.

    I also measured with a caliper and the dorman studs are MUCH larger in diameter than the stock tacoma studs. impact wrench was working overtime to smash them in. god what a headache it was.

    Knurl Dia: 14.20mm (0.559inch) BS Dorman!
    i measured and they were .576 I'm not sure what they're allowed as far as being in spec, but this was far from being in spec.
    It was such a PITA that I'm almost tempted to call them and get some sort of explanation.
    Anyone else measure their studs before installing?

    [​IMG]

    [​IMG]

    [​IMG]
     
  2. Jun 19, 2012 at 3:22 PM
    #2
    04LTtacoma

    04LTtacoma Well-Known Member

    Joined:
    May 15, 2010
    Member:
    #37190
    Messages:
    11,268
    Gender:
    Male
    Oregon
    Took you four hours to do 6 wheel studs??? :eek:


    I used washers with some grease.
     
  3. Jun 19, 2012 at 3:30 PM
    #3
    xyourlocaldjx

    xyourlocaldjx [OP] Well-Known Member

    Joined:
    Dec 22, 2009
    Member:
    #27990
    Messages:
    428
    Gender:
    Male

    Probably a bit longer since i started it one day and then the sun went down and then i started it again the next day lol. Knocking out the old studs was a breeze. 3-4 whacks with a hammer and they came out.

    I could not find anything in my garage to use as a spacer. I found a large socket for industrial sized nuts which rested against the elevated hub, i then spaced the opposite side of the socket with a huge allen key.

    someone mentioned they used a c clamp so i tried that route. No way in hell.
    each stud took enough time for Thomas Jefferson, Ben Franklin, and John adams to rewrite the Declaration of Independence three times. Well until i got large nuts for spacers.


    How'd you get the washers to sit flush by clearing the elevated part in the hub?
    I oiled the studs, but i doubt that helped any. The studs were super off on sizing.
     
  4. Jun 19, 2012 at 3:33 PM
    #4
    04LTtacoma

    04LTtacoma Well-Known Member

    Joined:
    May 15, 2010
    Member:
    #37190
    Messages:
    11,268
    Gender:
    Male
    Oregon
    Last comment LOL!


    It took me 30min to do both drivers side and passengers side wheel studs. I suggest you go with ARP wheel studs next time.

    EDIT: It only took me 30min cuz I had an impact gun.
     
  5. Jun 19, 2012 at 3:48 PM
    #5
    xyourlocaldjx

    xyourlocaldjx [OP] Well-Known Member

    Joined:
    Dec 22, 2009
    Member:
    #27990
    Messages:
    428
    Gender:
    Male
    30 minutes sounds about right. After i got the right spacers it was fairly easy, but the studs were so off sized that the impact wrench was struggling.

    i should have gone arp =( they were so expensive though.

    I envy the fact that it took you 30 minutes per wheel from the get go! =(
     
  6. Jun 19, 2012 at 3:50 PM
    #6
    04LTtacoma

    04LTtacoma Well-Known Member

    Joined:
    May 15, 2010
    Member:
    #37190
    Messages:
    11,268
    Gender:
    Male
    Oregon
    The thing that sucks about buying APR wheel studs is the fact only 5 come in a pack so you have to buy 3 packs to have a total of 12 wheel studs.:mad: It's about $30.00 for each pack, end up spending $90 for set.
     
  7. Jun 19, 2012 at 4:03 PM
    #7
    xyourlocaldjx

    xyourlocaldjx [OP] Well-Known Member

    Joined:
    Dec 22, 2009
    Member:
    #27990
    Messages:
    428
    Gender:
    Male
    thats one other way to make us purchase more than we need!

    thats mighty expensive, but not was much as 120 for some other ones i saw.

    I think i paid 40ish for my set shipped.
     
  8. Jun 19, 2012 at 4:14 PM
    #8
    04LTtacoma

    04LTtacoma Well-Known Member

    Joined:
    May 15, 2010
    Member:
    #37190
    Messages:
    11,268
    Gender:
    Male
    Oregon
    Oh cool. I have a set of ARP wheel studs sitting in the garage. I've been to lazy to put them on the truck. haha
     
  9. Jun 19, 2012 at 4:15 PM
    #9
    xyourlocaldjx

    xyourlocaldjx [OP] Well-Known Member

    Joined:
    Dec 22, 2009
    Member:
    #27990
    Messages:
    428
    Gender:
    Male

    you havent even installed the arp's yet??? lol Maybe inflation will let you sell them back for a profit!!
     
  10. Sep 27, 2012 at 2:11 PM
    #10
    TonkaToyTaco

    TonkaToyTaco Hope you can run faster than 965 FPS

    Joined:
    Feb 2, 2011
    Member:
    #50428
    Messages:
    1,671
    Gender:
    Male
    First Name:
    Louie
    Vehicle:
    11 Tacoma TRD DCLB 4X4
    Fox 2.0 Coilovers cranked up with JBA UCA, Rear OME 2" leaf pack with Ride Rite air bags, SCS Steath 6 matte black rims wrapped in 285/75/17 Cooper ST MAXX, Blacked out emblems, Debaged tailgate, Tinted windows (5% in rear, 5% up front and 40% on windsheild), Retro color matched HID headlights with Amber Halo, Projector LED Foglight, Custom LED Taillight and 3rd brake light, T-Rex 2 eyelids color matched, Fog light anytime MOD, All LED interior and exterior ligths, Volant CAI With forced Ram, JET throttle body spacer, Aero Turbine SS Muffler, Aero Turbine SS 4inch tip dumped after axel, URD MAF Calibrator, LED bed lights, 4X4 light mod, Satoshi Grill with matching scoop and lower Valance, 20" LED bar and 2 LED Pods behind Satoshi, Diff breather mod, Sea Blu secondary fuse box with 100A breaker, Outlaw Train Horns with dual Air Compressors and 5 Gal tank, Ultraguage, Andre Devil Horns, Pedal Commander
    Where the ARP studs to long for the nuts? Did you have to use anything special?
     

Products Discussed in

To Top