

-
Welcome to Tacoma World!
You are currently viewing as a guest! To get full-access, you need to register for a FREE account.
As a registered member, you’ll be able to:- Participate in all Tacoma discussion topics
- Communicate privately with other Tacoma owners from around the world
- Post your own photos in our Members Gallery
- Access all special features of the site
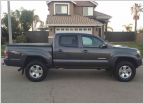 Question regarding Billy 5100's at 1.75"
 Coil Isolator Repl.
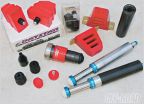 Options to increase payload
 Mevotech TTX Ball Joint FAIL
 XSP-X Wheels question
 Chirping or Cricket noise drivetrain
Mod: Adding 12v power outlets to the center console w/ pics
Discussion in '2nd Gen. Tacomas (2005-2015)' started by rmaddy, Mar 24, 2015.
Page 1 of 2
Page 1 of 2


