1. Welcome to Tacoma World!

    You are currently viewing as a guest! To get full-access, you need to register for a FREE account.

    As a registered member, you’ll be able to:
    • Participate in all Tacoma discussion topics
    • Communicate privately with other Tacoma owners from around the world
    • Post your own photos in our Members Gallery
    • Access all special features of the site

Wile's "The Coyote" Build (OCD edition)

Discussion in '2nd Gen. Builds (2005-2015)' started by Wile, Mar 18, 2015.

  1. Mar 18, 2015 at 4:40 PM
    #1
    Wile

    Wile [OP] Well-Known Member

    Joined:
    Oct 22, 2010
    Member:
    #45079
    Messages:
    897
    Gender:
    Male
    First Name:
    Tim
    New Mexico
    Vehicle:
    08 4x4 DC TRD Offroad
    Pioneer AVH-5600BHS, ScanGauge, Wet Okole Seat Covers, Allpro Aluminum front bumper, Allpro Aluminum IFS skid plate, Allpro APEX rocksliders, Warn 9500s winch
    "The Coyote" Build Thread Overview:


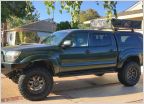
    Base vehicle: 2008 Toyota Tacoma - Indigo Blue, Double Cab, Short Bed, V6, 4x4, Offroad Package

    INSTALLED MODIFICATIONS:

    Interior:
    - Pioneer AVH-5600BHS head-unit
    - JL Audio speakers
    - Scan Gauge II
    - Wet Okole Seat Covers
    - Center Console Vault

    Armor:
    - All-Pro APEX Aluminum Plate Front Bumper
    - All-Pro Aluminum Skid Plate
    - All-Pro APEX Steel rock sliders
    - All-Pro Rear Bumper with Swing-out Tire Carrier.

    Suspension and tires:

    - Icon Stage 6 suspension system with #700 coils and billet aluminum UCAs
    - All-Pro Expo Rear Leaf Springs
    - 5x Cooper Discovery ST MAXX 255/85/R16
    - 5x Black FJ Trail Team wheels
    - sway-bar delete

    Winch:
    - Warn 9.5 XP-S performance winch with synthetic rope

    Lighting and Electrical:

    - Rigid Industries DOT/SAE Fog Lights
    - Rigid Industries 20" RDS LED Curved Lightbar
    - Rigid Industries D2 Flushmount Reverse Lights
    - DEPO aftermarket replacement headlights
    - OPT7 FluxBeam LED headlight kit with Arc Glass
    - OTRATTW and Toyota FJ Cruiser switches

    more detailed information in the posts below:
     
    Last edited: Aug 24, 2016
    ChadsPride, Tarzan13 and YotaGirl93 like this.
  2. Apr 12, 2015 at 11:52 AM
    #2
    Wile

    Wile [OP] Well-Known Member

    Joined:
    Oct 22, 2010
    Member:
    #45079
    Messages:
    897
    Gender:
    Male
    First Name:
    Tim
    New Mexico
    Vehicle:
    08 4x4 DC TRD Offroad
    Pioneer AVH-5600BHS, ScanGauge, Wet Okole Seat Covers, Allpro Aluminum front bumper, Allpro Aluminum IFS skid plate, Allpro APEX rocksliders, Warn 9500s winch
    ORIGINAL FIRST POST:

    Hey All,

    After stalking this forum for over four years and benefiting from other member's knowledge and experience, I want to give a little back.

    I've recently ordered the following for my mostly bone stock 2008 Tacoma DCSB Truck (TRD Offroad edition) with TSB 3+1 rear leafsprings:

    - Icon Stage 6 suspension system with the heavier #700 coils in front, 1.5 inch add a leafs in the rear and billet aluminum UCAs (alignment: 0 toe, 0 camber, +3 caster)
    - All-Pro APEX aluminum front bumper
    - All-Pro APEX steel rock sliders
    - All-Pro aluminum skid plate
    - 5x Cooper Discovery ST MAXX 255/85/R16 mounted on new Black FJ Trail Team wheels: (16x7.5" 4.5" backspacing)
    - Warn 9.5 XP-S performance winch with synthetic rope.

    I will be updating this thread with all "post mod" measurements and any rubbing or clearance issues I might run into once the kit is installed (including more photos).

    Presently I have BFG All-Terrian KOs 265/75/R16 with about 65000 miles on them. They are on their way out.

    [​IMG]

    I've taken "pre-mod" measurements in areas around the truck using a BOSCH range finder while the truck was parked on the poured concrete floor in my garage.

    [​IMG]


    First, actual ground clearance:

    [​IMG]
    - (pre-mod) 9 5/16 inches from the frame cross member directly under the engine
    - (after adding skid plate) 8 5/8 inches from the plate itself


    [​IMG]
    - (pre-mod) 9 inches from the frame cross member just behind the oil pan
    - (after adding skid plate) 8 5/8 inches from the plate itself


    [​IMG]
    - (pre-mod) 9 9/16 inches from the lowest part of the rear differential housing

    Fender height:

    [​IMG]
    I've measured distance between the ground and each fender flare. Placing the range finder at the center of the bottom of each tire to....


    [​IMG]
    ...the center of the bottom horizontal surface of the fender flares directly above the center of the tire.

    Fender Measurements are as follows:

    Front drivers side:
    - (pre-mod) 2 feet 10 3/16 inches

    Front passengers side:
    - (pre-mod) 2 feet 10 3/8 inches

    Rear drivers side:
    - (pre-mod) 3 feet 1 3/16 inches

    Rear passengers side:
    - (pre-mod) 3 feet 1 1/4 inches

    Frame to top of rear axle:

    I also took measurements between the top of the rear axle to the frame (bumpstop contact plate) on each side.

    [​IMG]
    - (pre-mod) 8 1/2 inches


    [​IMG]
    - (pre-mod) 8 7/16 inches


    Here is where I started:

    [​IMG]

    [​IMG]

    [​IMG]

    [​IMG]

    [​IMG]


    I will be updating this thread with all "post mod" measurements and any rubbing or clearance issues I might run into once the kit is installed (including photos).

    UPDATE on the Icon Stage 6 Suspension:

    It appears I have been given front coil-overs equipped with 650# coils vs the 700# coils that I ordered. After everything settled over the last couple weeks and with all the added weight from my winch and armor, my truck barely stands 1.5" taller than stock in the front. This is with 1 1/4" of threads showing above the coil-over's coil adjustment ring. New coil-overs with the proper 700# coils will hopefully arrive tomorrow from Icon. The plan is to swap them out on Saturday.

    The 650#(left) and 700#(right) icon coils side by side:


    The icon model number for the 650# coil is 158504
    The Icon model number for the 700# coil is 158508

    My coil-over:


    Oh well, at least I can post exact lift measurements of both the 650# and 700# coils while under an estimated 230lbs of extra weight a winch and trail armor.


    APPLIED INFORMATION GAINED FROM THIS FORUM:


    Proper alignment:

    Based on an excellent write up by bjmoose and then confirmed by Todd over at Icon.

    Link to bjmoose's alignment thread

    He uses different UCAs than I do but the general idea is to adjust the lower control arms forward as far as it is safely possible (using the caster adjustment) then use the aftermarket upper control arms' enhanced adjustablity to bring the alignment numbers back into spec. This was also confirmed with the fine folks over at Icon. This approach helps add some of the needed clearance for the use of oversized tires.

    Target alignment numbers should be as follows:
    Toe - 0
    Camber - 0
    Caster - + 2.5 to 3 degrees (slightly higher than spec)

    Tire size:

    Thanks to everyone's input in rsbmg's thread regarding LT255 sized tires. I went with LT255/85/R16 KM2s

    Link
    to rsbmg's thread.

    General consensus on his thread and others is that with stock 2nd Gen Offroad rim (16x7 bs 5.25) wrapped in a 255/85/16 tire will fit better in the wheel well with less or no rubbing at full stuff than a set of 285s if alignment guidelines mentioned above are followed, even with a stock suspension. Some trimming may be required as Engimaaron pointed out at least a couple of occasions:


    APPLIED INFORMATION GAINED ALONG THE WAY:

    Icon Suspension:

    COILS:

    The standard coils that come with the Icon suspension are rated at 650#. Icon recommends the that you upgrade to the 700# springs if you are planning to add 200# or more to the front of the truck. I'm adding an aluminum All-Pro APEX front bumper and eventually a winch which collective will weight an estimated 175 pounds so I went with the 700# coils.

    AAL:

    The standard instructions for the Icon 1.5" AAL call for the permanent removal the overload spring during installation. This is actually an option not a requirement. Icon has you remove the overload spring in order to improve suspension compliance. This aids in both ride comfort and suspension response while under stock vehicle weights. Icon states that rear load capacity will be reduced by 10% when installing the AAL without the overload spring. Keeping the overload spring returns the rear to stock payload capacity but sacrifices some the suspensions compliance. Keeping the overload spring will also add an additional 1/2" of lift to the rear for a total of 2".

    All-Pro APEX Aluminum Plate Front Bumper:

    The combined weight of the bumper and winch only compressed the stock front suspension an addition 1/8 inch. Far less than I expected.

    All-Pro Aluminum Skid Plate:


    The addition of this skidplate will result in the loss of under one inch of ground clearance between the front two tires.
     
    Last edited: Jun 16, 2015
    ChadsPride likes this.
  3. Apr 25, 2015 at 9:43 PM
    #3
    Wile

    Wile [OP] Well-Known Member

    Joined:
    Oct 22, 2010
    Member:
    #45079
    Messages:
    897
    Gender:
    Male
    First Name:
    Tim
    New Mexico
    Vehicle:
    08 4x4 DC TRD Offroad
    Pioneer AVH-5600BHS, ScanGauge, Wet Okole Seat Covers, Allpro Aluminum front bumper, Allpro Aluminum IFS skid plate, Allpro APEX rocksliders, Warn 9500s winch
    As I am still waiting for all the parts for my suspension and tires to arrive, I have decided to move on to my trail armor.

    [​IMG]

    [​IMG]

    Test fix the PIAA 510 Ion yellow fogs. Perfect.
    [​IMG]

    Removed the front bumper cover, grill and aluminum OEM "bumper". There are great detailed instructions on how to do this within the .

    Put painter tape on the body panel edges that were in danger of "contact" with the bumper during fitting.
    [​IMG]

    Generally speaking the bumper fix well but seems to fit snug to the passenger side front fender flare's lower edge while leave at least a half inch of gap between the driver side's flare and the bumper. Made some adjustments to the mounting holes to allow for about 3/8" gap between the bumper and the fenders and flares.
    [​IMG]

    [​IMG]

    The aluminum IFS skid plate fit with no issue.
    [​IMG]

    However, BE WARNED. The APEX bumper is a one size fixes all design. It is an optimal fit for the 2012+ Tacoma front clip design.
    [​IMG]

    When installing this bumper on a 2005-2011 you get a significant gap between the front end and the bumper. This gap being it's widest in front of the grill at about 2". Although this is not a deal breaker for me, this fit "issue" should be disclosed on ALL-PRO's website and in the installation instructions (no mention of it anywhere). If I had known about this I may have leaned toward another manufacturer for an aluminum bumper.
    [​IMG]

    Since the top plate's edge is design to carefully contour the shape of the 2012+ front clip and not my 2008, there indentations in the cut that are designed to fill the transistion from the headlight to the grill on the 2012+. On my 2008, these look like a really bad cutting job, a mistake. My OCD said they had to go. The closeups below show these indentations. I used a black sharpie to "color in" the metal I planned to remove leaving a smooth and straight edge all along the top edge of the top plate cut.
    [​IMG]

    [​IMG]

    After the metal removal. The gap still makes my left eye twitch but at least it's a clean straight clean edge.
    [​IMG]

    Fitting is complete, off to the powdercoater. I'm leaning toward a semi-gloss black. Open to suggestions, I'm not sold on anything yet. :D

    Photoshopped some color options (decided on the first, a textured black powdercoat):

    [​IMG]

    [​IMG]

    [​IMG]

    [​IMG]

    Here is the temporary "super slick" grill to protect the radiator until the bumper comes back from the powder coater. Super high end model.

    [​IMG]

    [​IMG]

    INSTALLING THE ALL-PRO APEX ALUMINUM BUMPER:


    After the pre-fit, I decided not to put my OEM "bumper" back on only to have to remove it again in a week or so. The posed the question on what to do with the inner fender wells until the plate bumper came back from powdercoating. This is my daily driver so I need it on the road 24/7.

    In All-Pro's they say that you should "tuck" the plastic inner wells into the back cavity of the bumper after you have finished installing it. With this in mind, I trimmed just the "cup-like" structures of the very bottom edge of the liners. I then drilled holes in what remained of that lower edge. After, using zipties through those holes, I attached the inner fender wells to the body just below the headlights. There is a structure that supported the top edge of the OEM "bumper" skin that works great as a place to "tie" to.


    This "temporary" solution works out to be a great "more permanent" approach to the "tucking" procedure All-Pro suggests for dealing with the inner wheel liners. More on that in a bit.

    First, a quick mention on the installation of the winch. All-Pro places the mounting holes for the winch so precisely that the slightest misalignment will leave you thinking that the holes were improperly drilled. This, with the fact that the powdercoating had ever so slightly narrowed the size of the holes had me ready to grab a drill and widen all four of them. DO NOT DO THIS! These hole are precise for the reason. The stresses put on these anchor points could force them to fail if there is any "play" left in them. Leave them be and practice a little patience. You will be happier in the long run.

    The other issue to be aware of is the small metal piece that resides just above the winch in the picture below:


    A closer look:


    This must be trimmed or it will make contact with you rope spool when the line is completely spooled in. This could potentially cut or damage you expensive synthetic line. A whiz wheel, dremal or even a pair of tin snips will do the job. Just make sure to cut away the thinner forward most part of the structure leaving just the thicker part with the plastic sheathed hole where your front grill's center mounting pin inserts.


    File or grind off the rough edges and you are good to go.


    Now back to the plastic inner wheel wells. Turns out that ziptying them to the body results in a nice clean alternative to just "tucking" them in the bumper after it is in place. This ties securely hold them in place and keep them from find there way out and free to be promptly and violently
    "removed" by your front tires.


    I plan to go back with a heatgun to smooth out a wrinkle or two were the plastic bends oddly because of the way it was molded.


    Here are some more stills of the end result.


    Last edited: May 6, 2015
    ChadsPride likes this.
  4. Apr 26, 2015 at 10:02 AM
    #4
    Wile

    Wile [OP] Well-Known Member

    Joined:
    Oct 22, 2010
    Member:
    #45079
    Messages:
    897
    Gender:
    Male
    First Name:
    Tim
    New Mexico
    Vehicle:
    08 4x4 DC TRD Offroad
    Pioneer AVH-5600BHS, ScanGauge, Wet Okole Seat Covers, Allpro Aluminum front bumper, Allpro Aluminum IFS skid plate, Allpro APEX rocksliders, Warn 9500s winch
    After some fantastic customer support at All-Pro (the whole story here) my sliders are ready for powdercoating! :thumbsup:

    Full write-up coming!

     
    ChadsPride likes this.
  5. Apr 26, 2015 at 10:04 AM
    #5
    Wile

    Wile [OP] Well-Known Member

    Joined:
    Oct 22, 2010
    Member:
    #45079
    Messages:
    897
    Gender:
    Male
    First Name:
    Tim
    New Mexico
    Vehicle:
    08 4x4 DC TRD Offroad
    Pioneer AVH-5600BHS, ScanGauge, Wet Okole Seat Covers, Allpro Aluminum front bumper, Allpro Aluminum IFS skid plate, Allpro APEX rocksliders, Warn 9500s winch
    Replaced the headlights today with aftermarket replacements from Amazon. DEPO is the manufacturer. $60 a piece. Worth a shot. The OEM headlights were getting cloudy. Review included.

    [​IMG]

    [​IMG]

    Ordered these from Amazon simple because they were the highest rated by the most people. As you can see from the OEM headlight on the driver's side (in the picture above) it was time to replace them. The passenger's side is the new headlight from Amazon.

    They went in easily and everything lined up perfectly. I did notice that the quality of the main headlight bulb retainer clip was a little less robust than the OEM clip. Regardless, the clip holds the bulb solidly.

    Both headlights' alignment needed to be adjusted after the install. This is a very simple process by turning the adjustment screws. It may be necessary to remove the windshield washer fluid reservoir to get at the lower adjustment screw on the passenger side.


    As far as the performance, these headlight do have some negatives. The beams seem a bit less inconsistent than their OEM counterparts. However compared to my clouded over headlights I'm replacing, these things are a huge improvement. This and considering that the dealer will charge you $600 plus for a pair of OEM headlamps, I think a mere $60 each is well worth the getting rid of my foggy headlights.

    LED HEADLIGHT BULBS:
    I recently installed FluxBeam LED headlight kit from OPT7. They are available here on Amazon. Let me tell you these things are bright. They advertise 7000 lumins (3500 per blub)

    After installing the SAE/DOT certified foglights from Rigid Industries, I wasn't happy with my standard halogen headlights warm orange glow.


    So after reading many positive reviews on Amazon I purchase these:


    Before installing the new LED bulbs, I took light measurements using my light meter (I work in film).


    For those who understand photography, my old headlights produced a stop reading of 5.6 and a half at 400 ASA with the meter being held 6 feet away from the headlight. For those who don't know what that means, don't worry I'll put it in better context in a moment.

    The bulbs themselves have four LED diodes on each bulb. Two on the left side:


    and two on the right:


    Each bulb has an inline "LED driver" (manufacturer's term)


    and a male terminal that will plug straight into your existing wiring harness.


    Installation was a snap. No ballasts to mount. No extra wires to run.

    Here is a comparison with the LED on the driver side and the halogen on the passenger side.


    So back to the MEASURED results:

    The old headlights were at a "T-stop" of 5.6 and a half.
    The LED headlight read at a "T-stop" of 11 and a half.

    That's 2 stops difference! OR FOUR TIMES BRIGHTER! :eek:

    ...and now the headlights match the fogs!


    Here is a pic running them on the road:


    and running together with the Rigid SAE/DOT Foglights.


    My only two complaints with these light are:

    1. The fans are noisy. Without the engine running you can hear them clearly in the cab of the truck. But with the engine running, you can't hear them at all.

    2. I have had these running for two nights. I get the high-beams from oncoming traffic often. I checked the alignment twice. I had to set the alignment lower than manufacture spec to keep oncoming drivers high-beams at bay. These lights are freaking bright!

    UPDATE: "Glare-Guard MOD"

    Anyone with LEDs installed in Tacoma OEM headlight housings know that glare is a significant issue. I have [​IMG]OPT7 FluxBeam H4 LED Headlights installed in OEM headlight housings. Glare has been a issue since I put them in. I've had to aim them very low to limit the glare for on coming traffic this has an rendered the highbeams far less effective due to the fact that they are aimed more at the ground.

    From what I've read on TacomaWorld, many believe that HID and LED headlights don't belong in open-reflector type enclosures. I was not convinced of this. The physics of reflected and refracted light doesn't change regardless of it's wavelength or intensity. So I examined a standard halogen H4(9003) bulb to find what feature limits the glare. Here is what I found:

    There are two filaments. One for low beam and one for high. The low beam is the one closest to right, inside a upward facing reflective bowl. This bowl is what is responsible for sculpting the lowbeam's shape and reducing the glare. The bowl or "glare guard" blocks the lowbeam filament's light from hitting the lower half of the reflector in the headlight enclosure. This lower half of the reflector only used for the highbeam.
    [​IMG]

    Looking at my OPT7s, there is nothing present to block the low beam emitter's light from hitting the lower half of the headlight enclosure's reflector. The lowbeam emitter is to the left, highbeam to the right.
    [​IMG][​IMG]
    So using 1/2" copper pipe, I've come up with a "Glare Guard MOD" that effectively eliminates the glare that plagues LEDs Headlights in open-faced enclosures.

    On a standard halogen, the glare guard sits just below the low beam filament:
    [​IMG]

    My "Glare Guard MOD" is shaped to cut lowbeam emitter's light from the lower half of the enclosures reflector without doing the same to the highbeam emitter. Notice only the lowbeam emitter's lower half is obsured when viewing it from the side:
    [​IMG][​IMG][​IMG]

    Here is the lowbeam pattern before:
    [​IMG]

    Here is the lowbeam pattern with the "Glare Guard MOD" notice the top of the hotspots on the garage door are cutoff:
    [​IMG]

    Here is the headlight without:
    [​IMG]

    Here it is with the Glare Guard MOD, notice the horizontal cut across the middle of the headlight and no light reflecting off the lower half of the reflector.
    [​IMG]

    Resulting in an even horizontal cut in the lowbeams. I was able to return the headlights to a normal height adjustment, making the highbeams effective again. The lowbeam cut from the "Glare Guard MOD" keeps your LED headlights' light on more of the road and out of other drivers eyes.
    [​IMG]

    Here's how to make them:

    Starting with 1/2" copper pipe, make a cut into the end of the pipe parallel with its length. Be sure to make the cut off center.
    [​IMG]

    Then make a cut perpendicular to the pipes length to remove a section on pipe so it looks like this.
    [​IMG]

    The cut of the excess. Leaving this.
    [​IMG]

    Using a set of diagonal cutters, snip a slit into the remaining ring of the pipe
    [​IMG]

    This creates a very effective spring-like clip that holds the "Glare-Guard" in place.
    [​IMG]

    Using a careful, trial and error method. Use a bench grinder to remove material from the "Glare-Guard" a little bit at a time, reattaching the guard to the LED bulb to check your work as you go, until...
    [​IMG][​IMG]

    ...your "Glare-Guard MOD" looks like this. Viewing from the side, only the top-half of the lowbeam emitter should be visable. The highbeam emitter should not be obscured from the side or...
    [​IMG]
    ...from above or below.
    [​IMG][​IMG]
    NOTE: Take care not to damage the emitters when attaching and removing the "Glare-Guards".

    That's it. Enjoy.:)
     
    Last edited: Oct 11, 2015
    ChadsPride and VE7OSR like this.
  6. Apr 26, 2015 at 10:08 AM
    #6
    Wile

    Wile [OP] Well-Known Member

    Joined:
    Oct 22, 2010
    Member:
    #45079
    Messages:
    897
    Gender:
    Male
    First Name:
    Tim
    New Mexico
    Vehicle:
    08 4x4 DC TRD Offroad
    Pioneer AVH-5600BHS, ScanGauge, Wet Okole Seat Covers, Allpro Aluminum front bumper, Allpro Aluminum IFS skid plate, Allpro APEX rocksliders, Warn 9500s winch
    Wired up the auxiliary fuse/relay block! I decided to go with the Bussmann RFRM 10 relay and 40 fuse power distribution block.

    [​IMG]

    It has too much fuse space but I believe that I will be needing the 10 relay spaces for other projects such as rock, reverse, roof lights as well as an air compressor. For now, I'll be using the aux block for just my 20" Rigid Industries lightbar.

    I've seen some beautiful wiring setups on this site. The most daunting task, I believe, is getting the wire harnesses cleanly from inside the cab to the aux block in the engine compartment. I didn't want to keep running a single wire thru the firewall for every new accessory I decided to add over the years. The result would be a hodgepodge of wires that would never look "right". I want it to look clean. For this task, I decided to use 7 conductor trailer wire. Trailer wire provides 7 color coded wires protected in a durable black rubber sheath. There are many options out there, here on Amazon, I purchased a roll of trailer wire where all conductors came in the same gauge (14 gauge).


    I only intend to use 5 of the seven available wires in this "harness" to send switch signals to the relays in the aux block. One of the other two wire will be used for sending power from the truck's marker light circuit (fuse tap in the "tail" circuit in the fuse box under the dash) to the ND4 foglight's anytime mod and the DIY raptor lights circuit under the hood. The last wire will be use to send power from the fuse tap in the highbeam fuse in the main fuse block under the hood back into the cab. This will power half of the hidden SPDT switch in my 20" LED light bar circuit. (Diagram of all of this is coming)

    Here is a pic of the trailer wire run to the bottom of the aux block. The black wire loom you see contains all the negative returns from all ten relay circuits. I wired them all for later use. You can see the white and black wires from the trailer wire are not connected to the aux block. The white will carry the highbeam signal and the black will carry the marker light power.


    I'm mounting the Bussmann RFRM using a mounting plate purchased from Yotamac. It is an excellent product and works flawlessly. Here is the aux block mounted with Denso relays installed.


    Here you can see the trailer wire fished thru the grommet.


    Eventually, I will run a second trailer wire harness to service the other five relays. But for now, I'm good with five. Now to the inside and the switches.

    Here you can see, I have pulled out the dash. I have fished that trailer wire "harness" up over the fuse panel so it will come in just behind the switches to the left of the steering wheel.


    I am using an OEM accessory switch for the FJCrusier to operate the 20" LED lightbar. Pictured below next to the foglight switch. Pardon the dirt and dust on the dash.


    ALL EXTERIOR LIGHTING on this truck can be shut off by turning the OEM lightswitch on the turnsignal lever. ALL LIGHTS. Twist the knob and everything is out. This works great because it means all lights (auxiliary and OEM) mantain the "lights out command" when the ignition is off and the driver door is opened. Saves the battery. Need the light on with the ignition off tho? Turn the marker lights off and back on again and you are back in business.

    Powering all you aux light switches from the marker light circuit makes this possible. Just run a fuse tap from the fuse under the dash labeled "tail". It's that easy.

    When it came to the 20" Rigid Industries RDS Light Bar. I wanted a couple of features. I wanted to be able to operate the light independently by pressing the button on the dash (while the marker lights are on), but I also wanted the option to run the lightbar with my highbeams. This meant I would need to run a SPDT (single pole, double throw) switch on my dash. But I like the look of the FJ switch which is a SPST (single pole single throw). I have opted for a "hidden" 6 AMP mini SPDT switch. I have placed it in the "change box" to the lower left of the steering wheel. I placed the DVD player "park brake interlock" defeat switch in there last year (switch on the left). Seemed like a good spot. Cheap piece to replace if I decided to remove the switches later.


    This "hidden" switch will allow me to decide whether to feed power from either the marker light circuit or highbeam circuit to the lightbar switch.


    Worked out to be a pretty clean install.


    Really crappy iPhone photo:

     
    Last edited: Jul 21, 2015
    ChadsPride likes this.
  7. Apr 26, 2015 at 11:22 AM
    #7
    RearViewMirror

    RearViewMirror Saw things so much clearer once you... were in my

    Joined:
    Apr 13, 2013
    Member:
    #102010
    Messages:
    24,069
    Gender:
    Male
    First Name:
    Craig Christ
    State of Love and Trust
    Vehicle:
    2023 Subaru WRX GT
    Gonna look good once you get it all completed. I opted for a Pelfreybilt aluminium front bumper (no hoops) and sliders. ICON suspension is next on the list but I'm still deciding on a mid mount rack for the back for the RTT.

    Look forward to seeing your finished product though I would suggest keeping the radiator protector in place ;)
     
    Wile[OP] likes this.
  8. Apr 26, 2015 at 12:54 PM
    #8
    Connormc11

    Connormc11 Jangler

    Joined:
    Nov 19, 2013
    Member:
    #116879
    Messages:
    384
    Gender:
    Male
    First Name:
    Connor
    Norfolk VA
    Vehicle:
    2010 DCSB TRD-Offroad
  9. Apr 26, 2015 at 4:11 PM
    #9
    Wile

    Wile [OP] Well-Known Member

    Joined:
    Oct 22, 2010
    Member:
    #45079
    Messages:
    897
    Gender:
    Male
    First Name:
    Tim
    New Mexico
    Vehicle:
    08 4x4 DC TRD Offroad
    Pioneer AVH-5600BHS, ScanGauge, Wet Okole Seat Covers, Allpro Aluminum front bumper, Allpro Aluminum IFS skid plate, Allpro APEX rocksliders, Warn 9500s winch
    Pelfreybilt products look fantastic! I was on the fence between them and All-Pro. All-Pro could ship in a week where it was at least 8 weeks for the Pelfreybilt. That ended up being the deciding factor. Honestly though, if I had known there would be such a gap between the grill and the bumper as I mentioned above, it could have leaned me back towards the Pelfreybilt. Still waiting on the ICON suspension to come in. Seems the vendor's distribution hub is taking it's sweet ass time filling the order. I'm trying to install as much I can while I wait.

    Nice build BTW.

    Saw some pics on your thread from the Ouray area. Love it up there. Ran the Bear Creek and Imogene pass last summer. It was amazing!
     
    Last edited: Apr 26, 2015
  10. Apr 26, 2015 at 5:04 PM
    #10
    Wile

    Wile [OP] Well-Known Member

    Joined:
    Oct 22, 2010
    Member:
    #45079
    Messages:
    897
    Gender:
    Male
    First Name:
    Tim
    New Mexico
    Vehicle:
    08 4x4 DC TRD Offroad
    Pioneer AVH-5600BHS, ScanGauge, Wet Okole Seat Covers, Allpro Aluminum front bumper, Allpro Aluminum IFS skid plate, Allpro APEX rocksliders, Warn 9500s winch
    Still waiting for the suspension and tires...

    ...moving my obsessive tendencies to the skidplate.

    Here is how the plate looked when I received it:


    I'm not big on the "kinda" mirror-like finish. Too much shiny. Plus too much maintenance, with ever little imperfection staring back at me. I'm OCD says this will not do. :annoyed:

    I considered powdercoating it to match the bumper but felt that this would also allow imperfections to stand out when the first rock scratches the coating away to reveal the shiny aluminum underneath. No thanks.

    SOLUTION:

    So I have opted to sand it to a satin finish that will be better at hide small scratches and provide a future method to "refinish" the surface when the time comes.


    Using a finishing sander and 220 grit sandpaper, I removed the gloss like finish along the entire exposed side of the plate. Once the gloss was gone, I went back over the entire surface moving the sander in parallel sweeping motions from back to front. This created a lateral textured "lines" that run the length of the skidplate, giving the finish a more "deliberate" feel. You can see the textured lines in the pic below.


    INSTALLATION:

    During manufacturing, welding and cutting can cause minor distortions in the metal that will cause fitment issues. This was the case with the skidplate. After starting the two screws at rear most end of the plate, the two front most screw holes would not line up with the holes in the frame and the middle two screws would not lay flush to the frame. The whole plate had a slight "belly" bend to it. Placing a jack under the center of the skidplate to compress the "belly" flat solved this. Once the jack was in place, everything lined up perfectly.


    Here is some pics of the final install:


    RearViewMirror likes this.
  11. Apr 26, 2015 at 5:32 PM
    #11
    qnyla

    qnyla Well-Known Member

    Joined:
    Feb 2, 2010
    Member:
    #30604
    Messages:
    1,308
    Gender:
    Male
    NM
    Vehicle:
    2006 & 2016 DCSB TRD Off Road 6-Speed
    I like the satin aluminum finish and agree with leaving it bare. Any use at all would leave shiny scratches just as you described.
     
    Wile[OP] likes this.
  12. Apr 26, 2015 at 6:00 PM
    #12
    RearViewMirror

    RearViewMirror Saw things so much clearer once you... were in my

    Joined:
    Apr 13, 2013
    Member:
    #102010
    Messages:
    24,069
    Gender:
    Male
    First Name:
    Craig Christ
    State of Love and Trust
    Vehicle:
    2023 Subaru WRX GT
    You and I are a lot alike when it comes to OCD tendencies.

    Pelfreybilt was my first choice and you're right... the waiting is the hardest part. They should be here in the next few weeks though. Going to have the bumper painted to match my truck and rhino line the sliders. I'm waiting to order the ICON suspension to see how much the rack with a RTT and bumper affect the height. I ordered the aluminum bumper and it only weighs 55# so it "shouldn't" weigh the front down much since I'm not putting a winch on it.

    I think you did the right thing by sanding the skid plate. That looks real nice and I might consider the same since like qnyla said it should be easy to buff out any scratches you might incur on the trail.

    Little taste of my OCD 14k on the odo and I take it off road often.

    IMG_0038_zpssgqeztmc_a531aa0b11e6074b9bea3b70631802e9dfe44ff0.jpg

    IMG_0037_zpstxtpnbmf_fcee82f42f0c2c6fd5a8fee59e0f8b8733393286.jpg


    IMG_0041_zpsx4bjcvkx_346f07d911bf69ed0c5df4f1653536ff11120847.jpg
     
  13. Apr 26, 2015 at 6:08 PM
    #13
    Wile

    Wile [OP] Well-Known Member

    Joined:
    Oct 22, 2010
    Member:
    #45079
    Messages:
    897
    Gender:
    Male
    First Name:
    Tim
    New Mexico
    Vehicle:
    08 4x4 DC TRD Offroad
    Pioneer AVH-5600BHS, ScanGauge, Wet Okole Seat Covers, Allpro Aluminum front bumper, Allpro Aluminum IFS skid plate, Allpro APEX rocksliders, Warn 9500s winch
    Immaculate frame. Mine has a bit more mileage. 120K.

    :jellydance:
     
  14. Apr 27, 2015 at 10:38 PM
    #14
    Wile

    Wile [OP] Well-Known Member

    Joined:
    Oct 22, 2010
    Member:
    #45079
    Messages:
    897
    Gender:
    Male
    First Name:
    Tim
    New Mexico
    Vehicle:
    08 4x4 DC TRD Offroad
    Pioneer AVH-5600BHS, ScanGauge, Wet Okole Seat Covers, Allpro Aluminum front bumper, Allpro Aluminum IFS skid plate, Allpro APEX rocksliders, Warn 9500s winch
    Finally got the bumper on with the winch mounted. Very happy with the result! The powdercoater did an awesome job! Next the rocksliders and hopeful the suspension system soon after that.


    More pictures and a detailed write up mañana. Time for bed.
     
  15. Apr 27, 2015 at 11:50 PM
    #15
    Solid Seung

    Solid Seung GWOT Infidel

    Joined:
    Sep 6, 2013
    Member:
    #111993
    Messages:
    230
    Gender:
    Male
    New California Republic
    Vehicle:
    2013 SC V6 DCSB TRD OR 4x4
    TRD Supercharger aFe Stage-2 Si Pro DRY S CAI JBA Cat4ward Shorty Headers TRD Performance Exhaust PLX Wideband Air/Fuel Sensor Module Speedhut Boost & Wideband Air/Fuel Ratio Gauges CravenSpeed Flexpod ScanGauge SGIIFFP Computer Uni Filter Mod Mobil 1 Synthetic Oil Pelfreybilt Off-Road: Aluminum Front Plate Bumper, Rigid DOT/SAE Fog Lights, Pelfreybilt Hawse Fairlead & Flipster Winch License Plate Bracket, Aluminum IFS Skid Plate, Steel Standard Rear Bumper, Smittybilt 3/4" Black D-Rings w/Daystar Isolators & Washers KB Voodoo Tailgate Cap System King Shocks 2.5 Front Remote Reservoir Coilovers SPC Light Racing UCAs King Shocks 2.5 Rear Remote Reservoir Shocks OME Dakar EL095R Leaf Spring Set Wheelers Off-Road Front SuperBumps, Rear U-Bolt Flip Kit with SuperBumps Crown Performance Red SS Brake Line Kit Body Mount Chop Tandem Off-road 612 Bravo 17x8.5” Wheels BFG T/A KO2 285/70R17 Tires Redline Tuning QuickLIFT ELITE Hood Struts Redline Tuning Tailgate EZDOWN TRD Battery Hold Down Duralast Platinum Battery 24F-AGM OEM Black Grille Bezel TRD Pro TOYOTA Grille TRD Pro Black Headlights Sylvania Silverstar zXe H4 Lamps Rain-X Silicone AdvantEdge Wiper Blades OEM Running Boards OEM Tacoma Bed Mat AJT Design Climate Control Knobs WeatherTech Floor Liners Covercraft Carhartt Precision Fit Custom Seat Covers Emergency Assistance Kit First Aid Kit Salex Organizers Center Console & Glovebox OCD Anker 36W Dual USB Car Charger PowerDrive+ 2 Type S Drive Dash Camera Garmin nüvi 255W 4.3" GPS Navigator Steadfast Auto 8" Antenna Pioneer AVH-X3500BHS 2-DIN Multimedia DVD Receiver 6.1" WVGA iPod nano 8G (6th Gen) JL Audio XD700 Watt/5 Channel Amplifier JL Audio C2-650X & C2-650 6.5" speakers JL Audio 10W1v2-4 10" subwoofers (x2) in a JL Audio Stealthbox
  16. Apr 28, 2015 at 4:31 AM
    #16
    RearViewMirror

    RearViewMirror Saw things so much clearer once you... were in my

    Joined:
    Apr 13, 2013
    Member:
    #102010
    Messages:
    24,069
    Gender:
    Male
    First Name:
    Craig Christ
    State of Love and Trust
    Vehicle:
    2023 Subaru WRX GT
    Very nice! Out of curiosity how much trouble was it to take the factory bumper off and where did you trim the inner liner so it wouldn't hang down in front of the tire?
     
  17. Apr 28, 2015 at 8:30 AM
    #17
    Wile

    Wile [OP] Well-Known Member

    Joined:
    Oct 22, 2010
    Member:
    #45079
    Messages:
    897
    Gender:
    Male
    First Name:
    Tim
    New Mexico
    Vehicle:
    08 4x4 DC TRD Offroad
    Pioneer AVH-5600BHS, ScanGauge, Wet Okole Seat Covers, Allpro Aluminum front bumper, Allpro Aluminum IFS skid plate, Allpro APEX rocksliders, Warn 9500s winch
    The OEM bumper removal is fairly easy. Followed these instructions from All-Pro: As far as the fender's inner liner, I cut just the very bottom "cup" shaped parts off, drilled a few holes along the remaining bottom edges then used the holes to ziptie them up against the body under the headlight before installing the bumper. The bumper slides over them during installation, leaving them tucked inside, resulting a "clean" looking wheel well.

    I'll have better pictures of this soon.


    Last edited: Apr 28, 2015
  18. Apr 28, 2015 at 8:34 AM
    #18
    josh0351

    josh0351 Californication

    Joined:
    Mar 27, 2013
    Member:
    #100717
    Messages:
    1,099
    Gender:
    Male
    First Name:
    Josh
    VA
    Vehicle:
    Supercharged '13 TRD OR | '96 4X4 Reg Cab (RIP)
    Some stuff...
    Wow, Bad-azz build! Very nicely done! :thumbsup:
     
    Wile[OP] likes this.
  19. Apr 28, 2015 at 9:20 AM
    #19
    Wile

    Wile [OP] Well-Known Member

    Joined:
    Oct 22, 2010
    Member:
    #45079
    Messages:
    897
    Gender:
    Male
    First Name:
    Tim
    New Mexico
    Vehicle:
    08 4x4 DC TRD Offroad
    Pioneer AVH-5600BHS, ScanGauge, Wet Okole Seat Covers, Allpro Aluminum front bumper, Allpro Aluminum IFS skid plate, Allpro APEX rocksliders, Warn 9500s winch
    Thanks and thank you for your service!
     
  20. Apr 28, 2015 at 11:01 AM
    #20
    TwoTacos

    TwoTacos Well-Known Member

    Joined:
    Jan 12, 2012
    Member:
    #70497
    Messages:
    125
    Gender:
    Male
    First Name:
    Mike
    Winnipeg, MB.
    Vehicle:
    2011 TRD DCLB Sport
    3" Leveling Kit with AAL, 5160/6112 Billsteins, LED Bed and under hood Lighting, backflip F1 tonneau cover, TRS HID Headlights, Homemade Satoshi Grill, heated seats, cluster and dash white LEDS, TPMS disable switch, ABS/VSC disable switch, fog light anytime mod, Backup Camera On anytime mod, Power locking tailgate, blue LED floor lighting c/w dimmer, tinted windows, aftermarket Nav/Audio with built in sub, aftermarket homelink.
    Looking good, just have to paint that chrome grill now.
     

Products Discussed in

To Top