

-
Welcome to Tacoma World!
You are currently viewing as a guest! To get full-access, you need to register for a FREE account.
As a registered member, you’ll be able to:- Participate in all Tacoma discussion topics
- Communicate privately with other Tacoma owners from around the world
- Post your own photos in our Members Gallery
- Access all special features of the site
 Where to buy nerf bars?
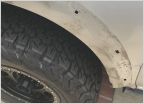 Best way to remove this weird adhesive?
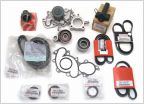 Timing belt / water pump 2002 toyota tacoma
 Front D-shackle mounting location?
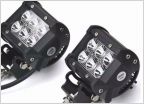 Best place to put lights
 Oil leak
Hilux 167 Snorkel for 3.4L Tacoma
Discussion in '1st Gen. Tacomas (1995-2004)' started by MatthewMay1, May 18, 2015.
Page 1 of 13
Page 1 of 13


