1. Welcome to Tacoma World!

    You are currently viewing as a guest! To get full-access, you need to register for a FREE account.

    As a registered member, you’ll be able to:
    • Participate in all Tacoma discussion topics
    • Communicate privately with other Tacoma owners from around the world
    • Post your own photos in our Members Gallery
    • Access all special features of the site

DIY rear door actuator motor repair

Discussion in '2nd Gen. Tacomas (2005-2015)' started by VanillaGuerrilla, Jun 13, 2015.

  1. Jun 13, 2015 at 1:58 PM
    #1
    VanillaGuerrilla

    VanillaGuerrilla [OP] Active Member

    Joined:
    Mar 20, 2014
    Member:
    #125735
    Messages:
    35
    Gender:
    Male
    Georgia
    Vehicle:
    PreRunner SR5
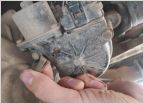
    All my actuators died in my 08 prerunner and I got tired of doing without so I looked around and found a pretty solid thread about fixing the fronts in a rav4 forum. I decided to do one for the rears to post here. Getting this done at a dealership would cost a ton. This just costs a saturday morning and part of the afternoon.

    Tools used: a couple different picks, phillips head, flat head, vise, 4mm allen wrench and 9mm socket.

    Start here, pull back slowly from top to bottom.
    eb3e4a9013bc4be467845d4daad37d12_454b8578ff7207e2bcd096638e531cf2821311e0.jpg

    Pop this out, nice and easy, as othater stated below you can press the center and it will release:
    10065b113133067c21d329b8e579b1fd_b23d08e0392450fe926f7b311bb762adc834f318.jpg

    Go ahead and unscrew the philips here and in the door handle:
    683c883707f44d49d09086eee94a53c6_a573352d2e8d96088bc72dfc77d6cf0bfa1e5cb5.jpg

    Raise this guy up by pushing in a clip once you get under the unit:
    e7413de1059eeac53f6af97dcb55df5d_47e6befde55713f8b543c312432f2a5a12e1a419.jpg

    Undo the wire harness:
    a0c3025b440b4f9d4af90a656f65a751_366f8ca0445074e1029d6b4c526970a354e97605.jpg

    Start appling rearward pressure on the panel from the hinges:
    38d99f4b88df5aa5500461407c34b0c0_a0b5646db805f6912dd9de52f580a2732f6221c9.jpg

    Work your way around the bottom and then raise it up at the window and remove the panel:
    9471eca792f5090789e9dcb239327e5d_4361d0910c7ede8ca355acf6260e011dff1cd82f.jpg

    After you peel back the moisture barrier, unhook the wire harness and remove rubber plug:
    2eb858d0beefc6b8196d0d3d1d9edbce_da50656dada93be8a943b37ec6bf7d9938a0c294.jpg
    5dd76c737e49f2bce7e7f1c3868050a2_39b0135ba45062093dbdffc74b395c90ef9937b1.jpg

    Use a 9 or 10 mm socket to remove these bolts, the hold a guide for the window that prevents you from pulling the actuator straight out. Once its loose, remove it.
    de6dfdb6dd82cd93ca6a0c0f0965a06d_21a220128a1c1aba2a14fdb0ca9a091c2f47b1d0.jpg
    86ab99973648043188fced03db89905d_1c44c76199d8e2492a4dde1ab61a46e98db23199.jpg

    loosen and remove:
    f6f5c5d4427cd719339bd998a4cb0cdf_a792704d8b99107d46899b02f106767c9217d6d8.jpg

    Pull out the unit and and remove lock and handle cable buy opening little doors detach the cables and go to the work bench:
    8c6228057871637dcc0fbbed099eba83_e06b43bb62eb46de736af3e3a328428c77f24ebd.jpg
    8aa86c001c3103ba1a760d173ad81c0d_ac799d5b2f2f5b15a4d85bf0cbc719964f215ec7.jpg

    Remove this little piece and unscrew these:
    ab674159f7152eef627d6446424de758_4f41b24a1ca41011ae3e10a4a3354a77534d865e.jpg
    9d07cc7aad75cf272519411bae3c1903_f7bdb56d0daf35413f31d8965ad0b997fd61d71d.jpg
    a9e51710e05fb4d2ee3d5e24ccef6c8f_140c704c02d4f77f23b8e4e8f7956fef2cb1841f.jpg

    pull out the lock mechinism and start poping up all these little clips. Its a pain you just have to figure out something that works. I had some old dog tags I used to hold some up while i popped the others:
    6a4e04e43e1c660a2c1aaf141c9821a7_0161990d852f4bb1da2024c45e9e5294525305ac.jpg
    275f08edddb4273204e5efa2575be410_209fa4b806e5bb953d632d5dabe918bb25c8b9da.jpg

    Get it open and seperate the pieces carefully. You dont want anything to pop out, and it wont if you take your time. Then remove the motor:
    b503f0109d547899c7e570c11e06d5f3_3148fd17be27fb10dd8e81864f085b67e6b907e7.jpg
    a01fa1421fb38880a8481a0b838e20d7_db0cd407135c63e4d4cb4a7d71bf3915ea754bc9.jpg

    Now you have to take the motor apart. The two little clips holding the housing on are hard to pry up. I eneded up putting the motor in a rag and then a vise and just digging the clips up with a pick. Then you seperate the motor into 3 pieces and start cleaning carbon:
    2e18fdada65a303e312f5436f7e29be6_100be093dbaa9ddae4a6c5d75f531af8ce23331a.jpg
    f8773c35d69f59448c56e1cd472ccdf6_ae11bce6c8b0cdf245ad5795605d7019be110658.jpg

    Most importantly, you have to clean the carbon off the shaft. The carbon builds up and dosent allow proper contact, so you have to get it off. I used 220 grit paper:
    5b052f0ed5b05fb83b7c7d30f23d2388_b8b85def4dd42ae61d345776d8af22fabfdb0a27.jpg

    Then reasemble the motor, make sure the contacts are on either side of the copper section you just cleaned:
    b99ca87c17bb886f6e190a4aa1652183_07ed001c238104904dfea0e4e7ec182ce7e3b023.jpg
    369e8aeb8e350c611c8ca692d7985860_d690736317aea09e4c1369a1bdc5625b35c994ba.jpg

    Pop her back in (can only go one way)

    This next part is vital. If this does not get done right the door will shut but won't open from the outside i had to take apart and reasemble a few times:
    7655c87750b75447bbca9dd8d00b71d1_3dc4c73f1266a87cd33966b15cbc767a8bf1e666.jpg

    At this point, you put all your screws back in, reverse the process, drink a beer and laugh at how much cash the toyota place didnt get from your wallet.
     
    Last edited: Jun 14, 2015
  2. Jun 13, 2015 at 2:24 PM
    #2
    othater

    othater Well-Known Member

    Joined:
    Aug 22, 2009
    Member:
    #21558
    Messages:
    355
    Gender:
    Male
    SoCal-Walnut
    Vehicle:
    06 Prerunner SR5 TRD Sport
    Very good description VG.
    Pic two, you push in the center and it releases.
    I did the same but I cleaned and replaced the contacts.
    Also you can buy the Mabuchi motors online or ebay.
     
    This site contains affiliate links for which the site may be compensated.
    #2
    VanillaGuerrilla[OP] likes this.
  3. Jun 13, 2015 at 2:25 PM
    #3
    Bagman

    Bagman Dental Floss Tycoon

    Joined:
    Jan 28, 2013
    Member:
    #96359
    Messages:
    2,096
    Gender:
    Male
    Area 51
    Vehicle:
    2023 4Runner SR5 Premium
    Nice write-up and the pics sure help. Thanks for putting this out there.
     
    VanillaGuerrilla[OP] likes this.
  4. Jun 13, 2015 at 2:37 PM
    #4
    VanillaGuerrilla

    VanillaGuerrilla [OP] Active Member

    Joined:
    Mar 20, 2014
    Member:
    #125735
    Messages:
    35
    Gender:
    Male
    Georgia
    Vehicle:
    PreRunner SR5
    Good deal thanks!
     
    This site contains affiliate links for which the site may be compensated.
    #4
  5. Jun 30, 2015 at 8:34 AM
    #5
    DEEVON911

    DEEVON911 Semi-Pro

    Joined:
    Apr 11, 2010
    Member:
    #35030
    Messages:
    15,187
    Gender:
    Male
    First Name:
    Dave
    Bethel Park, PA. Burb of da Burgh.
    Vehicle:
    2010 MGM Mostly Stock Off-Road 4x4
    TRD Cat-back Exhaust. Semi-Debadged. Trimmed down stock Antenna. Weathertech vent visors. TRD FJ Cruiser Center Cap Wheel Mod. 265/75/16 Firestone Destination A/T,s . Inverter tapped into for outlet in cab. Tacomaworld sticker which adds 5 hp.
    Great write up. My diver side rear door lock just quit on me. So I'm going to give this a shot. Thanks for taking the time to do this and hopefully saving me a bunch of money. :)
     
    Crom and VanillaGuerrilla[OP] like this.
  6. Jun 30, 2015 at 8:47 AM
    #6
    Mademan925

    Mademan925 Senor Taco

    Joined:
    Nov 7, 2012
    Member:
    #90668
    Messages:
    7,636
    Gender:
    Male
    First Name:
    Nick
    Discovery Bay, CA
    Vehicle:
    2014 4x4 TRD OFFROAD DCSB
    enough to go over stuff
    Toyota did this for me yesterday under warrenty. I still had to sign the cost sheet. almost $500....
     
  7. Jun 30, 2015 at 8:53 AM
    #7
    Crom

    Crom Super-Deluxe Member

    Joined:
    Jun 22, 2009
    Member:
    #18782
    Messages:
    9,634
    Gender:
    Male
    First Name:
    Nick
    San Diego, CA
    Vehicle:
    2009 4x4 DCSB Camp Supreme
    Millions
    nice write up. I hope I never have to use it, but will do if necessary. Thank you.
     
  8. Jun 30, 2015 at 3:48 PM
    #8
    DEEVON911

    DEEVON911 Semi-Pro

    Joined:
    Apr 11, 2010
    Member:
    #35030
    Messages:
    15,187
    Gender:
    Male
    First Name:
    Dave
    Bethel Park, PA. Burb of da Burgh.
    Vehicle:
    2010 MGM Mostly Stock Off-Road 4x4
    TRD Cat-back Exhaust. Semi-Debadged. Trimmed down stock Antenna. Weathertech vent visors. TRD FJ Cruiser Center Cap Wheel Mod. 265/75/16 Firestone Destination A/T,s . Inverter tapped into for outlet in cab. Tacomaworld sticker which adds 5 hp.
    Big thank you to the OP for this write up. Took me a couple hours and cost me nothing but time. Working great now.
     
    VanillaGuerrilla[OP] and Crom like this.
  9. Jun 30, 2015 at 5:35 PM
    #9
    VanillaGuerrilla

    VanillaGuerrilla [OP] Active Member

    Joined:
    Mar 20, 2014
    Member:
    #125735
    Messages:
    35
    Gender:
    Male
    Georgia
    Vehicle:
    PreRunner SR5
    Awesome. Glad to do it.
     
    DEEVON911[QUOTED] likes this.
  10. Nov 3, 2015 at 2:21 PM
    #10
    DEEVON911

    DEEVON911 Semi-Pro

    Joined:
    Apr 11, 2010
    Member:
    #35030
    Messages:
    15,187
    Gender:
    Male
    First Name:
    Dave
    Bethel Park, PA. Burb of da Burgh.
    Vehicle:
    2010 MGM Mostly Stock Off-Road 4x4
    TRD Cat-back Exhaust. Semi-Debadged. Trimmed down stock Antenna. Weathertech vent visors. TRD FJ Cruiser Center Cap Wheel Mod. 265/75/16 Firestone Destination A/T,s . Inverter tapped into for outlet in cab. Tacomaworld sticker which adds 5 hp.
    Sooooooo... question for OP or anyone that could help.

    I have done this to all four locks. Driver side went first, then the passenger side went. So I cleaned all the motors and all lock and unlock great. With one minor issue.

    With the key in the ignition, doesn't matter if it's just in there, acc, or on. When the passenger door is closed. All of the power locks unlock twice. As if someone is hitting the unlock button 2 times in a row. It's only the passenger door that does it. Does not do it when the key is not in the ignition. I took it all apart again to see if wires got damaged during the fix. I disconnected the battery, thinking maybe something got confused during repair. No wire damage and battery disconnect did nothing for it.

    So anyone have any ideas? I don't have a clue.
     
  11. Mar 2, 2016 at 5:23 PM
    #11
    chasecamper

    chasecamper Well-Known Member

    Joined:
    Feb 8, 2016
    Member:
    #177586
    Messages:
    373
    Gender:
    Male
    First Name:
    Sawyer
    Orange county
    so does anyone know what would you have to do if you broke off that switch and didn't want to deal with the double locking sound? I cant seem to find the switch that you guys are talking about :confused:
     
  12. Mar 2, 2016 at 9:38 PM
    #12
    chasecamper

    chasecamper Well-Known Member

    Joined:
    Feb 8, 2016
    Member:
    #177586
    Messages:
    373
    Gender:
    Male
    First Name:
    Sawyer
    Orange county
    figured it out, if you have more than one door that went bad make sure to lock all of your doors before you test your lock that you repaired. If one of the doors has a bad actuator and is unlocked it will make all of the doors cycle the lock one more time, making you think your switch isn't getting a solid contact. This made me re-do this process like 4 times!!
     
  13. Apr 10, 2016 at 10:08 AM
    #13
    cobracomander

    cobracomander Well-Known Member

    Joined:
    Oct 4, 2008
    Member:
    #9695
    Messages:
    53
    I am attempting this fix on two doors today. I will try to get a picture of the little switch. I have noticed that my lights don't always flash when I lock the truck. Does this mean I have bad switches??
     
  14. Apr 10, 2016 at 11:30 AM
    #14
    DEEVON911

    DEEVON911 Semi-Pro

    Joined:
    Apr 11, 2010
    Member:
    #35030
    Messages:
    15,187
    Gender:
    Male
    First Name:
    Dave
    Bethel Park, PA. Burb of da Burgh.
    Vehicle:
    2010 MGM Mostly Stock Off-Road 4x4
    TRD Cat-back Exhaust. Semi-Debadged. Trimmed down stock Antenna. Weathertech vent visors. TRD FJ Cruiser Center Cap Wheel Mod. 265/75/16 Firestone Destination A/T,s . Inverter tapped into for outlet in cab. Tacomaworld sticker which adds 5 hp.
    I think mine did that once in a while before the fix. I think it's because some of the doors aren't locking. So it's effecting the signal to flash the lights. Also if you're a double cab. If you have the time, do all 4. They all gonna go sooner or later. And by the time you're done your 2nd one, the third and fourth are cake.
     
  15. Apr 10, 2016 at 11:36 AM
    #15
    cobracomander

    cobracomander Well-Known Member

    Joined:
    Oct 4, 2008
    Member:
    #9695
    Messages:
    53

    That's what I figured. Done with the first, but I'm now getting the double lock issue. I looked and couldn't find the small switch. There was so much grease in it I didn't want to go digging through it. Looks like I am now.
     
  16. Apr 10, 2016 at 11:40 AM
    #16
    DEEVON911

    DEEVON911 Semi-Pro

    Joined:
    Apr 11, 2010
    Member:
    #35030
    Messages:
    15,187
    Gender:
    Male
    First Name:
    Dave
    Bethel Park, PA. Burb of da Burgh.
    Vehicle:
    2010 MGM Mostly Stock Off-Road 4x4
    TRD Cat-back Exhaust. Semi-Debadged. Trimmed down stock Antenna. Weathertech vent visors. TRD FJ Cruiser Center Cap Wheel Mod. 265/75/16 Firestone Destination A/T,s . Inverter tapped into for outlet in cab. Tacomaworld sticker which adds 5 hp.
    I wish I took a pic. , but even though it's small, you'll see it. And you'll notice that something doesn't look right as soon as you find it.
     
  17. Apr 10, 2016 at 11:53 AM
    #17
    DEEVON911

    DEEVON911 Semi-Pro

    Joined:
    Apr 11, 2010
    Member:
    #35030
    Messages:
    15,187
    Gender:
    Male
    First Name:
    Dave
    Bethel Park, PA. Burb of da Burgh.
    Vehicle:
    2010 MGM Mostly Stock Off-Road 4x4
    TRD Cat-back Exhaust. Semi-Debadged. Trimmed down stock Antenna. Weathertech vent visors. TRD FJ Cruiser Center Cap Wheel Mod. 265/75/16 Firestone Destination A/T,s . Inverter tapped into for outlet in cab. Tacomaworld sticker which adds 5 hp.
    Found a pic for you on another thread I happen to come across. Circled in red is the switch. That little metal arm gets bent and doesn't make contact. Causing the double lock issue.
    Apr_10_2016_997.jpg
     
  18. Apr 10, 2016 at 12:03 PM
    #18
    cobracomander

    cobracomander Well-Known Member

    Joined:
    Oct 4, 2008
    Member:
    #9695
    Messages:
    53
    Ok? I was very careful when I took this apart. My actuator is a little different. I was very easy to take apart. Hmmm
     
  19. Apr 10, 2016 at 12:05 PM
    #19
    DEEVON911

    DEEVON911 Semi-Pro

    Joined:
    Apr 11, 2010
    Member:
    #35030
    Messages:
    15,187
    Gender:
    Male
    First Name:
    Dave
    Bethel Park, PA. Burb of da Burgh.
    Vehicle:
    2010 MGM Mostly Stock Off-Road 4x4
    TRD Cat-back Exhaust. Semi-Debadged. Trimmed down stock Antenna. Weathertech vent visors. TRD FJ Cruiser Center Cap Wheel Mod. 265/75/16 Firestone Destination A/T,s . Inverter tapped into for outlet in cab. Tacomaworld sticker which adds 5 hp.
    Which doors have you done?
     
  20. Apr 10, 2016 at 12:07 PM
    #20
    cobracomander

    cobracomander Well-Known Member

    Joined:
    Oct 4, 2008
    Member:
    #9695
    Messages:
    53
    Driver rear. 08
     

Products Discussed in

To Top