1. Welcome to Tacoma World!

    You are currently viewing as a guest! To get full-access, you need to register for a FREE account.

    As a registered member, you’ll be able to:
    • Participate in all Tacoma discussion topics
    • Communicate privately with other Tacoma owners from around the world
    • Post your own photos in our Members Gallery
    • Access all special features of the site

DenverMojo's Build Thread!

Discussion in '2nd Gen. Builds (2005-2015)' started by DenverMojo, Oct 2, 2013.

  1. Oct 2, 2013 at 5:20 PM
    #1
    DenverMojo

    DenverMojo [OP] Well-Known Member

    Joined:
    Sep 11, 2013
    Member:
    #112314
    Messages:
    188
    Gender:
    Male
    Evergreen, CO
    Vehicle:
    13 DCSB OR 6-spd
    Well, here goes my build thread for my new 2013 MGM DCSB Offroad, 6-spd.

    As I write this first post, I've had my Tacoma for roughly 3 weeks! I'm new to the world of Toyota, but have always admired many of the trucks and SUVs that Toyota has produced over the years. I'm very happy to now be in the Toyota family and am looking forward to many years of fun with my Tacoma.

    The Taco will serve as a daily driver and weekend warrior, hauling a family of three plus a dog or three up into the Colorado mountains for fun and adventure. I'm actually replacing 2 vehicles with this truck, a 2000 Audi A4 (daily driver) and a 1998 Jeep Wrangler (weekend offroading/rockcrawling). In all honesty, I'm sacrificing a little bit on both ends of the spectrum by consolidating to just the Tacoma, but I'm actually happy to do so. I am going to miss the sports car handling and acceleration of my Audi (25psi of boost through a K04 turbo plus a whole assortment of other goodies). I am also going to miss the offroad nimbleness and capability of my TJ, which deserves it's own build thread (6" lift, 35" tires, ford 8.8 rear axle with e-locker, etc...). But, I have already started to plan out how to make this Taco "mine" and make it a little more fun and functional. Yes, I am *gasp* a former Jeep owner (I also used to have a 72 Jeepster Commando), but I try not to get pulled into that whole debate... :taco:

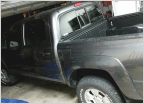
    So, with that background said, here's a pic of my new truck, probably a day or two after I first got it.
    Photo Sep 17, 4 49 27 PM.jpg

    Softopper mode
    2013-11-03 12.34.47.jpg

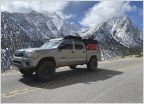
    As it looks today
    [​IMG]

    2014-06-01 09.03.19-2.jpg
     
    Last edited: Nov 6, 2014
  2. Oct 2, 2013 at 5:24 PM
    #2
    DenverMojo

    DenverMojo [OP] Well-Known Member

    Joined:
    Sep 11, 2013
    Member:
    #112314
    Messages:
    188
    Gender:
    Male
    Evergreen, CO
    Vehicle:
    13 DCSB OR 6-spd
    So, one of the first things I did was new tires and wheels. I got these 16" FJ TRD Team Trail Edition wheels from Frank Motors on Ebay. And, I wrapped them in 265/75r16 Duratracs, from Discount Tire.

    Photo Sep 21, 6 55 15 PM.jpg
     
    This site contains affiliate links for which the site may be compensated.
    #2
  3. Oct 3, 2013 at 12:22 AM
    #3
    Naholo808

    Naholo808 Well-Known Member

    Joined:
    Feb 13, 2013
    Member:
    #97465
    Messages:
    673
    Gender:
    Male
    First Name:
    Jordan
    9th Island (Las Vegas)
    Vehicle:
    2020 4Runner Off-Road
    2020 Toyota 4Runner Off-Road 3inch lift 33s Ko2s Matte black SCS SR8 2013 Tacoma TRD Sport 2wd - Traded In.
    nice!!!!
     
  4. Oct 4, 2013 at 11:27 PM
    #4
    DenverMojo

    DenverMojo [OP] Well-Known Member

    Joined:
    Sep 11, 2013
    Member:
    #112314
    Messages:
    188
    Gender:
    Male
    Evergreen, CO
    Vehicle:
    13 DCSB OR 6-spd
    I learned of Iggee from owning a Jeep TJ. I bought a set for that and loved the fit and quality. Those seat covers survived a lot of abuse, from open top torrential downpours, to large huskies stomping all over them. I loved the durability and ease of cleaning of synthetic leather. The fit was so good that most people do not realize they are seat covers.

    So, with my Tacoma I decided to go the same route with seat covers. I also have a 2.5 yr old toddler, so these cloth seats will otherwise get trashed very quickly. I've already got Weathertech digital liners in the front and back. So, these synthetic leather seat covers should finish things off nicely.

    First, here's a couple "before" pictures of the interior:
    [​IMG]

    [​IMG]

    A few things that I first should mention about Iggee. They don't have the best web presence. Their website is mediocre at best, but you get all of the info that you need when you go to it. Next, if you do decide to buy a set of their seat covers, do it through their Ebay listing (which also could use a little work). You will save money this way. The Ebay listing is for one set (front or back) of seat covers. So, you must order 2 sets for front and back.

    I actually bought 2 full sets of seat covers this time around, one for my Tacoma and a set for our Subaru Forester. After placing the 2 orders on Ebay, I followed up by calling the company up, where I was helped by a very friendly lady. She was able to verify for me the details around each vehicle, ensuring that the covers would account for everything specific to each vehicle. I did have to mention side impact air bags, for which they sew in velcro openings in the side of the two front seat back covers. I had also taken pictures of the seats (my before pictures above) and emailed it to them, but I don't think they used them or really needed them, since I was able to give her enough info over the phone.

    I chose the Black/Charcoal colored seat covers. I debated between that and the Black/Grey, which is a little lighter. I think the Grey may match the interior grey a little better, but prefer a darker tone, so went with Charcoal.

    I also bought a set of seat heaters at the same time, with the intention of adhering them to the insides of the front driver and passenger seat covers. I'll do a separate writeup on that when I've finished that specific install, as I haven't wired them up yet.

    So, the first thing I did was to install the rear seat covers. I first did the bottom seat covers. Since they are regular 60/40 rear seats, the set came with matching 60/40 seat covers. They went on pretty smoothly. Each cover has varying number of semi-elastic loops. Iggee provides S hooks which the universal instructions show as hooking into metal seat springs on the bottom of the seat. Since we have metal seat bottoms, I just attached opposite loops in patterns that seemed to make sense for each seat cover.

    Photo Sep 28, 3 35 17 PM.jpg

    Photo Sep 28, 3 25 40 PM.jpg

    Next, just a little adjusting and tucking in of the seat cover after lowering the seat bottoms.

    Photo Sep 28, 3 38 47 PM.jpg

    Next step was to put the seat backs on. Those sent on without much of a problem. You just pull a soft flap through the seat back and attach to the other velcro side of the seat cover. Once you do that, the instructions show how you have to cut X's into the seat covers, where they are now covering the holes for the headrests. You then pull/push the fabric down under the plastic collars that the headrest posts slide into. Have to admit that slicing into a new seat covers made me a little anxious, but after i did one hole, i realized how easy it is.

    Photo Sep 28, 4 02 15 PM.jpg

    One thing that I noticed very quickly, though, is that the instructions didn't say anything about the hoop in the back of each seat back that is used to lock the seat back in place, which is now also covered. I ended up slicing the seat cover in those 2 spots, but didn't need to remove any material. Just slicing a hole is enough to make the seat lock in place again. I don't believe the material will rip any further than what I intentionally did, I guess I could reinforce it with duct tape or something of the like. But, I don't think that will be an issue in general.

    Photo Sep 28, 4 05 17 PM.jpg

    The covers for each of the headrests were straightforward and went on ok.
    Photo Sep 28, 4 31 52 PM.jpg

    Next, I moved on to the front seats. First, I put the seat heaters into the 4 (driver/passenger back/bottom) seat covers. It was a perfect fit with no trimming needed. I knew I wasn't going to have enough time to wire up the seat heaters right away, but didn't want to have to take these off again when I get to that, so I just put the heater elements in and am leaving the wires hanging out for now.

    Photo Sep 28, 5 33 37 PM.jpg

    The front seat covers go on similar to the back seats, with the separate top and bottom seat covers. I did run into one problem that I wasn't sure the best way to solve. Our front seats have a flap that wraps down and under the seat, attached to the bottom seat spring with 2 elastic clips. That flap blocks the front side of the back cover from passing through to the back of the seat, where it can be velcro'd together. Because of the flap, I have the soft/front flap of the seat cover wrapped under and following the flap under the seat. The back/velcro side of the seat cover then velcros to the existing flap.
    This photo shows you the flap that I'm talking about and how I have the back part of the seat cover velcro attached to that existing flap.
    Photo Oct 02, 5 20 19 PM.jpg

    I also did find it a little difficult to get the top seat covers on. Because of the curves in the bolsters of the back of the seat, the synthetic seat cover doesn't naturally go flush against the seat. Rather, it's a bit taught and there's a gap in some of that back area between the cover and the actual seat. Once you sit in it, that presses them back into the seat and it feels fine. I found that if i unbolted the seats, that gave me better angles and leverage to try and fit that top cover better, which helped. I feel like after doing a little driving in them, the driver side seat cover has better conformed with the seat, too. So, time will tell on that aspect. Besides that, I'm pretty happy with these seat covers. I think they look nice, they are absolutely functional for my needs and are a little less expensive than other seat cover options.

    Photo Oct 02, 5 18 13 PM.jpg

    Photo Oct 02, 5 22 04 PM.jpg

    Photo Oct 02, 5 37 49 PM.jpg

    Photo Oct 02, 5 38 04 PM.jpg
     

    Attached Files:

    Last edited: Oct 23, 2013
    This site contains affiliate links for which the site may be compensated.
    #4
  5. Dec 3, 2013 at 10:12 PM
    #5
    DenverMojo

    DenverMojo [OP] Well-Known Member

    Joined:
    Sep 11, 2013
    Member:
    #112314
    Messages:
    188
    Gender:
    Male
    Evergreen, CO
    Vehicle:
    13 DCSB OR 6-spd
    So, I've put some time over the last couple months on deciding what I wanted to do with the truck bed. First, I landed on going with a Softopper to cover the rear. I love the look and versatility of the Softopper. In fact, the first weekend after I put my Softopper on, I got to collapse it forward to move multiple sets of washers/dryers around town. Super easy, exactly what I was looking for.

    I'm also psyched about the deal I got on the Softopper. Found a shortbed Softopper for $400 on Craigslist and haggled the guy down to $350. Only caveat was that the previous owner had it on a first gen Tacoma, so he had different mounting brackets than what I need for my second gen. Otherwise, it's less than a year old and in good shape. One of the buckles on a tie down strap was also broken. It needed a little cleaning up, but looked practically new after I cleaned it with some 303 Aerospace Protectant.

    I also have to say that I've been super impressed by Supertopper as a company. They are local to me, so I stopped by initially to pick up the mounting brackets that I needed. They were only ~$5/each. They were super nice there and also gave me extra velcro, a replacement buckle and strap and a couple other things. I went back a second time more recently to buy a mesh rear window, which I'm going to try and run throughout the winter. They were nice enough to give me a 20% discount on that without my even asking. I also walked away with another couple small replacement parts that I didn't ask for, but very much appreciated. I love seeing a company that stands by their product to this level, especially considering I'm the second owner of my Softopper!

    Here's a couple shots just after I installed the Softopper before cleaning and spraying it down with 303. The combo of cleaning and 303 basically restored the appearance to new. Very impressed with 303, too.

    Photo Nov 03, 12 35 33 PM.jpg

    Photo Nov 03, 12 35 50 PM (1).jpg

    Once I got the Softopper sorted out, I focused on the inside of the bed. Before I bought the Softopper, I actually had found a set of these Inno Bed Rack mounts on Craigslist. Picked them up for $60. After I got the Softopper, I figured these wouldn't work and I'd have to sell them. But, once I fitted it up against the frame of the Softopper, I realized I could make these work inside the Softopper! I mounted them up, not using the metal plate that comes with it, but felt like there was enough support with it clamping down on the Softopper frame. Next, I took a few measurements and noted that a 60" load bar should fit perfectly. I also found that most load bars around that size come either in a 58" or 65" length. I bought a set of 65" Inno load bars (was looking at Thule bars, too) and cut both down to 60". After test fitting, I found that if I trimmed another .5" off each that the bars would fit better, with no portion of the bar extending out of the Inno rack mount. The Inno rack mounts do press up against the Softopper fabric a little. I don't think it's enough to damage the Softopper, that Softopper material is pretty tough. However, just for piece of mind, I'm probably going to reinforce the area where the mounts touch the softopper with some duct tape or something similar/better for that purpose. The only real downside of this setup is that I have to take the load bars and rack mounts off if I want to lower the Softopper now. But, I don't think I'll need to do that very often through the winter and I mainly want the load bars in the winter for skis and snowboards.

    Photo Dec 01, 2 05 58 PM.jpg

    Photo Dec 01, 2 06 26 PM.jpg

    Photo Dec 01, 2 06 38 PM.jpg

    I then threw on a Thule ski rack that I already had. This setup is what drove me to getting the mesh rear window for the Softopper. My skis should be able to fit in the bed with the Softopper window down, but longer skis may require the rear window rolled up. I know the vinyl windows are brittle in the winter, so figured the mesh window may be better from this perspective.

    I also strapped on that canvas bag to the bed cleats on the passenger side of the bed. That bag came out of my Jeep, it's meant to strap on to the rollbars of the Jeep and has that extra pouch in front that you can stuff a rolled up blanket into. I decided to roll up the rear vinyl softopper window and put it in there, giving me the option to swap that back in while on the road if I need to for any reason. I've got a pillow case wrapped around part of it to protect the window, but will replace that with an extra fleece blanket that I've been searching for...

    Again looking to reuse something from my Jeep, I took this tailgate MPAC rack that I had on my TJ and mounted it to the front utility track of the bed. The rack is meant to be a modular system, specifically allowing MOLLE style bags and accessories to be easily mounted. Using info I found in another thread on here, I got some Superstrut Channel Spring nuts, bolts and washers and was able to use that to mount the rack to the utility track.

    And, finally, with the recent Black Friday sales, I was able to pickup a new Bedrug Mat and Bedrug Tailgate Mat for a pretty decent price. Put those in this past weekend and I think I like how I've got things set up. Next up may be extra D-rings and thinking I'll tackle LED bed lights this spring.

    Photo Dec 01, 2 06 54 PM.jpg

    This photo gives a good view on the hardware I used to mount the rack to the utility track.
    Photo Dec 01, 2 07 13 PM.jpg
     
  6. Dec 14, 2013 at 6:03 AM
    #6
    Luke01

    Luke01 Well-Known Member

    Joined:
    Mar 27, 2013
    Member:
    #100703
    Messages:
    622
    Gender:
    Male
    First Name:
    Luke
    Dallas, TX
    Vehicle:
    2012 Tacoma DCSB MGM lifted dented and armored
    Grillcraft Grill, Leer 100q top, 5100's on four corners, OME 885x up front, OME Dakars with add a leaf in rear, Lighting, a mix of Rigid and Chinese LED's, US Off Road hidden winch front bumper, SOS offroad conceprs skids, and rear bumper with swing out
    Looks great. Any concerns about the ends of the rack cutting the sides of the softopper over time?
     
    Last edited: Dec 14, 2013
  7. Dec 14, 2013 at 6:07 AM
    #7
    1993t100

    1993t100 I’m good looking and I drive a Jeep.

    Joined:
    Nov 11, 2013
    Member:
    #116388
    Messages:
    4,801
    Gender:
    Male
    First Name:
    Big Sexy
    Nebraska
    Vehicle:
    Jeep Wrangler Rubicon
    Awesome truck man! I think aftermarket bumpers would look awesome on this truck, but that's just my .02 :rolleyes:
     
  8. Sep 12, 2014 at 1:56 PM
    #8
    DenverMojo

    DenverMojo [OP] Well-Known Member

    Joined:
    Sep 11, 2013
    Member:
    #112314
    Messages:
    188
    Gender:
    Male
    Evergreen, CO
    Vehicle:
    13 DCSB OR 6-spd
    Made some updates to my truck over the last month!

    First, I finally got my CVT Mt Rainier tent from the group buy earlier in the year. I had to be patient, especially since I bought on the last day of the group buy... But, I'm very happy with it in the end. :D

    [​IMG]


    Also, since I've now switched to a full on bed rack in back, I've decided to move on from the Softopper (going to be putting that up for sale soon). I did want to still keep some of the bed covered, though, so ended up making an Access Literider work with my bed rack. Writeup on that is here.

    Here's a shot of how it looks. More detailed photos in the thread linked above.
    [​IMG]
     
  9. Nov 6, 2014 at 7:31 PM
    #9
    DenverMojo

    DenverMojo [OP] Well-Known Member

    Joined:
    Sep 11, 2013
    Member:
    #112314
    Messages:
    188
    Gender:
    Male
    Evergreen, CO
    Vehicle:
    13 DCSB OR 6-spd
    My next project on the Tacoma was to add some retro stripes! I've always loved the look and the homage to Toyota trucks of the past, but was conflicted if it would be "too much" for my personal tastes on my truck. But, I figured I could temper that by going with matte black decals. The matte black against MGM sounded like a great subtle combo to me. Plus, it's not permanent, so I can always take them off if I didn't end liking them...

    So, I ordered a full set of decals from CBoy808 in this thread. And... voila! I love the way they turned out. :D

    [​IMG]

    [​IMG]

    [​IMG]

    [​IMG]

    [​IMG]

    [​IMG]

    [​IMG]

    [​IMG]

    [​IMG]

    [​IMG]
     
  10. Nov 7, 2014 at 5:03 PM
    #10
    krob32

    krob32 Well-Known Member

    Joined:
    Feb 18, 2012
    Member:
    #73075
    Messages:
    1,367
    Gender:
    Male
    First Name:
    Kelly
    Sierra Vista, AZ / Asheville, NC
    Vehicle:
    2012 MGM TRD Sport DCLB
    WeatherTec Digi Liners, AVS Bugflector II, TRD FJ SE Anthracite Rims, BF Goodrich AT KO2 265/75/16, AVS In-Channel Wind Deflectors, Extang Solid Fold, Pop & Lock, Color Match Grill Emblem (Anthracite), Plasti Dip Emblems, Tacoma Bed Mat, Tacoma Door Sill Protectors, ToyTec Ultimate Lift Kit, ICON UCAs, Wheeler's Progressive AAL, Wet Okoles, Sockmonkey 3rd Brake Light Cover, LED Hood/Bed Lighting w/ OTRATTW Switches, Famous Fabrication Sliders, Sockmonkey TRD Bed Decal, Proven Design 4x4 Mudflaps, BenWA's Rear Power Sliding Window, Jasper Off Road 6" Reverse LED Pod, ImMrYo Rear View Mirror Bracket, GrillCraft w/ Black Mesh and color matched Land Cruiser Emblem, LED Tail Lights, Badge Removal and Vinyl TRD/Tacoma Stickers, Bullaculla Trailer Harness Relocation.
    Great looking truck! Of course MGM FTW! Retro decals are good, but the rims with that color looks great. Lift?
     
  11. Nov 7, 2014 at 5:53 PM
    #11
    DenverMojo

    DenverMojo [OP] Well-Known Member

    Joined:
    Sep 11, 2013
    Member:
    #112314
    Messages:
    188
    Gender:
    Male
    Evergreen, CO
    Vehicle:
    13 DCSB OR 6-spd
    Thanks! I see you have equally good taste in wheels and color. :cool:

    No lift at the moment, but I'll get to it eventually.
     
  12. Jul 1, 2015 at 9:49 AM
    #12
    VandalTaco

    VandalTaco Well-Known Member

    Joined:
    Dec 28, 2014
    Member:
    #145129
    Messages:
    1,045
    Gender:
    Male
    First Name:
    Will
    Moscow/Idaho falls, Idaho
    Vehicle:
    07 DCSB TRD SPORT
    OME 887 lift, 16" XD addicts, 285 duratracs, leather seats, badass JL/Focal stereo
    Great looking truck! I have a question about the prinsu rack you have. It looks like your ski rack is the same one I have, does the prinsu rack give enough room to mount the ski rack to it?
     
  13. Jul 1, 2015 at 9:52 AM
    #13
    DenverMojo

    DenverMojo [OP] Well-Known Member

    Joined:
    Sep 11, 2013
    Member:
    #112314
    Messages:
    188
    Gender:
    Male
    Evergreen, CO
    Vehicle:
    13 DCSB OR 6-spd
    My ski rack is mounted on the bed rack, not the Prinsu rack over the cab. However, I see no reason why you couldn't mount the ski rack on the Prinsu rack using two bolts and tslot connectors for each ski rack.
     
  14. Jul 1, 2015 at 10:05 AM
    #14
    VandalTaco

    VandalTaco Well-Known Member

    Joined:
    Dec 28, 2014
    Member:
    #145129
    Messages:
    1,045
    Gender:
    Male
    First Name:
    Will
    Moscow/Idaho falls, Idaho
    Vehicle:
    07 DCSB TRD SPORT
    OME 887 lift, 16" XD addicts, 285 duratracs, leather seats, badass JL/Focal stereo
    Sweet, thanks. How do you like the prinsu? Looks great! How was the install?
     
  15. Jul 1, 2015 at 10:14 AM
    #15
    ODNAREM

    ODNAREM MEMBER Of The Church Of @ODNAREM

    Joined:
    Feb 28, 2015
    Member:
    #149762
    Messages:
    41,292
    Gender:
    Male
    First Name:
    Ron
    Huntington Beach,CA.
    Vehicle:
    2012 TRD Sport Prerunner
    TRD catback exhaust,FJ Cruiser trail team wheels,BFG All Terrain K02 tires,Grillcraft front grill,Pelfreybilt IFS/Mid skids,sliders,standard rear bumper,Total Chaos bed stiffeners.TRD Pro Bilstein front/rear suspension.
    Lookin real nice!I have the same FJ Cruiser Trail Team wheels on my 2012.Love these wheels!Everything else you're doing is really cool OP!
     
  16. Jul 1, 2015 at 11:09 AM
    #16
    DenverMojo

    DenverMojo [OP] Well-Known Member

    Joined:
    Sep 11, 2013
    Member:
    #112314
    Messages:
    188
    Gender:
    Male
    Evergreen, CO
    Vehicle:
    13 DCSB OR 6-spd
    Love the Prinsu rack. Install is easy, since it uses existing bolt locations. I love how versatile and low profile the rack is.
     
  17. Jul 1, 2015 at 11:10 AM
    #17
    DenverMojo

    DenverMojo [OP] Well-Known Member

    Joined:
    Sep 11, 2013
    Member:
    #112314
    Messages:
    188
    Gender:
    Male
    Evergreen, CO
    Vehicle:
    13 DCSB OR 6-spd
    Thanks! I need to get another matching wheel for my spare. Still have the OEM wheel and tire for the spare...
     
  18. Jul 1, 2015 at 11:14 AM
    #18
    VandalTaco

    VandalTaco Well-Known Member

    Joined:
    Dec 28, 2014
    Member:
    #145129
    Messages:
    1,045
    Gender:
    Male
    First Name:
    Will
    Moscow/Idaho falls, Idaho
    Vehicle:
    07 DCSB TRD SPORT
    OME 887 lift, 16" XD addicts, 285 duratracs, leather seats, badass JL/Focal stereo
    Sweet, think that will be my next upgrade. Thanks!
     
  19. Jul 1, 2015 at 11:20 AM
    #19
    Shmellmopwho

    Shmellmopwho Well-Known Member Vendor

    Joined:
    Apr 10, 2014
    Member:
    #127399
    Messages:
    11,663
    Gender:
    Male
    First Name:
    Ryan
    Lomita CA
    Vehicle:
    2013 White DCLB TRD sport
    Bunch of stuff
    Sweet truck dude! Digging the build so far. Took a big camping/off-roading trip last September with my wife and came through Denver and caught a Broncos game while we were there. Love Colorado man! Wish we had the same kinds of trails here in my area!
     
  20. Jul 1, 2015 at 12:12 PM
    #20
    DenverMojo

    DenverMojo [OP] Well-Known Member

    Joined:
    Sep 11, 2013
    Member:
    #112314
    Messages:
    188
    Gender:
    Male
    Evergreen, CO
    Vehicle:
    13 DCSB OR 6-spd
    Thanks! Love it out here in Colorado, definitely spoiled with what we have access to. Going to be moving to northern VA at the end of the summer, though. Started to research what's out in that area... But, it's a temporary move and planning on being back in CO after 2 years...
     

Products Discussed in

To Top