

-
Welcome to Tacoma World!
You are currently viewing as a guest! To get full-access, you need to register for a FREE account.
As a registered member, you’ll be able to:- Participate in all Tacoma discussion topics
- Communicate privately with other Tacoma owners from around the world
- Post your own photos in our Members Gallery
- Access all special features of the site
 Microsoft Surface or tablet mount?
 New Headlights for 2010
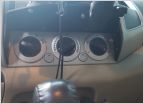
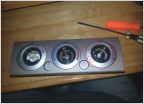 AC Control lighting question
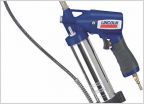 Zerks or no..?
 How much did your Dakars settle?
 Trying to identy what part is missing to replace
OFFICIAL 2nd gen 4x4 front differential bearing vibration thread
Discussion in '2nd Gen. Tacomas (2005-2015)' started by BenWA, Apr 17, 2011.
Page 122 of 226
Page 122 of 226
Products Discussed in


