1. Welcome to Tacoma World!

    You are currently viewing as a guest! To get full-access, you need to register for a FREE account.

    As a registered member, you’ll be able to:
    • Participate in all Tacoma discussion topics
    • Communicate privately with other Tacoma owners from around the world
    • Post your own photos in our Members Gallery
    • Access all special features of the site

Incognito's Build

Discussion in '2nd Gen. Builds (2005-2015)' started by Incognito, Jul 25, 2015.

  1. Sep 9, 2015 at 3:46 PM
    #21
    Incognito

    Incognito [OP] No better friend, no worse enemy

    Joined:
    May 25, 2009
    Member:
    #17626
    Messages:
    13,751
    Gender:
    Male
    VA
    Vehicle:
    2012 Pyrite AC TRD OR
    Spacer lift, bumper stickers, ejector seat, etc.
    Couple pics on the farm


    Crom likes this.
  2. Sep 11, 2015 at 10:04 AM
    #22
    Crom

    Crom Super-Deluxe Member

    Joined:
    Jun 22, 2009
    Member:
    #18782
    Messages:
    9,634
    Gender:
    Male
    First Name:
    Nick
    San Diego, CA
    Vehicle:
    2009 4x4 DCSB Camp Supreme
    Millions
    I like what you have done Colton! Nice you got 4x4 now! Which guide do you recommend for trimming the flares?
     
  3. Sep 11, 2015 at 11:11 AM
    #23
    Incognito

    Incognito [OP] No better friend, no worse enemy

    Joined:
    May 25, 2009
    Member:
    #17626
    Messages:
    13,751
    Gender:
    Male
    VA
    Vehicle:
    2012 Pyrite AC TRD OR
    Spacer lift, bumper stickers, ejector seat, etc.
    Thank you Sir! Power to the front wheels really makes a difference. :D

    For the flares, I took a small wheel and nailed it to a wooden ruler to measure 3" out of the body on the front (to account for curvature of the wheel wells). Cut with a jigsaw for the most part but had to use an angle grinder to cut down by the door jam. I read through the 3" w/35's thread and accumulated a bunch of info. @la0d0g had a very good description on cutting the flares. I took 2" out of the flares and put door edge trim on them to clean it up. I'm on my phone right now but tonight I'll try and find the write up I followed.
     
  4. Sep 11, 2015 at 11:27 AM
    #24
    la0d0g

    la0d0g Its 4 o’clock somewhere

    Joined:
    Jan 25, 2011
    Member:
    #49903
    Messages:
    19,878
    Gender:
    Male
    First Name:
    Matt
    running for the hills
    Vehicle:
    For crawling not hauling
  5. Sep 24, 2015 at 6:40 PM
    #25
    Incognito

    Incognito [OP] No better friend, no worse enemy

    Joined:
    May 25, 2009
    Member:
    #17626
    Messages:
    13,751
    Gender:
    Male
    VA
    Vehicle:
    2012 Pyrite AC TRD OR
    Spacer lift, bumper stickers, ejector seat, etc.
    Took a few pics out at the lake this afternoon.


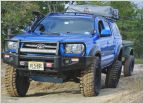
    In this pic you can see how far the 315's stick out without the rear fender flares. Also a good pic showing how far the 4xinnovations slider kickouts protrude from the cab.


  6. Sep 25, 2015 at 6:51 AM
    #26
    la0d0g

    la0d0g Its 4 o’clock somewhere

    Joined:
    Jan 25, 2011
    Member:
    #49903
    Messages:
    19,878
    Gender:
    Male
    First Name:
    Matt
    running for the hills
    Vehicle:
    For crawling not hauling
    Looks awesome, nice job!
     
  7. Sep 25, 2015 at 11:00 AM
    #27
    Incognito

    Incognito [OP] No better friend, no worse enemy

    Joined:
    May 25, 2009
    Member:
    #17626
    Messages:
    13,751
    Gender:
    Male
    VA
    Vehicle:
    2012 Pyrite AC TRD OR
    Spacer lift, bumper stickers, ejector seat, etc.
    Thanks Matt!

    Forgot to mention - installed Spicer greaseable U-joints last weekend and added a center console organizer. Also making an appt to get my frame inspected. Based on my research it looks like I have a good chance of getting a new frame.

    Next on the agenda - parts have already been ordered and delivered. If a new frame is in order, I'll have the new parts installed when the swap occurs.

    @BamaToy1997 wheel bearings
    Moog LBJ's
    BAMF shock relocation
    Energy suspension poly radiator bushings
    Coolant flush


    Also installed 25sq ft of fatmat in prep for 2 12" Shok Tritons behind the rear seat. Building the box utilizing the back of the cab sheet metal to get proper mounting depth. Going to be running a 5000W SSL amp to power those bad boys. Stay tuned. :spy:
     
    BamaToy1997 likes this.
  8. Sep 25, 2015 at 10:39 PM
    #28
    Shmellmopwho

    Shmellmopwho Well-Known Member Vendor

    Joined:
    Apr 10, 2014
    Member:
    #127399
    Messages:
    11,687
    Gender:
    Male
    First Name:
    Ryan
    Lomita CA
    Vehicle:
    2013 White DCLB TRD sport
    Bunch of stuff
    Truck looks great man! Really liking what you've done so far!!! I see you're going for a Superwinch Tigershark. I just ordered one tonight on Amazon. The 9500 with synthetic line. $572 after shipping and taxes. I'm hoping it's a sweet winch. I've heard great things about them.
     
  9. Sep 26, 2015 at 11:21 AM
    #29
    Incognito

    Incognito [OP] No better friend, no worse enemy

    Joined:
    May 25, 2009
    Member:
    #17626
    Messages:
    13,751
    Gender:
    Male
    VA
    Vehicle:
    2012 Pyrite AC TRD OR
    Spacer lift, bumper stickers, ejector seat, etc.
    Thanks Ryan! I've heard nothing but good things about the Superwinch as well, I think you'll like it.
     
  10. Sep 26, 2015 at 11:38 AM
    #30
    Sje1124

    Sje1124 Well-Known Member

    Joined:
    Nov 1, 2010
    Member:
    #45564
    Messages:
    5,023
    Gender:
    Male
    First Name:
    Sean
    Louisiana
    Vehicle:
    2010 DBL Cab TRD OR 4x4
    Just a few
    Great looking truck man. Looks exactly like mine. Been contemplating throwing a light bar up top lately. One question though, do you have a full size spare and if so where do you keep it?
     
  11. Sep 26, 2015 at 3:01 PM
    #31
    Incognito

    Incognito [OP] No better friend, no worse enemy

    Joined:
    May 25, 2009
    Member:
    #17626
    Messages:
    13,751
    Gender:
    Male
    VA
    Vehicle:
    2012 Pyrite AC TRD OR
    Spacer lift, bumper stickers, ejector seat, etc.
    Thanks man I appreciate it. Your truck was one that pushed me over the edge to get 35's after seeing them.

    The light bar was $100 and $8 for the 1/8" steel. Puts out an incredible amount of light at night but would definitely invest in one of these especially with your truck being white. Cuts the glare out tremendously. For the spare, I don't have on yet. I am still torn between getting a HC rear with swingout or try to make it fit where the stock spare was. Obviously one is a lot cheaper than the other so I might try to make it fit first and see what happens.
     
  12. Sep 26, 2015 at 5:41 PM
    #32
    Sje1124

    Sje1124 Well-Known Member

    Joined:
    Nov 1, 2010
    Member:
    #45564
    Messages:
    5,023
    Gender:
    Male
    First Name:
    Sean
    Louisiana
    Vehicle:
    2010 DBL Cab TRD OR 4x4
    Just a few
    That's awesome man. I've been wanting to get a black hood decal to cut the glare and it would help out with the light bar. How did you mount the light bar to you OEM roof rack? I had my 295/70/17 up under the truck in the stock location and the tire almost hit the rear pumpkin. Not sure a 35 would fit up in there. And I don't trust the stock tire holder to he old that heavy tire up there. Right now I have my tire strapped standing up in my bed since my wife uses the truck as her DD and needs room for the stroller in the bed. When I had the tire laying down it took up most of the bed and my wife had a hard time getting the stroller from on top of the tire. Still trying to find a better way to make it work.
     
  13. Sep 26, 2015 at 10:31 PM
    #33
    teamhypoxia

    teamhypoxia MichelinMan

    Joined:
    Aug 21, 2012
    Member:
    #85247
    Messages:
    9,690
    Gender:
    Male
    Colorado
    Vehicle:
    '12 DCSB TRD OR
    Nice truck you got here chief! :thumbsup:
     
  14. Sep 28, 2015 at 3:23 AM
    #34
    Patmac

    Patmac Well-Known Member

    Joined:
    Dec 22, 2011
    Member:
    #69223
    Messages:
    650
    Gender:
    Male
    First Name:
    Pat
    Chesapeake, VA
    Vehicle:
    14 TRD Sport
    20% tint, weather techs, icon stage 3. n-fab, bhlm, retrofits, SCS SR8, 285s
    Awesome build !
     
  15. Sep 28, 2015 at 7:00 PM
    #35
    Incognito

    Incognito [OP] No better friend, no worse enemy

    Joined:
    May 25, 2009
    Member:
    #17626
    Messages:
    13,751
    Gender:
    Male
    VA
    Vehicle:
    2012 Pyrite AC TRD OR
    Spacer lift, bumper stickers, ejector seat, etc.
    I made some custom brackets and drilled 4 5/16" holes per bracket. Remove the rack, then drill into the roof rack and secure the brackets using 5/16" bolts, lock washers on both the outside and the inside of the roof rack with nylock nuts. I'll get some pics tomorrow.

    I'll probably end up keeping one in the bed like you have now until I get a bumper.
    Thanks TH! :D
    Thanks Pat! It's a work in progress.
     
  16. Sep 28, 2015 at 7:03 PM
    #36
    Sje1124

    Sje1124 Well-Known Member

    Joined:
    Nov 1, 2010
    Member:
    #45564
    Messages:
    5,023
    Gender:
    Male
    First Name:
    Sean
    Louisiana
    Vehicle:
    2010 DBL Cab TRD OR 4x4
    Just a few
    Good deal, I'm thinking of getting some metal and have the tire sit at rail height in the bed to keep the bed space open. Been looking at @KB Voodoo brackets.
     
    KB Voodoo likes this.
  17. Sep 28, 2015 at 7:11 PM
    #37
    Incognito

    Incognito [OP] No better friend, no worse enemy

    Joined:
    May 25, 2009
    Member:
    #17626
    Messages:
    13,751
    Gender:
    Male
    VA
    Vehicle:
    2012 Pyrite AC TRD OR
    Spacer lift, bumper stickers, ejector seat, etc.
    I've heard nothing but good things about his stuff. I've been thinking about getting a set of his bed rails and fabbing up a bed rack or a set of bars that I could mount the spare to the underside and have a RTT on top. I was thinking have the bed rack around 12" off the rails to allow the tire to be mounted on the under side but still retain bed space like you were saying. Just don't want the RTT sitting too high past the roof line nor the bedsides flexing/bending because of the spare and RTT combined weight.
     
  18. Sep 28, 2015 at 7:16 PM
    #38
    Sje1124

    Sje1124 Well-Known Member

    Joined:
    Nov 1, 2010
    Member:
    #45564
    Messages:
    5,023
    Gender:
    Male
    First Name:
    Sean
    Louisiana
    Vehicle:
    2010 DBL Cab TRD OR 4x4
    Just a few
    Yeah if an RTT was in my future I'd do the exact same thing. I have the soft topper right now since we keep a stroller in the bed at all times for my wife to use. As for use we're sticking to a ground tent because the 5 person + RTTs are way to expensive. I'll be ordering those brackets tomorrow and once I get them in ill post a picture of how the tire fits on them and how much room it gives me.
     
  19. Sep 28, 2015 at 7:19 PM
    #39
    ckeene9

    ckeene9 Well-Known Member

    Joined:
    Sep 20, 2012
    Member:
    #87325
    Messages:
    10,848
    Gender:
    Male
    Chesterfield, VA
    Vehicle:
    '12 DCSB Supercharged 4x4 TRD Sport
    See Build Thread
    For your reference and decision process, ~9.5" will have an RTT level with a Prinsu rack. Let me know when you're ready for a bed rack.

    ImageUploadedByTapatalk1443493107.577147.jpg
     
  20. Sep 28, 2015 at 7:46 PM
    #40
    Incognito

    Incognito [OP] No better friend, no worse enemy

    Joined:
    May 25, 2009
    Member:
    #17626
    Messages:
    13,751
    Gender:
    Male
    VA
    Vehicle:
    2012 Pyrite AC TRD OR
    Spacer lift, bumper stickers, ejector seat, etc.
    Thanks for the info, looks like the perfect height for the RTT + bed space retention. Are you going back to your cap or going a different route?
     

Products Discussed in

To Top