1. Welcome to Tacoma World!

    You are currently viewing as a guest! To get full-access, you need to register for a FREE account.

    As a registered member, you’ll be able to:
    • Participate in all Tacoma discussion topics
    • Communicate privately with other Tacoma owners from around the world
    • Post your own photos in our Members Gallery
    • Access all special features of the site

SureSet air pump install

Discussion in '2nd Gen. Tacomas (2005-2015)' started by fla_sun, Oct 21, 2015.

  1. Oct 21, 2015 at 5:19 PM
    #1
    fla_sun

    fla_sun [OP] Well-Known Member

    Joined:
    Oct 15, 2015
    Member:
    #166710
    Messages:
    295
    Gender:
    Male
    Vehicle:
    2006 SR5 4X4 AC 4.0 Auto
    This is my SureSet by Air Lift install on 2006 Tacoma 4X4.

    I put some Air Lift bags on my Tacoma less than a month after I bought it in 2006. While looking at the truck before purchasing it new I saw the three leaf springs and told the salesman there would be a TSB down the road. I did tow a boat/trailer in the 3K pound range as well as made numerous trips to Lowes or home Depot for weekend projects, sometimes with hundreds of pounds of load.

    I soon got tired of the bicycle pump routine so I bought the SureSet pump kit. Well nine years later I finally found the time to install it.

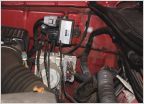
    Here is the install. I decided to utilize the storage compartments in the bed.

    The pump and regulator on the passenger side and the relay and controller on the other. I might move the controller to inside the cab one day. After nine years I pretty much know the PSI needed for any particular load. A 900 pound load needs 65 PSI to level for example.

    I have seen some really cool and way better installs in the engine compartment. I just didn’t have access to any fabricating equipment when I did this.

    The controller swivels out to read the display then back in to close the hatch. I left plenty of wiring slack on both sides so the compartments can be pulled out for any work.

    attached are pictures.

    IMG_0776.jpg IMG_0777.jpg IMG_0778.jpg IMG_0780.jpg IMG_0781.jpg IMG_0784.jpg IMG_0785.jpg IMG_0779.jpg

    Regards, Steve
     
  2. Oct 26, 2015 at 7:49 AM
    #2
    Livinserene

    Livinserene Thejerkyguy

    Joined:
    Nov 15, 2013
    Member:
    #116646
    Messages:
    875
    Gender:
    Male
    First Name:
    Kevin
    Nova Scotia
    Vehicle:
    18 sport mt Ovtuned
    OV TUNED MOFOS
    That looks.. awesome...any issues with moisture In those compartments? ?
     
    fla_sun[OP] likes this.
  3. Oct 26, 2015 at 11:34 AM
    #3
    fla_sun

    fla_sun [OP] Well-Known Member

    Joined:
    Oct 15, 2015
    Member:
    #166710
    Messages:
    295
    Gender:
    Male
    Vehicle:
    2006 SR5 4X4 AC 4.0 Auto
    Thanks, I will find out! I put B sealant (dries to a soft gel and easily removed) on the relay connections and covered the controller with a zip tied plastic bag.
     
    Livinserene[QUOTED] likes this.
  4. Jan 26, 2017 at 9:38 AM
    #4
    fla_sun

    fla_sun [OP] Well-Known Member

    Joined:
    Oct 15, 2015
    Member:
    #166710
    Messages:
    295
    Gender:
    Male
    Vehicle:
    2006 SR5 4X4 AC 4.0 Auto
    I wanted to update the moisture question. I have observed the controller module dripping wet with condensation during wet weather. I recently took it apart and it was dry and clean inside.
    However the inline barrel fuse developed some corrosion and caused the controller to lose power intermittently. I will replace this with a moisture proof blade type fuse soon.
     

Products Discussed in

To Top