

-
Welcome to Tacoma World!
You are currently viewing as a guest! To get full-access, you need to register for a FREE account.
As a registered member, you’ll be able to:- Participate in all Tacoma discussion topics
- Communicate privately with other Tacoma owners from around the world
- Post your own photos in our Members Gallery
- Access all special features of the site
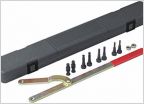 How can I improvise a crankshaft pulley holder?
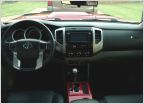 Painted my Shift Indicator Barcelona Red Metallic
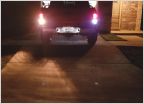 Best back up lights for the money?
 Some ass stole one of my bolt caps.
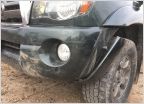 Amazon bumper after new frame and deer encounter?
 2007 TRD rust bucket!
Tacoma On Board Air (OBA) set up with Firestone Ride Rite Airbags
Discussion in '2nd Gen. Tacomas (2005-2015)' started by g34rh34d, Nov 3, 2015.
Products Discussed in


