1. Welcome to Tacoma World!

    You are currently viewing as a guest! To get full-access, you need to register for a FREE account.

    As a registered member, you’ll be able to:
    • Participate in all Tacoma discussion topics
    • Communicate privately with other Tacoma owners from around the world
    • Post your own photos in our Members Gallery
    • Access all special features of the site

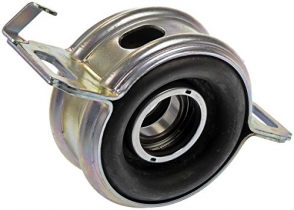
Center carrier bearing.

Discussion in '2nd Gen. Tacomas (2005-2015)' started by airship600, Apr 9, 2013.

  1. Apr 9, 2013 at 2:51 PM
    #1
    airship600

    airship600 [OP] Member

    Joined:
    Nov 15, 2010
    Member:
    #46213
    Messages:
    18
    Gender:
    Male
    First Name:
    Trevor
    Elizabeth City
    Vehicle:
    06 Tacoma
    Need some help please.

    I started to get a vibration under the truck a few weeks ago. I read on here somewhere talk about the center carrier bearing. I spun my center bearing around 180 and it made a huge difference. I want to replace the carrier bearing and wanted to know if anyone here has done it before? It looks like I may need to remove the U joint maybe?

    Any suggestions would be appreciated..

    Trevor..
     
  2. Apr 9, 2013 at 10:27 PM
    #2
    Texoma

    Texoma IG: Triple C Chop Shop

    Joined:
    Feb 1, 2011
    Member:
    #50374
    Messages:
    18,756
    Gender:
    Male
    First Name:
    Chris(Topher)
    Lago Vista, TX
    Vehicle:
    10 Taco 4x4
    A bunch a cool stickers, a bada ass MetalMiller Tx Longhorns grill emblem painted Hemi Orange, JBA long tube headers with o2 sims, Diff breather mod, Red LED interior lights, Fancy head unit that plays ipod n movies, Also DIY install factory stuff like, factory cruise control, factory intermittent wipers, OME nitro struts with 886x springs and toy tec top plate, JBA high caster UCA's for better alignmnet and dey beefier too, Old Man Emu Dakar leaf springs in da rear with the gear, U bolt flipper, Ivan Stewart TRD rims with 33" K Bro 2's, some bad ass weather tech floor liners so I don't muck up my interior, an ATO shackle flipper for mo travel in da rear wit the gear, also super shiny Fox 2.0 shocks back there too, all sorts of steal armor for bouncing off of the rocks like demello sliders, AP front skid, trans skid, n transfer skid, demello gas tank skid, and a tough as nails ARB bumper with warn 8k winch, I'm sure there's more
    First, you'll need to mark up the drive shaft with a paint pen at all the disassembly points. Mark the rear diff to shaft flange, slip yoke, at the u joint you disassemble, at the carrier bearing, and at the transmission to shaft flange. You are doing this so that when you re assemble the shaft, you assemble it exactly as it was before to maintain it's balance. I found it was easier for me to remove the entire drive shaft and take it to a bench vise to remove the u joint. I tried to remove the u joint with my big c clamp under the truck, but it was pressed in too good for the c clamp to handle. Once you get the u joint out, there is a staked nut on the shaft holding the CB in place along with a few washers. I would recommend getting new nut and washers to go with your new CB. After you get the stake nut off, you'll have to figure out how you want to remove the CB. I had a shop press at my disposal, so I used that. You may be able to rent a 2 jaw puller from the parts store, or slide hammer, or just use a BFH. How ever you do it, be careful not to damage your drive shaft. Once you get the old CB off, grease up the new one and slide it on as far as you can get it, with all the hardware it needs. You might not be able to slide it on completely, so at this point is where I used a long socket and a hammer, and I tapped it on enough to where I could assemble it the rest of the way and thread the stake nut on. There are 2 torque specs for the stake nut. One is high to ensure that the CB is seated all the way, then you back the nut off, and put the lower, final torque on, then you stake the lip of the nut on to the notch in the shaft. I'm not sure what the Torque spec is off hand, but I'm sure you could pry that info out of the internet somewhere. The rest is reverse of disassembly. While you're there, you might as well grease the hell out your slip yoke. One person has even gone as far as drilling and tapping in a grease fitting for the slip yoke. Hope this helps some. Good luck
     
    RobP62, BlackTaco22 and BandanaBerg like this.
  3. Apr 10, 2013 at 3:02 PM
    #3
    airship600

    airship600 [OP] Member

    Joined:
    Nov 15, 2010
    Member:
    #46213
    Messages:
    18
    Gender:
    Male
    First Name:
    Trevor
    Elizabeth City
    Vehicle:
    06 Tacoma
    Thanks for the write up it will help. I plan on doing it either this weekend or the one after. I will let you know how it went.
     
  4. Nov 12, 2014 at 11:39 PM
    #4
    Chuy

    Chuy Well-Known Member

    Joined:
    Aug 4, 2008
    Member:
    #8328
    Messages:
    3,445
    Gender:
    Male
    Lakeside, CA
    Vehicle:
    07 V6 DCLB 4X4 Sport
    Silver Taco
    Some quick points about my experience. I used a Sunex 52BS bearing splitter to, first, remove the yoke from the splined shaft, then, the bearing. I used a 20-ton shop press. They came off easy. If you don't have a press, you may be able to use a malley/hammer to strike the splitter. I used a punch, I think 3/16" to install the bearing. Tap it in place gently; you will feel when it seats. I used the press and bearing splitter to install the yoke far down enough until I could install the nut. I used a weld seam on the driveshaft to hold the splitter.

    I re-used the staked nut; used blue threadlocker during the install. Could not torque the nut because the shaft kept spinning in my little 4" vise. Used an impact driver to install the nut.

    I lost all my marks when I cleaned the driveshaft. But, after a week, I have not yet experienced any vibrations. Didn't have any before. I replaced the u-joints and carrier bearing on a 07 Taco 4-door, 4X4 long bed with 124K miles.

    Hope this helps someone.
     
    BandanaBerg likes this.
  5. Nov 27, 2015 at 9:05 PM
    #5
    HAWAIICALIVEGAZ

    HAWAIICALIVEGAZ Desert Warrior

    Joined:
    Mar 30, 2011
    Member:
    #54006
    Messages:
    845
    Gender:
    Male
    First Name:
    SHANE
    LAS VEGAS NV
    Vehicle:
    2005 TRD Pre Runner
    Dr Coilovers; Camburg UCAs; Sway bar Relocation block; Deaver J66 Leafs; ProComp extended travel rear shocks 6K HIDs & 13" antenna
    I just replaced mine. I didn't do two torques on the nut and my lines didn't line up. I installed the yoke then the 2 bolts that hold the carrier bearing up then when it came to the diff, the bolts didn't line up. They were just a little off so I jacked the rear up and let the tires spin until the bolts lined up. Is that a big Nono? If so, why?
     
  6. Nov 28, 2015 at 9:17 AM
    #6
    HAWAIICALIVEGAZ

    HAWAIICALIVEGAZ Desert Warrior

    Joined:
    Mar 30, 2011
    Member:
    #54006
    Messages:
    845
    Gender:
    Male
    First Name:
    SHANE
    LAS VEGAS NV
    Vehicle:
    2005 TRD Pre Runner
    Dr Coilovers; Camburg UCAs; Sway bar Relocation block; Deaver J66 Leafs; ProComp extended travel rear shocks 6K HIDs & 13" antenna
    Anyone know?
     
  7. Nov 28, 2015 at 10:42 AM
    #7
    Jimmyh

    Jimmyh Well-Known Member

    Joined:
    May 16, 2012
    Member:
    #78991
    Messages:
    13,795
    Gender:
    Male
    SC
    Vehicle:
    2012 Prerunner SR5
    That is why it is better to use a center punch to mark the match marks. You cannot wash them off.
     
    shakerhood likes this.
  8. Nov 28, 2015 at 11:35 AM
    #8
    Texoma

    Texoma IG: Triple C Chop Shop

    Joined:
    Feb 1, 2011
    Member:
    #50374
    Messages:
    18,756
    Gender:
    Male
    First Name:
    Chris(Topher)
    Lago Vista, TX
    Vehicle:
    10 Taco 4x4
    A bunch a cool stickers, a bada ass MetalMiller Tx Longhorns grill emblem painted Hemi Orange, JBA long tube headers with o2 sims, Diff breather mod, Red LED interior lights, Fancy head unit that plays ipod n movies, Also DIY install factory stuff like, factory cruise control, factory intermittent wipers, OME nitro struts with 886x springs and toy tec top plate, JBA high caster UCA's for better alignmnet and dey beefier too, Old Man Emu Dakar leaf springs in da rear with the gear, U bolt flipper, Ivan Stewart TRD rims with 33" K Bro 2's, some bad ass weather tech floor liners so I don't muck up my interior, an ATO shackle flipper for mo travel in da rear wit the gear, also super shiny Fox 2.0 shocks back there too, all sorts of steal armor for bouncing off of the rocks like demello sliders, AP front skid, trans skid, n transfer skid, demello gas tank skid, and a tough as nails ARB bumper with warn 8k winch, I'm sure there's more
    No big deal
     
  9. Nov 28, 2015 at 11:58 AM
    #9
    HAWAIICALIVEGAZ

    HAWAIICALIVEGAZ Desert Warrior

    Joined:
    Mar 30, 2011
    Member:
    #54006
    Messages:
    845
    Gender:
    Male
    First Name:
    SHANE
    LAS VEGAS NV
    Vehicle:
    2005 TRD Pre Runner
    Dr Coilovers; Camburg UCAs; Sway bar Relocation block; Deaver J66 Leafs; ProComp extended travel rear shocks 6K HIDs & 13" antenna
    I put everything back together and took it for a short drive. Haven't noticed anything so far.
     
  10. Apr 9, 2017 at 2:03 AM
    #10
    Chuy

    Chuy Well-Known Member

    Joined:
    Aug 4, 2008
    Member:
    #8328
    Messages:
    3,445
    Gender:
    Male
    Lakeside, CA
    Vehicle:
    07 V6 DCLB 4X4 Sport
    Silver Taco
    Replaced my carrier bearing (Dorman 934-401) a second time, and replaced the center u-joint, since I had to remove it to remove the yolk. Bearing lasted 2 years, but I realized I installed the bearing 180 degrees off last time That raised the shaft about an inch or so and probably put extra pressure on the rubber, which probably accelerated wear. Replaced with APDTY 045512 which came in a bag labelled MTC 9283. Replaced ujoint with a Moog 254 which was a tight fit at the ends when trying to fit the lock ring. The ujoint does feel and look like a heavy duty design, but if I get it again, I will grind the ujoint caps half a mm. Or stick with Spicer 5-1330X, good ujoint but after 2 years, the body is rusting. r

    Some notes to self: torque for the 8 bolts/nuts: 65 ft/lbs; 2 bolts on center carrier: 27 ft/lbs; yolk staked bolt: 51 ft/lbs. OEM carrier bearing pt#s: 37230-35130 (replaces 37230-0K010, 37230-0K011, & 37230-34020.)
     
    BlackTaco22 and RobP62 like this.
  11. Nov 22, 2020 at 7:25 PM
    #11
    BlackTaco22

    BlackTaco22 Member

    Joined:
    Oct 9, 2016
    Member:
    #199347
    Messages:
    20
    Gender:
    Male
    Vehicle:
    2009 Black Toyota Tacoma Prerunner - TRD Sport Package - SR5
    Bilstein 5100 Adjustable Shocks with Toytec coil springs (2.5 inch lift Front) - Bilstein 5100's rear - 265/70/R17 Goodyear Wrangler Duractrac's

    Just in case anyone was wondering still.... The center support nut is torqued to 134 ft-lbs to make sure the CB is properly seated. Then back the nut off and torque a 2nd time to 51 ft-lbs. Hope this helps someone out!

    Also, can anyone help me out?! I have a 2009 Prerunner 2WD TRD Sport DC Long Bed.....I know my driveshaft is slightly different than the 4X4 Tacos. My slip yoke slides into the output shaft of my transmission. I believe, the slip yoke is lubed by transmission fluid. Should I also be greasing the splines of the slip yoke every so often with bearing grease?? Just worried that some would end up in the transmission? Thanks for the help!
     
    Last edited: Nov 22, 2020
  12. Nov 23, 2020 at 12:51 AM
    #12
    Jimmyh

    Jimmyh Well-Known Member

    Joined:
    May 16, 2012
    Member:
    #78991
    Messages:
    13,795
    Gender:
    Male
    SC
    Vehicle:
    2012 Prerunner SR5

    No, You do not need to grease the splines going into the transmission tail shaft.
     
    BlackTaco22[QUOTED] likes this.

Products Discussed in

To Top