

-
Welcome to Tacoma World!
You are currently viewing as a guest! To get full-access, you need to register for a FREE account.
As a registered member, you’ll be able to:- Participate in all Tacoma discussion topics
- Communicate privately with other Tacoma owners from around the world
- Post your own photos in our Members Gallery
- Access all special features of the site
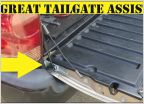 Tailgate cable for support strap for a truck
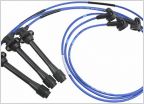 Possible Spark Plug/Spark Plug Wire issue
 2002 Pre-Runner Excab door handle
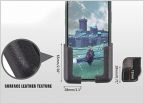 Cheap, easy effective cell phone mount
 1st Gen Bed Rack for RTT - recommendations
What have you done to your Tacoma today? 1st Gen Edition
Discussion in '1st Gen. Tacomas (1995-2004)' started by SlimDigg, Feb 7, 2011.
Page 4376 of 11226
Page 4376 of 11226
Products Discussed in


