

-
Welcome to Tacoma World!
You are currently viewing as a guest! To get full-access, you need to register for a FREE account.
As a registered member, you’ll be able to:- Participate in all Tacoma discussion topics
- Communicate privately with other Tacoma owners from around the world
- Post your own photos in our Members Gallery
- Access all special features of the site
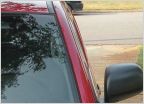 Weathertech or egr window deflectors?
 Bed Rail T-nuts- OE Toyota PN?
 Personal observation about the HVAC system and the mildew odor
 Need Entune Audio help!
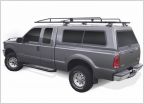 Ladder rack mounted to campershell!?
 Anyone on right now that can help me real quick?
Installing Better Bed Lights on the 2nd gen (Warning Picture Heavy)
Discussion in '2nd Gen. Tacomas (2005-2015)' started by TacoStandCT, Jan 5, 2016.
Page 1 of 2
Page 1 of 2


