

-
Welcome to Tacoma World!
You are currently viewing as a guest! To get full-access, you need to register for a FREE account.
As a registered member, you’ll be able to:- Participate in all Tacoma discussion topics
- Communicate privately with other Tacoma owners from around the world
- Post your own photos in our Members Gallery
- Access all special features of the site
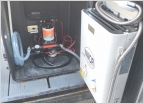 Heated WaterPORT??
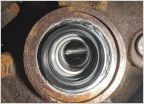 CV Axle Seal Install Issue - Thoughts?
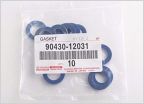 Anyone knows Oil Plug Gasket/crush washer and Rear diff gasket part #
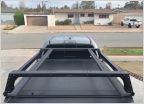 Rooftop tent modified install
Dual Battery Setups! Let's see them! Multiple Batteries Thread!
Discussion in 'Technical Chat' started by MJonaGS32, Sep 20, 2013.
Page 39 of 196
Page 39 of 196
Products Discussed in


