

-
Welcome to Tacoma World!
You are currently viewing as a guest! To get full-access, you need to register for a FREE account.
As a registered member, you’ll be able to:- Participate in all Tacoma discussion topics
- Communicate privately with other Tacoma owners from around the world
- Post your own photos in our Members Gallery
- Access all special features of the site
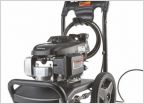 My new toys = spotless taco
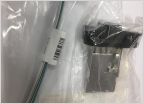 Intermittent air problem
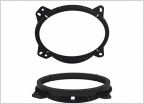 Metra adaptor for 2015 front speaker
 "Certified" Preowned = Limp Dealer Scam!
 Tacoma Lug Nuts
 300,000 Miles Today
Fog light mod
Discussion in '2nd Gen. Tacomas (2005-2015)' started by Snowmang, Dec 3, 2009.


