1. Welcome to Tacoma World!

    You are currently viewing as a guest! To get full-access, you need to register for a FREE account.

    As a registered member, you’ll be able to:
    • Participate in all Tacoma discussion topics
    • Communicate privately with other Tacoma owners from around the world
    • Post your own photos in our Members Gallery
    • Access all special features of the site

Sound System Upgrade - non-JBL OEM Factory Radio, LOC, Speakers, Sub all under seats in 2014 DCSB

Discussion in 'Audio & Video' started by UBYBC, Mar 14, 2016.

  1. Mar 14, 2016 at 12:20 PM
    #1
    UBYBC

    UBYBC [OP] Well-Known Member

    Joined:
    Aug 12, 2015
    Member:
    #161622
    Messages:
    492
    Vehicle:
    2014 Tacoma TRD OR
    First off thanks to TW and members who share their relevant knowledge to help others! I could not have done this as easily without TW.

    I just completed an awesome sound system upgrade in my 2014 DCSB using a non-JBL OEM factory radio, not cutting any factory wiring and not losing any cargo storage space. My goal was to stay low-profile, keep the factory look and keep my storage spaces available for my gear and stuff. I also got very lucky and purchased a non-JBL navigation unit from a member here. They are extremely hard to find. I wanted to use that unit and all it's features but still have great sound. i wish a post like this existed for me, so I decided to make one for others. Here's what I learned and did to accomplish a great sounding system using the factory radio.

    I bought:
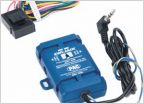
    -AudioControl LC7i Line Output Converter
    -MB Quart 6.5" Component speakers for front doors (with built in crossover)
    -MB Quart 6.5" 2-way speakers for rear doors
    -Speaker brackets for front door woofers Metra #82-8418
    -Speaker brackets for rear door 2-ways Scosche SAT69
    -Speaker wire adpaters for the OEM door speaker connections #71-035LC
    -Radio Wiring harness #70-1761 (Qty 2)
    -Radio Wiring harness #71-1761 (Qty 2)
    -Boom Mats for all (4) 6.5" speakers (foam speaker enclosures)
    -Alpine Power Pack - KTP-445U
    -Pioneer TS-WH500A powered sub
    - Lot's of wire, splices (crimp kind), quick connectors, and ring terminals.

    The job took me 2 VERY long days going slowly and making sure my wires runs were very clean, and i was slow and careful removing trim and parts to not break anything. I wish I had budgeted 3 days. I think a pro who knows the truck really well could do this in one day.

    I started by removing the seats and center console to make room to work.

    Subwoofer- (Passenger Seat) I choose this location b/c I did not want to feel the sub through the seat. The passenger seat required that all of the under seat connectors and wiring be removed and inverted to locate on the top of the bracket they attach to. I also rotated the under seat support bar 60 degrees to the rear of the truck. The sub was installed on the floor under the passenger seat and is a very tight fit. I also made 1/2" spacers out of plywood to keep the sub off the A/C vents. I did find a good position so the seat will have full adjustment range without hitting the sub. The sub does vibrate the seat cushion considerably, but can be adjusted down on demand with the supplied Pioneer sub remote. The sub remote was mounted inside the center console.

    LOC and Amp - (Driver Seat) The drivers seat required no modification. I again made wood spacers to provide a level surface and keep the equipment off the A/C vents. I mounted the LOC and Alpine so that I can easily reach the adjustment knobs from the front of the seat to allow for fine tuning. I disabled the GTO "auto turn on" feature on the LOC.

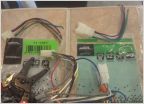
    Wire Harnesses - The Metra harness or BestKit harness are both fine. Please note: #71-1761 comes in (2) different flavors. There is an older version (yellow plastic) for older trucks that does not fit the newer OEM radio. Be sure you get the newer version. The reason for getting (2) of both the input and output harness is that you must dissect them to use the pins and splice a wire connection for the radio button illumination. This required wire is nonexistent in either of these harnesses. There is a great thread about this posted by Revelations, that really helped me. The LOC wiring diagram thread that is a sticky thread on the AV forum is wrong for newer models, hence why the extra wire added to the harness is required.

    Wiring - I made my own bundles and fed everything from the deck down through the dash and center console to the LOC and back up from the Alpine to the deck for the door speakers. The wire run through the dash is extremely tight, so make a good clean wire bundle wrapped inside a good wire loom. The 3rd channel for the sub ran under the center console to the other seat.

    Power - All devices run off the car battery. The #1 power antenna lead coming off the #71-1761 activates the remote on to the LOC, which activates the Alpine, which activates the sub. The #2 power antenna lead did not work for a remote turn on ( I tried it)

    Grounds - I grounded the LOC and both amps to the same spot under the center console, where I think the 12V cig lighter adapter or radio is grounded. It's pretty clear where it is and important that you ground these all to the same spot to avoid loops and/or noise.

    Door Trim - The window button plates do pop out lifting from the front of the plate. The drivers side connector is a real bitch and I almost broke mine. The door sails (not the panels) use small white plastic tabs. After you remove the sails use some needle nose pliers to carefully pull the clips out of the door frame and reinstall them on the sails. If you don't they will fall in the door when you pop the trim on. (Learned this the hard way and had to remove the entire door panel to fish them out)

    Speakers - All 6.5" speakers mounted really easily. If you use boom mats or speaker covers be sure to check your rolled down window clearance. I had to adjust my mounts for window clearance. I made mounting brackets for the tweeters out of plywood using the old OEM tweeter to make a stencil. A couple skinny long bolts and some nuts held them in place fine. It was hard to find a good front door location for the crossovers. I had to try a couple different spots so the door panel would pop back on flush.

    Tuning - I set everything to "0" and turned radio to 90% volume. I ended up setting the LOC outputs gain to about 50%. I set the Alpine outputs gain to about 10%-20%. Using the included remote I set the sub at about 50% and shelved the frequency at about 90hz. The dash unit i set treble high (7), mids in the middle (5), and lows low (3)
    The LOC has a bass response control I could tweak down some more probably, and bring it up in the deck.

    Results: No noise, exceptional volume and really awesome sound for this type of setup. I am very happy with the outcome and I did not give up one inch of my precious cargo space.

    Hope this helps someone else avoid going through the painful discovery process and painful "oops" moments I had.
     
    Last edited: Mar 14, 2016
  2. Mar 14, 2016 at 9:40 PM
    #2
    Purpleman

    Purpleman Well-Known Member

    Joined:
    Aug 13, 2014
    Member:
    #136093
    Messages:
    599
    Gender:
    Male
    Anaheim
    Vehicle:
    15 PreRunner
    Let us see some pictures!
     
    big_jarv likes this.
  3. Mar 14, 2016 at 9:45 PM
    #3
    edummann

    edummann Well-Known Member

    Joined:
    Aug 9, 2014
    Member:
    #135797
    Messages:
    226
    Gender:
    Male
    First Name:
    Eric
    Bend, Oregon
    What did it all cost?
     
  4. Mar 15, 2016 at 12:00 AM
    #4
    UBYBC

    UBYBC [OP] Well-Known Member

    Joined:
    Aug 12, 2015
    Member:
    #161622
    Messages:
    492
    Vehicle:
    2014 Tacoma TRD OR
    about $800 for everything except the 2015 nav head unit. I got that for $450.

    I sold my 2014 non nav unit for $300.

    and sorry didn't take many pictures. But I guess I can try and show how it all fits under the seats.
     
    edummann likes this.
  5. Mar 21, 2016 at 12:56 PM
    #5
    UBYBC

    UBYBC [OP] Well-Known Member

    Joined:
    Aug 12, 2015
    Member:
    #161622
    Messages:
    492
    Vehicle:
    2014 Tacoma TRD OR
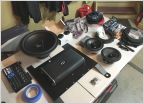
    ok, here's some pictures. Sorry for the crappy shots, but I was really focused on the task during the install, intending to not screw it all up.

    Center console and seats coming out.
    IMG_9111.jpg

    Driver's side
    IMG_9157.jpg
    IMG_9159.jpg

    Passenger's side:
    IMG_9161.jpg
    IMG_9162.jpg
     

    Attached Files:

  6. Jun 9, 2018 at 10:39 AM
    #6
    MolonLabeTaco

    MolonLabeTaco Well-Known Member

    Joined:
    Jan 30, 2018
    Member:
    #242953
    Messages:
    2,786
    Gender:
    Male
    First Name:
    Dude
    N. Texas
    Vehicle:
    '12 DC 4x4 OR
    Is there a reason you didn't use the yellow wire of the 71-1761 harness (which is the gray wire +12V ignition in the factory harness) for the remote on?
    You used the #1 power antenna lead and I'm just curious why. I'll be installing the same Alpine amp soon. Thanks!
     
  7. Jun 9, 2018 at 1:15 PM
    #7
    UBYBC

    UBYBC [OP] Well-Known Member

    Joined:
    Aug 12, 2015
    Member:
    #161622
    Messages:
    492
    Vehicle:
    2014 Tacoma TRD OR
    Sorry bro it’s been a while and maybe they changed the harness a bit? My system is still going strong. Sounds great! All I remember is that I did it the only way it would work at the time. I do not have a power antenna so maybe that’s why? Maybe it was a better way to sequence the remote on power feed? Or I just used the available wire. I’d have to open it up to look and that’s not happening until it needs to. Mostly my post was to help me remember what I did since it was a bit complicated for a first timer and maybe help others.
     
    Last edited: Jun 10, 2018
    cutter2 and MolonLabeTaco like this.

Products Discussed in

To Top