

-
Welcome to Tacoma World!
You are currently viewing as a guest! To get full-access, you need to register for a FREE account.
As a registered member, you’ll be able to:- Participate in all Tacoma discussion topics
- Communicate privately with other Tacoma owners from around the world
- Post your own photos in our Members Gallery
- Access all special features of the site
 Leveling kit vibration
 Are Bilstein 5125 33-230337 the right shock for 1in rear block on 3rd gen TRD OR DCLB?
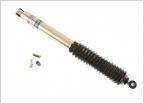 1st Gen Shock Problem
 OME Dakars with D29XL
 Rear Suspension advice and help
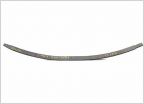 Question on D29XL
Hellwig 979 Helper Spring Install - 2013 Tacoma TRD Sport
Discussion in 'Suspension' started by Gerrrr, Jun 27, 2015.


