

-
Welcome to Tacoma World!
You are currently viewing as a guest! To get full-access, you need to register for a FREE account.
As a registered member, you’ll be able to:- Participate in all Tacoma discussion topics
- Communicate privately with other Tacoma owners from around the world
- Post your own photos in our Members Gallery
- Access all special features of the site
Quick Links: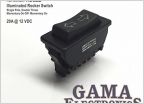 Electronics whiz types - can anyone help me figure out how to wire this switch?
  DIY TRUE BOLT ON Cheap Ebay Longbed Flares on a Shortbed! Gear Oil Question
 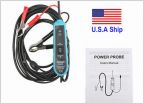 What is this electrical tester? For those who re geared (aftermarket gears)- What Gear Oil Weight?
  High temp spray paint for exhaust?
Can't Get Nut Off Top Strut For Bilstein Install
Discussion in 'Technical Chat' started by grubburg, Apr 2, 2016.
Page 1 of 2
Page 1 of 2


