1. Welcome to Tacoma World!

    You are currently viewing as a guest! To get full-access, you need to register for a FREE account.

    As a registered member, you’ll be able to:
    • Participate in all Tacoma discussion topics
    • Communicate privately with other Tacoma owners from around the world
    • Post your own photos in our Members Gallery
    • Access all special features of the site

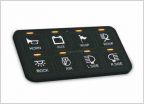
Switch-Pro 8 switch panel group buy!

Discussion in 'Automotive Group Buys' started by Spixelz, Sep 3, 2015.

  1. Apr 21, 2016 at 7:21 PM
    #301
    NaZRaQ

    NaZRaQ Well-Known Member

    Joined:
    Jul 22, 2014
    Member:
    #134452
    Messages:
    562
    Gender:
    Male
    First Name:
    Zee
    Denver
    Vehicle:
    2024 TRD OR Tacoma hybrid
    Looks fantastic :thumbsup:.
    Sorry if this has already been covered I skipped to the end....
    How water proof is the button section since its next to the cup holder ?
    I always have spills there...
     
  2. Apr 21, 2016 at 8:41 PM
    #302
    XPOTRPR

    XPOTRPR CNC Programmer/Machinist

    Joined:
    May 29, 2011
    Member:
    #57449
    Messages:
    31,136
    Gender:
    Male
    First Name:
    Josh
    Chandler, AZ
    Vehicle:
    [2009 Supercharged Adventuretruck] & [1986 22r Minitruck]
    > BUILD LINKS >
    I would think the switches would be ok. Idk, can anybody confirm? Sealing under the bezel with RTV or silicone would help too.
     
  3. Apr 21, 2016 at 10:43 PM
    #303
    Kismaokole

    Kismaokole Paratus et Fidelis

    Joined:
    Nov 9, 2012
    Member:
    #90809
    Messages:
    24
    Gender:
    Male
    Colorado Springs and Denver
    Vehicle:
    '15 DCSB TRD OR '12 ACLB SR5
    Please sign me up for one. Curved style/Shifter console mount. Great job, sir!
     
  4. Apr 21, 2016 at 10:58 PM
    #304
    Jmad1997

    Jmad1997 Well-Known Member

    Joined:
    Feb 17, 2016
    Member:
    #178521
    Messages:
    1,274
    Gender:
    Male
    Vehicle:
    2005 TRD sport long bed 6" fab tech lift
    Awesome flush mount I think this thread just sold me on this panel! And @Moose1988 how much were your flush mounts going to be going for I will be in for a batch of the curved mount. Also are these panels similar to the Spod such as connecting the power and the ground directly to the switch pro power source? I'm not the best with wiring and didn't see that covered in the video...
     
  5. Apr 22, 2016 at 6:02 AM
    #305
    Joelev

    Joelev Well-Known Member

    Joined:
    Feb 15, 2015
    Member:
    #148712
    Messages:
    329
    Gender:
    Male
    The switches are all one plastic sheet, so I'd suspect they are "mildly waterproof." There is a lip where their bezel sits over top of the membrane, which could probably get gummed up. I'd bet that if you didn't pour soda directly on them, though, you could wipe off most spills without issue.
     
    CO MTN Steve likes this.
  6. Apr 22, 2016 at 7:33 AM
    #306
    alphabravo

    alphabravo Well-Known Member

    Joined:
    Jan 6, 2014
    Member:
    #120082
    Messages:
    1,735
    Gender:
    Male
    First Name:
    Christopher
    Canada via FL
    Vehicle:
    2003 Tacoma TRD
    Supercharger AntiDark Hood Light Redline Tuning Hood Struts Morimoto Projectors Grey Wire Mod Tundra 13WL Brake Conversion EBC ED Pads and GD Rotors Mean Green Starter DC Power 250A Alternator Odyssey PC2150 Battery, Artec Cage ADS shocks Total Chaos UCA ComeUp Winch, Factor 55 Splicer Relentless bumpers OTRATTW Switches, Bussman 15304-2-2-4 RTMR, Paranoid Fabrication switch brackets Jensen JHD3630BT Morimoto XB LED Fogs Deaver Custom Springs Ivan Stewart TRD Wheels, Pro Series TRD Wheels
    It's been awhile since I read through the documentation and I forgot.

    Does the SwitchPro have a setting that will turn off the accessory with the ignition but can still be manually switched on/off while the ignition is off?
     
  7. Apr 22, 2016 at 9:16 AM
    #307
    XPOTRPR

    XPOTRPR CNC Programmer/Machinist

    Joined:
    May 29, 2011
    Member:
    #57449
    Messages:
    31,136
    Gender:
    Male
    First Name:
    Josh
    Chandler, AZ
    Vehicle:
    [2009 Supercharged Adventuretruck] & [1986 22r Minitruck]
    > BUILD LINKS >
    yes! I was bummed out at first, but then found it has an option to program the buttons to work without ignition. I first wired it up as instructed, and was bummed out to find out I need the key in the ignition to use the switches. I then rewired it to constant 12v.. but that leaves the LEDs lit the entire time. So.. after some reading.. read that was an option, and programmed all the buttons to work when the ignition is off. its perfect now!!
     
  8. Apr 22, 2016 at 9:18 AM
    #308
    XPOTRPR

    XPOTRPR CNC Programmer/Machinist

    Joined:
    May 29, 2011
    Member:
    #57449
    Messages:
    31,136
    Gender:
    Male
    First Name:
    Josh
    Chandler, AZ
    Vehicle:
    [2009 Supercharged Adventuretruck] & [1986 22r Minitruck]
    > BUILD LINKS >
    thanks guys! I will let everyone now when its finalized. hoping within the next week. I'll need my Switchpanel back to confirm one last time.
     
    CO MTN Steve and reidbailey like this.
  9. Apr 22, 2016 at 10:08 AM
    #309
    XPOTRPR

    XPOTRPR CNC Programmer/Machinist

    Joined:
    May 29, 2011
    Member:
    #57449
    Messages:
    31,136
    Gender:
    Male
    First Name:
    Josh
    Chandler, AZ
    Vehicle:
    [2009 Supercharged Adventuretruck] & [1986 22r Minitruck]
    > BUILD LINKS >
    alright guys.. the revision I printed last night is definitely a huge step in the right direction! I think I should have it dialed in by the end of the day. which is good, because then I can send my switchpro in today as well.
     
    TacoSTIG, Jmad1997 and reidbailey like this.
  10. Apr 22, 2016 at 10:37 AM
    #310
    XPOTRPR

    XPOTRPR CNC Programmer/Machinist

    Joined:
    May 29, 2011
    Member:
    #57449
    Messages:
    31,136
    Gender:
    Male
    First Name:
    Josh
    Chandler, AZ
    Vehicle:
    [2009 Supercharged Adventuretruck] & [1986 22r Minitruck]
    > BUILD LINKS >
    you can see the two curves in different directions. its so close..

    upload_2016-4-22_10-36-54.png
     
    Camel51, TacoSTIG, Coop68 and 4 others like this.
  11. Apr 22, 2016 at 5:35 PM
    #311
    XPOTRPR

    XPOTRPR CNC Programmer/Machinist

    Joined:
    May 29, 2011
    Member:
    #57449
    Messages:
    31,136
    Gender:
    Male
    First Name:
    Josh
    Chandler, AZ
    Vehicle:
    [2009 Supercharged Adventuretruck] & [1986 22r Minitruck]
    > BUILD LINKS >
    Made another change or two since that one ^^

    its so damn close.. I'm about to just call it good. I'm gonna try one more thing Monday.

    I'm also hoping when I do the final test fit, and use some black RTV.. it will pull it down into place enough. The corners aren't making contact with the console. everything else basically is (the long sides will be pulled down with the RTV easily. the short side that will be towards the back of the truck should also be pulled down. the one short, facing the front of the truck is the real problem area. its a different curve than the opposite short side. its also different on that end on the long side too.

    One short end will have slightly more material than the other, and will have a different curve as well. this side will be what faces the front of the truck. I've just been trying to get it to a point where we are just fighting gravity to pull the bezel down in to place because it fits the contours.. vs printing it flat and fighting the memory of the plastic and bending it down into place. if that makes sense. lol

    I will let you guys know asap Monday. I sent out my Switchpro so I wont have it back until Wednesday at the earliest. no biggie tho, as I'm confident in that fitment.
     
    adio, Coop68, Acerwin and 1 other person like this.
  12. Apr 23, 2016 at 12:19 AM
    #312
    Doc V

    Doc V Well-Known Member

    Joined:
    Jan 31, 2016
    Member:
    #176743
    Messages:
    94
    Gender:
    Male
    Caldwell, ID
    Vehicle:
    2013 Tacoma Double Cab Short Box
    Rear seat 12V Outlets Streamlight Flashlight Install Remote Start Bed lights Amber emergency lighting Aries Grille Guard ARE topper with ski-rack USB power point
    First of all, thanks to the early adopters and bezel creators for this. Really great stuff. I'm sure there are others like me drooling over these switch systems. Just a heads up the promo codes from March were expired but I did some looking on autoanything and found a code for this month.
    "EAP1622WS" pricing is as follows. Happy Hunting!
    image.jpg
     
    TacoSTIG, reidbailey and Acerwin like this.
  13. Apr 23, 2016 at 3:35 AM
    #313
    Acerwin

    Acerwin The unNORM NORM

    Joined:
    Nov 20, 2014
    Member:
    #142732
    Messages:
    32,623
    Gender:
    Male
    First Name:
    Andrew
    South Carolina
    Vehicle:
    Toyota Tundra
    Damn if I had the funds right now
     
    Jmad1997 likes this.
  14. Apr 23, 2016 at 9:02 PM
    #314
    HenrikBP

    HenrikBP Well-Known Member

    Joined:
    Dec 3, 2014
    Member:
    #143611
    Messages:
    139
    Gender:
    Male
    First Name:
    Henrik
    SF, New Mexico
    Vehicle:
    2010 DCSB TRD Off-road
    Here's how I will wire and mount up my Switch-Pro panel:

    I made a mounting panel from 1/8" aluminum and cut it to fit behind the fuse/relay box in the engine compartment - similar to how many others have mounted their custom fuse panels. It was a bitch to bend - couldn't find anyone local with a break big enough to handle the thick aluminum.


    The wires from the Switch-Pro are connected to the terminal block in order from 1-8 bottom to top to make it easier to connect everything. The terminal block will also make it easy to add new loads and to move the loads to different switches later on if I decide to remap the controller.

    I'll run the power feed wires up through the oval hole in the plate, and will run all the negative wiring to the Busbar. I know I could have grounded most of it "local" to the load, but I wanted to avoid voltage drop for most of the loads such as ham radio, inverter, 12V outlets in the bed etc.

    Here is the panel temporarily laid into the engine compartment where it'll be mounted:


    I'll power the panel from a Stage 1 wire kit from Bamatoys. I'm embarrassed to say I'm still trying to figure out how to get the wiring installed :) . Looks like I'll need to remove the skid plate to get to the starter motor and engine block ground cable.

    I'm planning to mount the controller on the lip of the little bin to the right of the steering wheel. There should be enough room for my knee, and the controller will hopefully be somewhat in my field of view.
     
  15. Apr 25, 2016 at 10:33 AM
    #315
    XPOTRPR

    XPOTRPR CNC Programmer/Machinist

    Joined:
    May 29, 2011
    Member:
    #57449
    Messages:
    31,136
    Gender:
    Male
    First Name:
    Josh
    Chandler, AZ
    Vehicle:
    [2009 Supercharged Adventuretruck] & [1986 22r Minitruck]
    > BUILD LINKS >
    Made the changes I was trying for. printing now. Now that I have the curves down.. its just fine tuning the Dims on it which are easy. should be a couple more fit tests and be good.
     
  16. Apr 25, 2016 at 12:30 PM
    #316
    Acerwin

    Acerwin The unNORM NORM

    Joined:
    Nov 20, 2014
    Member:
    #142732
    Messages:
    32,623
    Gender:
    Male
    First Name:
    Andrew
    South Carolina
    Vehicle:
    Toyota Tundra
    Hell ueah
     
  17. Apr 25, 2016 at 12:31 PM
    #317
    XPOTRPR

    XPOTRPR CNC Programmer/Machinist

    Joined:
    May 29, 2011
    Member:
    #57449
    Messages:
    31,136
    Gender:
    Male
    First Name:
    Josh
    Chandler, AZ
    Vehicle:
    [2009 Supercharged Adventuretruck] & [1986 22r Minitruck]
    > BUILD LINKS >
    just test fit it.. HUGE improvement. made one more small tweak before I left for lunch. This last one might be it!
     
  18. Apr 25, 2016 at 1:25 PM
    #318
    TacoSTIG

    TacoSTIG Untamed Member

    Joined:
    Jun 22, 2014
    Member:
    #132473
    Messages:
    1,141
    Gender:
    Male
    First Name:
    Jeremy
    WA, Issaquah
    Vehicle:
    2005 AC, TRD OR
    hell yeah!
    :cheers:
     
  19. Apr 25, 2016 at 1:46 PM
    #319
    Acerwin

    Acerwin The unNORM NORM

    Joined:
    Nov 20, 2014
    Member:
    #142732
    Messages:
    32,623
    Gender:
    Male
    First Name:
    Andrew
    South Carolina
    Vehicle:
    Toyota Tundra
    I'll buy you a beer when I visit AZ for all the trouble you've been through with this
     
  20. Apr 25, 2016 at 2:03 PM
    #320
    XPOTRPR

    XPOTRPR CNC Programmer/Machinist

    Joined:
    May 29, 2011
    Member:
    #57449
    Messages:
    31,136
    Gender:
    Male
    First Name:
    Josh
    Chandler, AZ
    Vehicle:
    [2009 Supercharged Adventuretruck] & [1986 22r Minitruck]
    > BUILD LINKS >
    haha. :cheers: not needed buddy. its fun and its "training" for me here at work. lol

    I think I go it guys.. gonna call it good. Once I sanded down the little imperfections left from the 3D printer, it sits FLUSH!

    So, that being said.. I can sand these down for you guys, or I can send em out as is, and you guys can play with them and alter them as you see fit. Most of you will be sanding and painting anyways I assume. I know for mine, I will be priming, sanding, and painting to get a smooth finish. then adhere to the console with black RTV and it should be it! I want to finish mine up and get a "Complete" version done so you guys and myself can see how it looks all said and done, but, I dont have my switch panel, and I need to repaint anyways, so I would probably take some time this week. maybe by Thursday or Friday I will have a Finished Setup to show.

    that is unless you guys are ok with going forward based off of these...

    20160425_135446.jpg 20160425_135517.jpg 20160425_135528.jpg 20160425_135534.jpg 20160425_135633.jpg
     

Products Discussed in

To Top