1. Welcome to Tacoma World!

    You are currently viewing as a guest! To get full-access, you need to register for a FREE account.

    As a registered member, you’ll be able to:
    • Participate in all Tacoma discussion topics
    • Communicate privately with other Tacoma owners from around the world
    • Post your own photos in our Members Gallery
    • Access all special features of the site

The Start Of My HID Retrofit

Discussion in 'Lighting' started by WATacoRider, Dec 22, 2009.

  1. Dec 22, 2009 at 4:47 PM
    #1
    WATacoRider

    WATacoRider [OP] Well-Known Member

    Joined:
    Nov 24, 2009
    Member:
    #26479
    Messages:
    539
    Gender:
    Male
    Vehicle:
    TRD Sport 4x4
    I ordered a couple of temporary lights to use. A used driver side and aftermarket passenger side.
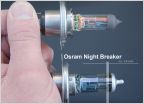
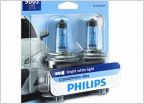
    Bought some TL projectors. Then bought some Philips 85122+. Mitsubishi ballasts and harness. Then Gatling shroud.

    I only started working on 1 side. I wanted to see how it would go. Well,I finally manage to test fit the 1 i've been working on today. But it sure wasnt simple. I live in an apartment, and there isnt a level wall I can shine my light at to see if the cutoff is level. So I have to leave the property to look for a location.

    When I first got to the location, about 5 mins away. I put my projector setup in and then try to connect the ballast... FFFUUUU. My projector sits too far inside. The ballast cap wont fit on the bulb. Hitting the outside of the housing. Needs about 1/4" or so more.

    Drive back home, did a little more cutting. Then head back out again. So I'm mounting the headlamps again and connect the ballast. Then connect the harness and FFFUUUU, forgot the adapter at home. [​IMG].

    So I start putting everything back away and I drop a screw/bolt that holds my headlights into the engine bay. Sound like it hit my skid plate. So I remove that, and find my screw. Then head back home again to get my adapter.

    Head back to location, and FINALLY get to turn on my projectors. Looks good. Looks pretty level. Might need an ever slightly clockwise rotation, but it should be fine as is.
    [​IMG]
    [​IMG]
    [​IMG]
    [​IMG]
    [​IMG]
    [​IMG]


    I'm still tryin to decide on how I want to cover it up. I would prefer a vacuum formed cover. But the investment is not worth it to me, for just 1 use. The gatling shroud, I did not like. I might just use a flat sheet of ABS.
    [​IMG]
     
  2. Dec 23, 2009 at 5:27 PM
    #2
    WATacoRider

    WATacoRider [OP] Well-Known Member

    Joined:
    Nov 24, 2009
    Member:
    #26479
    Messages:
    539
    Gender:
    Male
    Vehicle:
    TRD Sport 4x4
    Well, I've decided that the driver side is currently too low. I didn't notice it the first time, but my height elevation is maxed out in this pic, and I still need it to be up a little higher.

    [​IMG]


    My passenger side, the height seems to be fine, but I need a little bit counter-clockwise adjustment. In the picture, I dont have all bolts on for my headlights. When I put on the last bolt, the cutoff is a little bit closer to level. I may leave it as.

    [​IMG]
     
  3. Dec 23, 2009 at 6:27 PM
    #3
    rossk35

    rossk35 Do Work Son!

    Joined:
    Mar 26, 2009
    Member:
    #15197
    Messages:
    1,000
    Gender:
    Male
    hawaii
    Vehicle:
    07 TRD Sport Supercharged
    TRD S/C/TRD Intake/TRD Boost Gauge/DT Headers/OEM TL/ZKW retro/Pioneer DVD w/Ipod/Magnaflow/20% Tint/BHLM/JL 10" sub, JL VR components, JL 450/4 amp/Helwig Sway bar/Viper 791/ 18" limited 4runner rims
    For the height adjustment park behind a normal height car ex, camry, accord, civic, etc and have the top of the cutoff be right on the bottom of the side view mirrors. Anything higher then that and you will blind them when your stopped at a light. Here's what my tls look like before I painted them. I used ABS plastic which is painted black and a completely round shroud.

    P5220018_c25d97d4f2c3e4c0884dcad2a0221f4afc4307a5.jpg
    And complete on the truck
    P8060002_d9222dfd34bbfa09c3edab9603f68eaf057b209a.jpg
     
  4. Dec 23, 2009 at 9:47 PM
    #4
    WATacoRider

    WATacoRider [OP] Well-Known Member

    Joined:
    Nov 24, 2009
    Member:
    #26479
    Messages:
    539
    Gender:
    Male
    Vehicle:
    TRD Sport 4x4
    what did you use for that shroud/benzel?
     
  5. Dec 24, 2009 at 7:57 AM
    #5
    bajamoon

    bajamoon Well-Known Member

    Joined:
    Feb 3, 2009
    Member:
    #13269
    Messages:
    5,945
    Gender:
    Male
    First Name:
    STEVE
    Whittier
    it says abs plastic. both look good and something i would like to do
     
  6. Dec 24, 2009 at 7:51 PM
    #6
    WATacoRider

    WATacoRider [OP] Well-Known Member

    Joined:
    Nov 24, 2009
    Member:
    #26479
    Messages:
    539
    Gender:
    Male
    Vehicle:
    TRD Sport 4x4
    Well yeah, but I'm talking about the perfectly round peice around the lens.


    So I adjusted both sides and FFUUU, now the driver side is too high. Maxed out trying to lower it, but it wont go lower. :eek: At first, I thought they were right on, until I double checked my height. I'm using my halogens as a reference.
    The passenger side is good enough for me. It's not 100% level, but about 98-99% there. And I have plenty of adjustments to go up and down. Can probably shim the headlamps to get it even closer if i tried.
    Silverstar Ultra
    [​IMG]

    Driver side
    [​IMG]
    Passenger side
    [​IMG]

    Together
    [​IMG]
     
  7. Dec 27, 2009 at 7:27 PM
    #7
    WATacoRider

    WATacoRider [OP] Well-Known Member

    Joined:
    Nov 24, 2009
    Member:
    #26479
    Messages:
    539
    Gender:
    Male
    Vehicle:
    TRD Sport 4x4
    Did more adjustments. I think i got it as close as it's going to get. Hard to tell for sure without securing that 4th bolt, but holding it in place seems to be very close.
    [​IMG]
    [​IMG]
    [​IMG]
    [​IMG]
     
  8. Feb 2, 2010 at 5:52 PM
    #8
    WATacoRider

    WATacoRider [OP] Well-Known Member

    Joined:
    Nov 24, 2009
    Member:
    #26479
    Messages:
    539
    Gender:
    Male
    Vehicle:
    TRD Sport 4x4
    All done.
    [​IMG]


    [​IMG] [​IMG]


    Running the wires isnt as close as I would like it, going across the engine bay, but it works. Didnt have to drill a hole to mount the relay. There were a few factory holes. I used the one right next to the coolant pipe. You can make out the relay on the 1st pic on the bottom. It's black.
     
  9. Feb 2, 2010 at 5:53 PM
    #9
    WATacoRider

    WATacoRider [OP] Well-Known Member

    Joined:
    Nov 24, 2009
    Member:
    #26479
    Messages:
    539
    Gender:
    Male
    Vehicle:
    TRD Sport 4x4
    I raised it slightly, after this pic was taken.

    [​IMG]
     
  10. Feb 2, 2010 at 5:57 PM
    #10
    AzogSS

    AzogSS Well-Known Member

    Joined:
    Aug 26, 2009
    Member:
    #21829
    Messages:
    2,976
    Gender:
    Male
    First Name:
    Andy
    Soda City, SC
    Vehicle:
    2008 Tacoma / 2011 FJC
    Looks good! I bought some temp lights off another TW member and will begin mine soon. Any pointers?
     
  11. Feb 2, 2010 at 6:11 PM
    #11
    i2andom81

    i2andom81 Well-Known Member

    Joined:
    Nov 6, 2009
    Member:
    #25548
    Messages:
    116
    Gender:
    Male
    Denver
    Vehicle:
    08 black prerunner
    Fox coilovers and resi rears, 20% tint, wet okole trd seat covers, LCE engineering headers, custom magnaflow exhaust, afe cai, satoshi grill, URD supercharger, retrofitted headlights, weather tech mats, standard duty leafs, allpro front bumper and uca
    you did good. did it a lot cleaner than my first attempt!
     
  12. Feb 2, 2010 at 8:23 PM
    #12
    ElectronMan

    ElectronMan Well-Known Member

    Joined:
    Apr 26, 2009
    Member:
    #16455
    Messages:
    93
    Gender:
    Male
    I was wondering what was going on with this pic, but I then remember what you told me. Glad you got it straightened out. The retro looks nice.

    [​IMG]
     
  13. Feb 2, 2010 at 9:34 PM
    #13
    G-Sak

    G-Sak Well-Known Member

    Joined:
    Dec 8, 2008
    Member:
    #11372
    Messages:
    255
    Gender:
    Male
    PNW
    Vehicle:
    2005 TRD Offroad SR5 DC 6 speed
    FX-R Projector Retrofit with Apollo Shrouds, Digital HID 55 watt ballasts, D2S Philips 85122+ bulbs in the Winter and Digital HID 55w 5k bulbs in the summer, Bakflip G2, Pop N Lock, Tint, Grillcraft with PIAAs behind it, ScanguageII and a few audio/video upgrades.
    Looks good! I like how the shrouds turned out :)
     
  14. Feb 2, 2010 at 10:57 PM
    #14
    supremetaco2

    supremetaco2 Well-Known Member

    Joined:
    Jul 9, 2009
    Member:
    #19500
    Messages:
    1,105
    Gender:
    Male
    concrete jungle, oahu
    Vehicle:
    04inacoma
    +hp, lifted, lights, dif breather mod, debadged, shorty antenna...
    turned out very nice after all the crap that you went through... lol
     
  15. Mar 10, 2010 at 1:19 PM
    #15
    RDAY

    RDAY Well-Known Member

    Joined:
    Dec 18, 2008
    Member:
    #11700
    Messages:
    712
    Gender:
    Male
    NY
    Vehicle:
    07 Tacoma SR5 4x4
    rosse how thick is that abs plastic like 1/8" where can u get it?
    also is it just a perfect circle sitting in there or did u trace it to cut it out somehow. I to am curious what u used for a shroud also? Is it possible to use the gatling shroud but just have the tip of it showing like u have?

    It just looks alot cleaner and u have no screws showing like u would if u didnt use the abs
     

Products Discussed in

To Top