1. Welcome to Tacoma World!

    You are currently viewing as a guest! To get full-access, you need to register for a FREE account.

    As a registered member, you’ll be able to:
    • Participate in all Tacoma discussion topics
    • Communicate privately with other Tacoma owners from around the world
    • Post your own photos in our Members Gallery
    • Access all special features of the site

HOW TO: DIY Painted Fenders

Discussion in 'Detailing' started by mjbtaco, May 30, 2016.

  1. May 30, 2016 at 2:06 AM
    #1
    mjbtaco

    mjbtaco [OP] low and slow

    Joined:
    Mar 21, 2008
    Member:
    #5423
    Messages:
    4,661
    Gender:
    Male
    First Name:
    Michael
    Montclair , so cal
    Vehicle:
    Turbo'd 95.5 extra cab and 2013 Silver DCSB TRD Sport
    PERFORMANCE Custom Turbo Setup FRONT SUSPENSION Drop Spindles by Aaron Carswell 01-04 Swaybar Endlinks Energy Suspension Endlink Bushings Cando Upper Control arms QA1 coilovers with 8" spring Custom 4 pot Brembo BBK Modified lower control arms with mjbfab qa1 mounting plates and Poly bushing sleeves REAR SUSPENSION Chasis Tech drop leafs QA1 adjustable shocks weld in drop notch Gas tank cross member bridge 3" angled blocks 2013 Double Cab Short Bed TRD Sport Eibach Pro Truck Shocks front and rear Lifted to the 3rd setting on the front shocks
    First off I'm not sure if this is the correct section so mod's feel free to move it if you'd like.

    Second this is by no means a quick DIY project. If you want good results it will take some time. I know I could have easily had someone paint them for me, but I'm cheap. :p Also thanks to @Dmonkey for some of the tips along the way and actually pushing me to do this lol


    STEP 1:

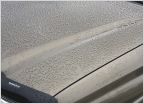
    Remove all the paint from the fenders. I used aircraft remover. Dont use the spray on stuff it's crap. Make sure you use the stuff that you put on with a brush and use a heavy layer of the stuff.


    STEP 2:

    Once i removed all the paint from the fenders I sanded them down with 600 grit sand paper then wiped them down with acetone to clean them before primer.


    STEP 3:

    I primed the fenders with Dupli-Color Self Etching primer. I used two whole cans of it, all light even coats with 10 minutes between each coat. Then I let it cure for 1 hour and sanded it down smooth with 1k sand paper and wiped them down with rubbing alcohol before painting.


    STEP 4:

    I used 4 cans of Dupli-Color Perfect Match paint. Again light even coats with 10 minutes between each coat. Its very important you do light coats so you dont get any runs in the actual paint. Then i let them cure for 1 hour before clearing them.


    STEP 5:

    I used 4 cans of RUST-OLEUM Painter's Touch 2x Ultra Cover Gloss Clear (make sure its the non-yellowing and uv resistant one). Again making sure i did light even coats with 10 minutes between coats. I gave the clear a full 24 hours to cure before color sanding.


    STEP 6:

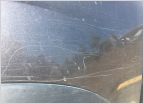
    Since my hands were dead by the time I clear coated the fenders, my control was a bit off and i got a few large runs in the clear. In order to knock those down I wet sanded the fenders with 1k. Then I moved on to 2k, then 3k, then a Mr. Clean Magic Eraser lol. Thanks to @Dmonkey for that tip haha.


    STEP 7:

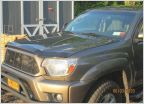
    I polished the fenders using Meguiar's Ultimate Compound Automotive Finish Restorer and a Mothers Power Ball polishing ball on my cordless hand drill. And here you can see the results.

    Im not going to lie, I didn't think they would come out any good. But at the end of the day I'm extremely happy with the results and wont hesitate to put these on my truck. I was always a bit hesitant to do this because of the results I've seen on youtube tutorials but really if you just take your time and use a whole lot of elbow grease you can get a pretty good result.


    Hope this helps someone out there!
     
    Last edited: May 30, 2016
  2. May 30, 2016 at 7:11 AM
    #2
    madsand

    madsand wanderer

    Joined:
    Oct 26, 2012
    Member:
    #89874
    Messages:
    3,373
    Gender:
    Male
    First Name:
    sandz
    Costa Mesa, CA
    Vehicle:
    2012 DBLCB LB sports 4x4 SC
    Icon 2.5" Remote Reservoir Extended Travel CDCV Icon tubular UCA Icon add a leaf Method NV wheels Nitto trail grappler MT 285/70/17 Weather Tech floor mat All Pro rock slider
    :eek: Shyt not gonna lie I won't be able tell the deference from rattle can paint vs professionally done with your work. :thumbsup: Your work is exceptional, it turn out great!:bowdown:
     
    Bakaysad, Key-Rei, Jentacoma and 2 others like this.
  3. May 30, 2016 at 7:19 AM
    #3
    mjbtaco

    mjbtaco [OP] low and slow

    Joined:
    Mar 21, 2008
    Member:
    #5423
    Messages:
    4,661
    Gender:
    Male
    First Name:
    Michael
    Montclair , so cal
    Vehicle:
    Turbo'd 95.5 extra cab and 2013 Silver DCSB TRD Sport
    PERFORMANCE Custom Turbo Setup FRONT SUSPENSION Drop Spindles by Aaron Carswell 01-04 Swaybar Endlinks Energy Suspension Endlink Bushings Cando Upper Control arms QA1 coilovers with 8" spring Custom 4 pot Brembo BBK Modified lower control arms with mjbfab qa1 mounting plates and Poly bushing sleeves REAR SUSPENSION Chasis Tech drop leafs QA1 adjustable shocks weld in drop notch Gas tank cross member bridge 3" angled blocks 2013 Double Cab Short Bed TRD Sport Eibach Pro Truck Shocks front and rear Lifted to the 3rd setting on the front shocks
    wow thank you very much! it was quite the process but worth the end result.
     
    Tennessee YODA and ODNAREM like this.
  4. May 30, 2016 at 7:23 AM
    #4
    DustStorm4x4

    DustStorm4x4 BBC 2020

    Joined:
    Jul 2, 2015
    Member:
    #158634
    Messages:
    8,934
    Gender:
    Male
    U S A
    Vehicle:
    04 Jeep LJ
    Now paint my whole truck :D
    Looks awesome man. :thumbsup:
     
    Cocolocobean, Key-Rei and ODNAREM like this.
  5. May 30, 2016 at 7:25 AM
    #5
    mjbtaco

    mjbtaco [OP] low and slow

    Joined:
    Mar 21, 2008
    Member:
    #5423
    Messages:
    4,661
    Gender:
    Male
    First Name:
    Michael
    Montclair , so cal
    Vehicle:
    Turbo'd 95.5 extra cab and 2013 Silver DCSB TRD Sport
    PERFORMANCE Custom Turbo Setup FRONT SUSPENSION Drop Spindles by Aaron Carswell 01-04 Swaybar Endlinks Energy Suspension Endlink Bushings Cando Upper Control arms QA1 coilovers with 8" spring Custom 4 pot Brembo BBK Modified lower control arms with mjbfab qa1 mounting plates and Poly bushing sleeves REAR SUSPENSION Chasis Tech drop leafs QA1 adjustable shocks weld in drop notch Gas tank cross member bridge 3" angled blocks 2013 Double Cab Short Bed TRD Sport Eibach Pro Truck Shocks front and rear Lifted to the 3rd setting on the front shocks
    lol! dont think id want to tackle a whole car with cans haha. but thanks man!
     
  6. May 30, 2016 at 7:28 AM
    #6
    SothernTaco

    SothernTaco Well-Known Member

    Joined:
    May 25, 2016
    Member:
    #187898
    Messages:
    660
    Gender:
    Male
    First Name:
    Danny
    Tomball
    Vehicle:
    Turd Gen
    When done right, as you can see here, rattle can paint can be a very cheap and nice alternative to paying a shop big bucks.

    OP,

    Great work man!!!!!!!
     
    Bakaysad, digitaLbraVo and ODNAREM like this.
  7. May 30, 2016 at 7:33 AM
    #7
    mjbtaco

    mjbtaco [OP] low and slow

    Joined:
    Mar 21, 2008
    Member:
    #5423
    Messages:
    4,661
    Gender:
    Male
    First Name:
    Michael
    Montclair , so cal
    Vehicle:
    Turbo'd 95.5 extra cab and 2013 Silver DCSB TRD Sport
    PERFORMANCE Custom Turbo Setup FRONT SUSPENSION Drop Spindles by Aaron Carswell 01-04 Swaybar Endlinks Energy Suspension Endlink Bushings Cando Upper Control arms QA1 coilovers with 8" spring Custom 4 pot Brembo BBK Modified lower control arms with mjbfab qa1 mounting plates and Poly bushing sleeves REAR SUSPENSION Chasis Tech drop leafs QA1 adjustable shocks weld in drop notch Gas tank cross member bridge 3" angled blocks 2013 Double Cab Short Bed TRD Sport Eibach Pro Truck Shocks front and rear Lifted to the 3rd setting on the front shocks
    thank you very much! i didnt think it was possible to be honest lol. and the reason i did it is cuz most shops were quoting me $300-$600 and im just not ready to pay that much lol.
     
    digitaLbraVo and ODNAREM like this.
  8. May 30, 2016 at 2:43 PM
    #8
    mahaloTaco

    mahaloTaco TcBob's BFFL

    Joined:
    Jun 28, 2015
    Member:
    #158370
    Messages:
    3,319
    Gender:
    Male
    First Name:
    Max
    Los Angeles
    Vehicle:
    13 RC 4x4 S/C'd lockers 4.88's Airflow Snorkel McNeil Glass
    How much do you think you spent in materials between the 600 sandpaper, acetone, 4 cans duplicator self-etching primer, 1000 grit sand paper, rubbing alcohol, 4 cans of perfect match, 4 cans of rustoleum 2x ultra touch, Meguiars polish and mothers polish ball?

    EDIT: Did you sand by hand or with a circular sander?
     
    Last edited: May 30, 2016
    ODNAREM likes this.
  9. May 30, 2016 at 2:49 PM
    #9
    ODNAREM

    ODNAREM MEMBER Of The Church Of @ODNAREM

    Joined:
    Feb 28, 2015
    Member:
    #149762
    Messages:
    41,292
    Gender:
    Male
    First Name:
    Ron
    Huntington Beach,CA.
    Vehicle:
    2012 TRD Sport Prerunner
    TRD catback exhaust,FJ Cruiser trail team wheels,BFG All Terrain K02 tires,Grillcraft front grill,Pelfreybilt IFS/Mid skids,sliders,standard rear bumper,Total Chaos bed stiffeners.TRD Pro Bilstein front/rear suspension.
    I already gave you props on the RCRC thread!:D:hattip:But :cheers: once again and starting this thread as well!:yes::thumbsup:
     
    mjbtaco[OP] and mahaloTaco like this.
  10. May 30, 2016 at 2:51 PM
    #10
    digitaLbraVo

    digitaLbraVo Derka Derka

    Joined:
    Sep 6, 2012
    Member:
    #86398
    Messages:
    7,514
    Covered in stickers and chrome stick-ons for extra horse torques and foot powers. Icon sticker gets me tons of travel, dozens of milimeters.
    Very nice, well done!
     
    mahaloTaco and mjbtaco[OP] like this.
  11. May 30, 2016 at 3:05 PM
    #11
    mjbtaco

    mjbtaco [OP] low and slow

    Joined:
    Mar 21, 2008
    Member:
    #5423
    Messages:
    4,661
    Gender:
    Male
    First Name:
    Michael
    Montclair , so cal
    Vehicle:
    Turbo'd 95.5 extra cab and 2013 Silver DCSB TRD Sport
    PERFORMANCE Custom Turbo Setup FRONT SUSPENSION Drop Spindles by Aaron Carswell 01-04 Swaybar Endlinks Energy Suspension Endlink Bushings Cando Upper Control arms QA1 coilovers with 8" spring Custom 4 pot Brembo BBK Modified lower control arms with mjbfab qa1 mounting plates and Poly bushing sleeves REAR SUSPENSION Chasis Tech drop leafs QA1 adjustable shocks weld in drop notch Gas tank cross member bridge 3" angled blocks 2013 Double Cab Short Bed TRD Sport Eibach Pro Truck Shocks front and rear Lifted to the 3rd setting on the front shocks
    I already had some of the materials so I spent about $90 total. And I sanded by hand.
     
  12. May 30, 2016 at 3:05 PM
    #12
    mjbtaco

    mjbtaco [OP] low and slow

    Joined:
    Mar 21, 2008
    Member:
    #5423
    Messages:
    4,661
    Gender:
    Male
    First Name:
    Michael
    Montclair , so cal
    Vehicle:
    Turbo'd 95.5 extra cab and 2013 Silver DCSB TRD Sport
    PERFORMANCE Custom Turbo Setup FRONT SUSPENSION Drop Spindles by Aaron Carswell 01-04 Swaybar Endlinks Energy Suspension Endlink Bushings Cando Upper Control arms QA1 coilovers with 8" spring Custom 4 pot Brembo BBK Modified lower control arms with mjbfab qa1 mounting plates and Poly bushing sleeves REAR SUSPENSION Chasis Tech drop leafs QA1 adjustable shocks weld in drop notch Gas tank cross member bridge 3" angled blocks 2013 Double Cab Short Bed TRD Sport Eibach Pro Truck Shocks front and rear Lifted to the 3rd setting on the front shocks
    Thank you!
     
  13. May 30, 2016 at 3:06 PM
    #13
    mjbtaco

    mjbtaco [OP] low and slow

    Joined:
    Mar 21, 2008
    Member:
    #5423
    Messages:
    4,661
    Gender:
    Male
    First Name:
    Michael
    Montclair , so cal
    Vehicle:
    Turbo'd 95.5 extra cab and 2013 Silver DCSB TRD Sport
    PERFORMANCE Custom Turbo Setup FRONT SUSPENSION Drop Spindles by Aaron Carswell 01-04 Swaybar Endlinks Energy Suspension Endlink Bushings Cando Upper Control arms QA1 coilovers with 8" spring Custom 4 pot Brembo BBK Modified lower control arms with mjbfab qa1 mounting plates and Poly bushing sleeves REAR SUSPENSION Chasis Tech drop leafs QA1 adjustable shocks weld in drop notch Gas tank cross member bridge 3" angled blocks 2013 Double Cab Short Bed TRD Sport Eibach Pro Truck Shocks front and rear Lifted to the 3rd setting on the front shocks
    Haha thanks Ron!
     
    mahaloTaco and ODNAREM[QUOTED] like this.
  14. May 30, 2016 at 3:13 PM
    #14
    mahaloTaco

    mahaloTaco TcBob's BFFL

    Joined:
    Jun 28, 2015
    Member:
    #158370
    Messages:
    3,319
    Gender:
    Male
    First Name:
    Max
    Los Angeles
    Vehicle:
    13 RC 4x4 S/C'd lockers 4.88's Airflow Snorkel McNeil Glass
    Do you think it's a bad idea to use a power sander?
     
    ODNAREM likes this.
  15. May 30, 2016 at 3:15 PM
    #15
    mjbtaco

    mjbtaco [OP] low and slow

    Joined:
    Mar 21, 2008
    Member:
    #5423
    Messages:
    4,661
    Gender:
    Male
    First Name:
    Michael
    Montclair , so cal
    Vehicle:
    Turbo'd 95.5 extra cab and 2013 Silver DCSB TRD Sport
    PERFORMANCE Custom Turbo Setup FRONT SUSPENSION Drop Spindles by Aaron Carswell 01-04 Swaybar Endlinks Energy Suspension Endlink Bushings Cando Upper Control arms QA1 coilovers with 8" spring Custom 4 pot Brembo BBK Modified lower control arms with mjbfab qa1 mounting plates and Poly bushing sleeves REAR SUSPENSION Chasis Tech drop leafs QA1 adjustable shocks weld in drop notch Gas tank cross member bridge 3" angled blocks 2013 Double Cab Short Bed TRD Sport Eibach Pro Truck Shocks front and rear Lifted to the 3rd setting on the front shocks
    You could probably get carried away really easily when sanding if you use a power sander. It's also easier to get into all the contours of the body lines and what not by hand.
     
  16. May 30, 2016 at 4:29 PM
    #16
    ODNAREM

    ODNAREM MEMBER Of The Church Of @ODNAREM

    Joined:
    Feb 28, 2015
    Member:
    #149762
    Messages:
    41,292
    Gender:
    Male
    First Name:
    Ron
    Huntington Beach,CA.
    Vehicle:
    2012 TRD Sport Prerunner
    TRD catback exhaust,FJ Cruiser trail team wheels,BFG All Terrain K02 tires,Grillcraft front grill,Pelfreybilt IFS/Mid skids,sliders,standard rear bumper,Total Chaos bed stiffeners.TRD Pro Bilstein front/rear suspension.
    :wave:Better make sure there's plenty of paint on those glass fenders and know how to use a power sander on glass!:thumbsup:
     
    mahaloTaco[QUOTED] likes this.
  17. May 30, 2016 at 6:40 PM
    #17
    mahaloTaco

    mahaloTaco TcBob's BFFL

    Joined:
    Jun 28, 2015
    Member:
    #158370
    Messages:
    3,319
    Gender:
    Male
    First Name:
    Max
    Los Angeles
    Vehicle:
    13 RC 4x4 S/C'd lockers 4.88's Airflow Snorkel McNeil Glass
    How much should I sand off?

    @ODNAREM feel free to chime in!

    I just got back from getting all the supplies. I just taped off my garage and am ready for action:curls::infantry:
     
    ODNAREM and DustStorm4x4 like this.
  18. May 30, 2016 at 7:00 PM
    #18
    mjbtaco

    mjbtaco [OP] low and slow

    Joined:
    Mar 21, 2008
    Member:
    #5423
    Messages:
    4,661
    Gender:
    Male
    First Name:
    Michael
    Montclair , so cal
    Vehicle:
    Turbo'd 95.5 extra cab and 2013 Silver DCSB TRD Sport
    PERFORMANCE Custom Turbo Setup FRONT SUSPENSION Drop Spindles by Aaron Carswell 01-04 Swaybar Endlinks Energy Suspension Endlink Bushings Cando Upper Control arms QA1 coilovers with 8" spring Custom 4 pot Brembo BBK Modified lower control arms with mjbfab qa1 mounting plates and Poly bushing sleeves REAR SUSPENSION Chasis Tech drop leafs QA1 adjustable shocks weld in drop notch Gas tank cross member bridge 3" angled blocks 2013 Double Cab Short Bed TRD Sport Eibach Pro Truck Shocks front and rear Lifted to the 3rd setting on the front shocks
    Keep an eye on the orange peel and drips. Once you knock that down flat with 1k move on to 2k then 3k then the magic eraser to remove the 1k scratches
     
    mahaloTaco[QUOTED] likes this.
  19. May 30, 2016 at 7:47 PM
    #19
    mahaloTaco

    mahaloTaco TcBob's BFFL

    Joined:
    Jun 28, 2015
    Member:
    #158370
    Messages:
    3,319
    Gender:
    Male
    First Name:
    Max
    Los Angeles
    Vehicle:
    13 RC 4x4 S/C'd lockers 4.88's Airflow Snorkel McNeil Glass
    You only used 1000 Grit I thought?

    Why did you sand after you did the gloss?
     
    Last edited: May 30, 2016
  20. May 30, 2016 at 8:20 PM
    #20
    mjbtaco

    mjbtaco [OP] low and slow

    Joined:
    Mar 21, 2008
    Member:
    #5423
    Messages:
    4,661
    Gender:
    Male
    First Name:
    Michael
    Montclair , so cal
    Vehicle:
    Turbo'd 95.5 extra cab and 2013 Silver DCSB TRD Sport
    PERFORMANCE Custom Turbo Setup FRONT SUSPENSION Drop Spindles by Aaron Carswell 01-04 Swaybar Endlinks Energy Suspension Endlink Bushings Cando Upper Control arms QA1 coilovers with 8" spring Custom 4 pot Brembo BBK Modified lower control arms with mjbfab qa1 mounting plates and Poly bushing sleeves REAR SUSPENSION Chasis Tech drop leafs QA1 adjustable shocks weld in drop notch Gas tank cross member bridge 3" angled blocks 2013 Double Cab Short Bed TRD Sport Eibach Pro Truck Shocks front and rear Lifted to the 3rd setting on the front shocks
    In step 6 I mentioned that I used 1k, 2k, 3k, and a magic eraser.

    In order to get clear coat to look good you need to color sand it (make it flat and smooth) before polishing it. Clear coat doesn't just automatically spray on like the finished product it has to be color sanded and polished.
     
    ODNAREM and mahaloTaco[QUOTED] like this.

Products Discussed in

To Top