1. Welcome to Tacoma World!

    You are currently viewing as a guest! To get full-access, you need to register for a FREE account.

    As a registered member, you’ll be able to:
    • Participate in all Tacoma discussion topics
    • Communicate privately with other Tacoma owners from around the world
    • Post your own photos in our Members Gallery
    • Access all special features of the site

Bored Clerk's Rear Bumper Build

Discussion in 'Armor' started by 1 Bored Clerk, Mar 12, 2016.

  1. May 17, 2016 at 7:35 AM
    #201
    OZ-T

    OZ-T I hate my neighbour

    Joined:
    Dec 15, 2009
    Member:
    #27584
    Messages:
    50,587
    Gender:
    Male
    First Name:
    Peter North
    British Columbia
    Vehicle:
    Mag Grey 09 Trd Sport DCLB 4x4
    OME 885x , OME shocks and Dakars , Wheelers SuperBumps front and rear , 275/70/17 Hankook ATm , OEM bed mat , Weathertech digifit floor liners , Weathertech in-channel vents , headache rack , Leer 100RCC commercial canopy , TRD bedside decals removed , Devil Horns by Andres , HomerTaco Satoshi
    I wonder if they are confusing the MFC with the MWC
     
  2. May 17, 2016 at 7:37 AM
    #202
    1 Bored Clerk

    1 Bored Clerk [OP] Well-Known Member

    Joined:
    Sep 18, 2013
    Member:
    #112786
    Messages:
    1,999
    Gender:
    Male
    Vancouver, WA
    Vehicle:
    '13 4x4 AC TRD OR
    I specified the MWC many times. And sent pictures. Because, yeah, the MWCs are about 1/4" bigger than MFCs in every dimension (odd).
     
  3. May 17, 2016 at 7:38 AM
    #203
    1 Bored Clerk

    1 Bored Clerk [OP] Well-Known Member

    Joined:
    Sep 18, 2013
    Member:
    #112786
    Messages:
    1,999
    Gender:
    Male
    Vancouver, WA
    Vehicle:
    '13 4x4 AC TRD OR
    Based on how the top plate is bent on the can holder, I can only guess that my cans are just that much taller than all the rest for some reason. I did put one of my steel water cans in the holder and it works perfectly.
     
  4. May 17, 2016 at 7:42 AM
    #204
    OZ-T

    OZ-T I hate my neighbour

    Joined:
    Dec 15, 2009
    Member:
    #27584
    Messages:
    50,587
    Gender:
    Male
    First Name:
    Peter North
    British Columbia
    Vehicle:
    Mag Grey 09 Trd Sport DCLB 4x4
    OME 885x , OME shocks and Dakars , Wheelers SuperBumps front and rear , 275/70/17 Hankook ATm , OEM bed mat , Weathertech digifit floor liners , Weathertech in-channel vents , headache rack , Leer 100RCC commercial canopy , TRD bedside decals removed , Devil Horns by Andres , HomerTaco Satoshi
    I can measure mine if you want to know
     
  5. May 17, 2016 at 7:43 AM
    #205
    1 Bored Clerk

    1 Bored Clerk [OP] Well-Known Member

    Joined:
    Sep 18, 2013
    Member:
    #112786
    Messages:
    1,999
    Gender:
    Male
    Vancouver, WA
    Vehicle:
    '13 4x4 AC TRD OR
    That would be cool! It would be nice to have an answer. Could help CBI too.
     
  6. May 17, 2016 at 7:44 AM
    #206
    OZ-T

    OZ-T I hate my neighbour

    Joined:
    Dec 15, 2009
    Member:
    #27584
    Messages:
    50,587
    Gender:
    Male
    First Name:
    Peter North
    British Columbia
    Vehicle:
    Mag Grey 09 Trd Sport DCLB 4x4
    OME 885x , OME shocks and Dakars , Wheelers SuperBumps front and rear , 275/70/17 Hankook ATm , OEM bed mat , Weathertech digifit floor liners , Weathertech in-channel vents , headache rack , Leer 100RCC commercial canopy , TRD bedside decals removed , Devil Horns by Andres , HomerTaco Satoshi
    Hang on
     
  7. May 17, 2016 at 7:47 AM
    #207
    OZ-T

    OZ-T I hate my neighbour

    Joined:
    Dec 15, 2009
    Member:
    #27584
    Messages:
    50,587
    Gender:
    Male
    First Name:
    Peter North
    British Columbia
    Vehicle:
    Mag Grey 09 Trd Sport DCLB 4x4
    OME 885x , OME shocks and Dakars , Wheelers SuperBumps front and rear , 275/70/17 Hankook ATm , OEM bed mat , Weathertech digifit floor liners , Weathertech in-channel vents , headache rack , Leer 100RCC commercial canopy , TRD bedside decals removed , Devil Horns by Andres , HomerTaco Satoshi
    Base to top of handle is 18 3/4" , my MWC's are about 5 years old
     
  8. May 17, 2016 at 8:01 AM
    #208
    1 Bored Clerk

    1 Bored Clerk [OP] Well-Known Member

    Joined:
    Sep 18, 2013
    Member:
    #112786
    Messages:
    1,999
    Gender:
    Male
    Vancouver, WA
    Vehicle:
    '13 4x4 AC TRD OR
    Mine are 19". That extra quarter inch might allow the locking hole to work...barely. So, there's the issue! Thanks Oz!
     
  9. May 17, 2016 at 9:32 AM
    #209
    OZ-T

    OZ-T I hate my neighbour

    Joined:
    Dec 15, 2009
    Member:
    #27584
    Messages:
    50,587
    Gender:
    Male
    First Name:
    Peter North
    British Columbia
    Vehicle:
    Mag Grey 09 Trd Sport DCLB 4x4
    OME 885x , OME shocks and Dakars , Wheelers SuperBumps front and rear , 275/70/17 Hankook ATm , OEM bed mat , Weathertech digifit floor liners , Weathertech in-channel vents , headache rack , Leer 100RCC commercial canopy , TRD bedside decals removed , Devil Horns by Andres , HomerTaco Satoshi
  10. May 17, 2016 at 9:44 PM
    #210
    1 Bored Clerk

    1 Bored Clerk [OP] Well-Known Member

    Joined:
    Sep 18, 2013
    Member:
    #112786
    Messages:
    1,999
    Gender:
    Male
    Vancouver, WA
    Vehicle:
    '13 4x4 AC TRD OR
    Tuesday. In the books.

    Today was water can holder day. My plan was to finish that off.

    3102d732e20f4115d592081f194c7ec4_a55c2abfefe84a9bb4a05e103ceb1383ee115682.jpg
    First step was to make the top plate clear the spouts on the MWCs. I clamped it in the vise and just bent it by hand.

    3ef34811557b008a32999f42bc68fcca_ce9d5fecec4676155523cd48c4ea8e80e7450907.jpg
    Easy peasy. Fits great. Now I just need to cut out and raise up the divider in the can carrier.

    d0f6ffe9f1d6897107b3063f220ec0b3_994713d05f2abfa88edef042b611d68bea89bcf6.jpg
    So, two thirds of the welds were pretty easy to get with the angle grinder. The welds at the bottom were impossible to get. So, I cut off the bottom of the divider. I moved the divider up 1/2" then welded in a new piece where the gap was. You'd never know it wasn't like this from CBI...unless you actually have eyes that work. Haha.

    7448f7ac9d6b3dd4960e2a352b73f48c_1d89db4750d863ce22777118ff21565808eab5b2.jpg
    Ta-da! Everything fits and I can now lock my water cans. Check that off the list.

    Moving on...

    7d899c075c5722f6ac0abe2dd45fd205_4cfea3eb245d2c974c79b995a075a860dafdbe2c.jpg
    542d873d59201ce4e86d0dc10f54e6e5_108009bbf7bd207a2c532573aee482c003c13b79.jpg
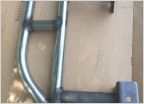
    I cleaned up all of the angle steel by cutting 45 degree angles in the ends and rounding all of the corners. Then I added a round tube brace under the can holder. It's just tacked in but that's okay, I have some finish welding and grinding to do on this swingarm anyway. I'll take it off the bumper for that because I don't want to weld upside down.

    That's it for today. I wanted to get into the license plate mount but I just didn't have time. I did get some time evaluating my first concept and thinking about other options, though. We'll see...

    More tomorrow!
     
  11. May 21, 2016 at 5:43 PM
    #211
    1 Bored Clerk

    1 Bored Clerk [OP] Well-Known Member

    Joined:
    Sep 18, 2013
    Member:
    #112786
    Messages:
    1,999
    Gender:
    Male
    Vancouver, WA
    Vehicle:
    '13 4x4 AC TRD OR
    Well, I got something done today. Not nearly what I wanted to get done but that's how it goes.

    6d8941f8377d083f94223f0ff29cf5db_a14bfe0b5ee5c758202d05ae6e850acd74b279ca.jpg
    Took this apart and finished welding the small swingarm. Actually missed a spot but I can get to it without taking it off.

    a73c2e8f425570d3d21cabafef626728_191fe5ce53fbedd34bc3189a7e7f779f89c76e0e.jpg
    Spent the rest of the time fussing with all of this stuff. I welded on the glide plates for the swingarms, bent the UHMWPE sheet and fiddly farted around with the clamps.

    3922bd384f2e768e5e66791ebd069152_298e7b4c11144bab656d86170379db33e7e224c6.jpg
    Here's where I ended up. Still not sure about the clamps. I don't have really any experience with these so I'm not sure how they should feel. But, I know they're not right yet. I kind of screwed up way at the beginning of the build without realizing the ramifications that I'm dealing with now. I have 90 degree clamps. But the way everything stacks up right now, I'm not quite 90 degrees so it doesn't lock out over center quite like it should. So, now I'm modifying the clamps a little and how they mount to try to find the happy spot. I'm also still not happy with the rubber bumpers I have. They are all too soft in my book but maybe they'll be okay once I get the clamps going over center and locking out properly?

    Regardless, I'm a little frustrated at this point. All the final fiddly crap is driving me nuts. I'll be back at it tomorrow at some point to fuss with it some more.
     
    GHOST SHIP, Tolip and malburg114 like this.
  12. May 22, 2016 at 5:37 PM
    #212
    1 Bored Clerk

    1 Bored Clerk [OP] Well-Known Member

    Joined:
    Sep 18, 2013
    Member:
    #112786
    Messages:
    1,999
    Gender:
    Male
    Vancouver, WA
    Vehicle:
    '13 4x4 AC TRD OR
    The last 10% takes 90% of the time. I feel like that's where I'm at. I spent ALL day working and feel like I got nothing major done.

    30c9e2cc5d611c51d5af1a68318f6249_a3a1b05f2e2b402477f7f5453b0d06b9b122ecad.jpg
    I welded the wheel studs in place. That's good...check it off the list.

    8c635dc48572248c9f692562d35794d2_10a357499eb0a80560a9f6d54fb97e30dcd11bd3.jpg
    b276ce0f15d03621ced602d6d3d52827_e15106e7f45a65f91ddd667ecf131beac138170d.jpg
    I welded these on. Check that off the list. Wait, no, put one back on the list. I forgot to weld one section on the inside of one plate. And, in case you were wondering, these are the end plates for the main bumper. The two holes in each plate are where the wrap around wings will bolt on.

    36a306c1ef30f164204cb3de8525175d_b7c97e557bea7750046f137ee0dcb5549593a3dc.jpg
    I bent and cleaned up the UHMWPE sheet. It'd be nice if it was super clean on the edges but this will do just fine. If I feel like getting crazy, I'll do more on it.

    44a0ed5c1d6a76274cf0e47bc411491c_82eb994c5ff5a3ca1bd262709118cebe5e9d9ab4.jpg
    I worked on the latches a lot. I trimmed them slightly to allow them to travel further and go more over center. It worked a little but it wasn't enough. So, I broke down and made it a bigger job. I welded a 1/4" thick piece of steel to the bottom of the part of the swing out that the clamp bolts to, then I used a round file to elongate the holes a 1/4" down. Yeah, 8 holes, moved 1/4" down in 1/2" steel. It sucked. It seems to have worked though! I'll clean up the holes so the clamps sit as close to perfectly vertical as I can. They seem to clamp well now.

    9d1dc28aa1055c3348d8a88681192aa6_2bc10a01d33bb836bde5b65b0fbd502b7622be91.jpg
    I also mounted these up. I like them but I still don't think they're firm enough. Back to the drawing board?? I'm going to see if I can get some die springs that will work. I'm probably way overthinking this. I have some 1/2" thick stall mat that would probably be perfect.

    So, that's that. It'll be another week before this has a chance of going out to powdercoat. I still have to add the spring pins that will hold the arms open at 90 degrees and I'm seriously considering adding gas assist cylinders to help with the opening on any kind of hill (side or otherwise).

    Onward!
     
    Tolip, Chepo, NewRider and 1 other person like this.
  13. Jun 1, 2016 at 12:38 PM
    #213
    1 Bored Clerk

    1 Bored Clerk [OP] Well-Known Member

    Joined:
    Sep 18, 2013
    Member:
    #112786
    Messages:
    1,999
    Gender:
    Male
    Vancouver, WA
    Vehicle:
    '13 4x4 AC TRD OR
    I haven't done much on the bumper lately. I did a little work but there's nothing to show for it just yet. I got some of the finishing pieces sent out for laser cut: spring pin mounts (to keep swing puts open to 90 degrees), wraparound end plates and some pieces I need to start mocking up my wraparound wings. I hope everything fits and works properly! I should have everything on Friday.

    I also have a plate being laser cut that will be the mount for my Engel MT35 refrigerator behind the front passenger seat. It's hard to measure bolt hole locations that I'm hoping to use in the back of the truck cab so I'm sure I'll need to do some tweaking. Fingers crossed that it's close. If it's a cool little project, I'll make a thread for it.
     
  14. Jun 1, 2016 at 2:18 PM
    #214
    EatSleepTacos

    EatSleepTacos Well-Known Member

    Joined:
    Mar 24, 2015
    Member:
    #151688
    Messages:
    59,834
    Gender:
    Male
    First Name:
    Randy
    West Valley, AZ
    Vehicle:
    2017 4Runner
    Keep up the good work man. I realized I've just been reading, but not posting at all. We've got to give this thread the attention it deserves! :cool:
     
    Michgnxj24 likes this.
  15. Jun 1, 2016 at 7:29 PM
    #215
    1 Bored Clerk

    1 Bored Clerk [OP] Well-Known Member

    Joined:
    Sep 18, 2013
    Member:
    #112786
    Messages:
    1,999
    Gender:
    Male
    Vancouver, WA
    Vehicle:
    '13 4x4 AC TRD OR
    I appreciate that! I know people are watching. I'm surprised you all have the patience to follow me on a multi month journey to build a stinkin' bumper. I'm really hoping to get the main bumper wrapped up this weekend. My punch list is short. How short? So short my punch list could parachute off a dime.
     
    Augie, EatSleepTacos and GHOST SHIP like this.
  16. Jun 1, 2016 at 7:32 PM
    #216
    GHOST SHIP

    GHOST SHIP hates you.

    Joined:
    Mar 9, 2015
    Member:
    #150537
    Messages:
    22,399
    First Name:
    GHOST
    I'm still following along.:popcorn:
    Good work takes time, especially if you aren't in the business of running a fab shop full time. When I build things, they usually get pushed to the weekends and only after my domestic duties are completed. Keep on trucking bud!
     
  17. Jun 4, 2016 at 11:07 PM
    #217
    1 Bored Clerk

    1 Bored Clerk [OP] Well-Known Member

    Joined:
    Sep 18, 2013
    Member:
    #112786
    Messages:
    1,999
    Gender:
    Male
    Vancouver, WA
    Vehicle:
    '13 4x4 AC TRD OR
    It was oppressively hot here today 100 degrees. I didn't spend much time doing anything after about 10am. I did get a teeny tiny amount of work done.

    I bent two brackets for the license plate mount. Pretty easy stuff but it needed to be done and I've been procrastinating a while on this for some reason.

    image.jpg
    First step is to put the first bend in. Mark your line across the metal, square it up in the vise, and bend...with a hammer in my case since I didn't feel like being fancier about it.

    image.jpg
    Use some hand pressure to pull the top of the metal while you use a hammer at the bottom of the metal to get a fairly crisp bend.

    image.jpg
    And there it is. I bent another one just like it. Well, not EXACTLY the same but it's pretty dang close.

    We may go surfing in the morning or we may ditch that in favor of projects. Not sure yet. Im leaning towards projects because I want to finish this up. It's supposed to be 100 degrees again tomorrow. It's decent working until late morning when the buildings start getting heat soaked. So, there may be updates tomorrow and there may not be.
     
    GHOST SHIP likes this.
  18. Jun 4, 2016 at 11:31 PM
    #218
    GHOST SHIP

    GHOST SHIP hates you.

    Joined:
    Mar 9, 2015
    Member:
    #150537
    Messages:
    22,399
    First Name:
    GHOST
    I say go surf. Working in the heat sucks (especially when you're working with heat like welding). I've been procrastinating building my gas can carrier for the same reason. Charlie don't surf but I'll probably take the mountain bike out tomorrow and work up a sweat before I'm sitting in ball soup for doing nothing around mid-day. Come back to it refreshed!
     
  19. Jun 5, 2016 at 11:05 AM
    #219
    1 Bored Clerk

    1 Bored Clerk [OP] Well-Known Member

    Joined:
    Sep 18, 2013
    Member:
    #112786
    Messages:
    1,999
    Gender:
    Male
    Vancouver, WA
    Vehicle:
    '13 4x4 AC TRD OR
    We decided to skip surfing. We were both sort of apathetic toward the idea so we bailed. The upside is that I did a little work before wearing jeans, a leather jacket, leather gloves and a welding hood became more than I cared for.

    I finished up one of the spring pins used to keep the swing out open. That was exciting. Here's how that went:

    image.jpg
    Start with the spring pin, some washers and some tape.

    image.jpg
    Add the washers to the spring pin. The washers need to fit over the actual pin but not be larger in diameter than the barrel that the pin mounts into. The washers are used to space the barrel off of the plate where the spring pin will drop into. It also helps keep everything plumb.

    image.jpg
    Then wrap tape around the pin below the washers. Wrap enough tape that it just barely skids into the hole where your pin will drop into. Dont put so much tape as to need to shove the pin into the hole because you don't want the tape bunching up. The tape keeps the spring pin concentric in the hole. The tape and washers constrain the pin and barrel location so that you reduce the amount of variables and tolerance.

    image.jpg
    Weld everything in place with the spring pin and barrel located in the hole at the end of the swingarm travel. This picture shows the barrel at the beginning of its travel when the swingarm is closed. I welded this all up when the swingarm was open to 90 degrees as that's where I want it to latch onto place.

    image.jpg
    Here it is all cooled off and put back together. If you look closely, you'll see that the spring pin is in its up position. The pin is just riding on the top of the steel plate. You could opt to have the spring pin engage here as well but it seemed like more hassle than the added fail safe warranted in day to day life.

    image.jpg
    Opened to 90 degrees. Drops right into place perfectly! I mocked up the other side and found that I'll have to modify the laser cut bracket I had made because my tape measure quality measurements weren't quite right. Oh well, nothing an angle grinder can't fix!
     
    GHOST SHIP likes this.
  20. Jun 5, 2016 at 11:07 AM
    #220
    1 Bored Clerk

    1 Bored Clerk [OP] Well-Known Member

    Joined:
    Sep 18, 2013
    Member:
    #112786
    Messages:
    1,999
    Gender:
    Male
    Vancouver, WA
    Vehicle:
    '13 4x4 AC TRD OR
    Oh yeah, I also welded the license plate brackets onto my can carrier.

    image.jpg
    Not exiting to look at but nice to have done. All that's left is drilling four holes to actually mount the plate.
     
    Chepo likes this.

Products Discussed in

To Top