1. Welcome to Tacoma World!

    You are currently viewing as a guest! To get full-access, you need to register for a FREE account.

    As a registered member, you’ll be able to:
    • Participate in all Tacoma discussion topics
    • Communicate privately with other Tacoma owners from around the world
    • Post your own photos in our Members Gallery
    • Access all special features of the site

How to: Front shock/spring removal

Discussion in 'Suspension' started by chris4x4, Mar 28, 2009.

  1. Jun 7, 2016 at 10:01 AM
    #521
    TheTacoma

    TheTacoma Well-Known Member

    Joined:
    Oct 11, 2015
    Member:
    #166371
    Messages:
    5,480
    Gender:
    Male
    First Name:
    Chris
    Birmingham, AL
    Vehicle:
    2017 DCSB, TRD OR 4x4, Quicksand. SOS Bolt-on Sliders. 285x75r16. Kings
    Did you find these pictures?
     
  2. Jun 7, 2016 at 10:04 AM
    #522
    sandyTrd87

    sandyTrd87 Well-Known Member

    Joined:
    Sep 27, 2015
    Member:
    #165297
    Messages:
    343
    Gender:
    Male
    Socal
    Bilstien 5100's x4 Dobinson 448 springs, rear 2inch AAL
  3. Jun 7, 2016 at 11:04 AM
    #523
    TheTacoma

    TheTacoma Well-Known Member

    Joined:
    Oct 11, 2015
    Member:
    #166371
    Messages:
    5,480
    Gender:
    Male
    First Name:
    Chris
    Birmingham, AL
    Vehicle:
    2017 DCSB, TRD OR 4x4, Quicksand. SOS Bolt-on Sliders. 285x75r16. Kings
  4. Jun 7, 2016 at 11:24 AM
    #524
    TucTaco520

    TucTaco520 Well-Known Member

    Joined:
    Nov 30, 2014
    Member:
    #143392
    Messages:
    473
    Gender:
    Male
    First Name:
    Phil
    It's a dry heat
    Vehicle:
    11 Hooptie
    OME 90000s+887s, LR UCAs. AllPro Expos + 5100. KM Fab hybrid sliders w/kickout. KM Fab bed rack. 48" hi-lift. 16" FJ Trail Team wheels. 285/75/16 Hankook Dynapro ATMs. Magnaflow cat-back. K&N filter. TRD short-throw shifter. Murdered out via plasti-derp front grille and rear bumper. LED interior. De-badged tailgate. Rock lights (7). G2V 3x2 ditch lights.
    Are your coilovers already assembled?
     
  5. Jun 7, 2016 at 4:07 PM
    #525
    sandyTrd87

    sandyTrd87 Well-Known Member

    Joined:
    Sep 27, 2015
    Member:
    #165297
    Messages:
    343
    Gender:
    Male
    Socal
    Bilstien 5100's x4 Dobinson 448 springs, rear 2inch AAL

    took around 3-4 hours
     
  6. Jun 8, 2016 at 6:21 AM
    #526
    TheTacoma

    TheTacoma Well-Known Member

    Joined:
    Oct 11, 2015
    Member:
    #166371
    Messages:
    5,480
    Gender:
    Male
    First Name:
    Chris
    Birmingham, AL
    Vehicle:
    2017 DCSB, TRD OR 4x4, Quicksand. SOS Bolt-on Sliders. 285x75r16. Kings
    Thanks for the info! I had my front assembled hopefully that will make it fast and easier.
     
    sandyTrd87[QUOTED] likes this.
  7. Jun 21, 2016 at 1:10 PM
    #527
    HCJ

    HCJ Well-Known Member

    Joined:
    Mar 30, 2016
    Member:
    #182820
    Messages:
    2,559
    Gender:
    Male
    First Name:
    John
    Virginia --> Texas
    Vehicle:
    '05 Taco with not enough miles
    Anybody know the bolt size for the top and bottom shock bolts? I'm putting on used Icon 2.5s and want new hardware.
     
  8. Jun 22, 2016 at 11:26 PM
    #528
    deadhed61

    deadhed61 :notsure:

    Joined:
    Oct 23, 2011
    Member:
    #65723
    Messages:
    8,072
    Gender:
    Male
    First Name:
    Chris
    Santa Barbara, Ca
    Vehicle:
    The Black Pearl
    A little lift and a little armor
    14 and 17mm IIRC. it might be a 19mm.
     
    HCJ[QUOTED] likes this.
  9. Jun 23, 2016 at 11:21 AM
    #529
    VE7OSR

    VE7OSR нет войне

    Joined:
    Dec 12, 2011
    Member:
    #68608
    Messages:
    5,774
    Gender:
    Male
    First Name:
    Rob II
    Okanagan, Canada
    Vehicle:
    05 DCLB TRD Sport
    Armour: All-Pro Skid plates - IFS, transmission, and transfer case. Pelfreybilt rear standard plate bumper, Metal Tech Sliders w/ kickout and dimple die filler plates. Front Suspension: OME 885 + NitroCharger 9000 shocks + 1/2" spacers for a 3" lift. Superbumps replacing stock bumpstops. Camburg ball joint UCA SS braid brake lines Future: ADS Extended length, extended length UCA BJ to increase droop capability Rear Suspension: All-Pro Expedition rear leafs, Walker Evans 27" rear shocks, extended rear brake lines (Wheelers Offroad), U -bolt flip kit, rear Timbren bumpstops. Future: Hammer Hangers, Shock relocate, ADS 12" or 14" shock. Interior: Weatherteck floor liners - front, Wet Okoles- front, ScanGauge, LED interior & map lights. Power moonroof. Exterior: Raider Cobra canopy, retrofit headlight by Insight, LED bulbs all around, modified flasher unit for LEDs. Rear diff breather mod. Front diff vibe problem, driver's side needle bearing replaced with ECGS bushing. yet to install: HID Blazer Fog Retrofit, LED Flood & Spot, + switches, fuse panel. swaybar relocate blocks (build my own)
    Would this be the bolt size or the wrench used on the bolt head? Makes a difference if he orders a bolt.
     
    deadhed61[QUOTED] likes this.
  10. Jun 23, 2016 at 11:25 AM
    #530
    deadhed61

    deadhed61 :notsure:

    Joined:
    Oct 23, 2011
    Member:
    #65723
    Messages:
    8,072
    Gender:
    Male
    First Name:
    Chris
    Santa Barbara, Ca
    Vehicle:
    The Black Pearl
    A little lift and a little armor
    :facepalm: Damn , I must have been tired last night and didn't fully read his question. You're right. I was thinking socket size.

    :sorry:
     
  11. Jun 23, 2016 at 1:50 PM
    #531
    HCJ

    HCJ Well-Known Member

    Joined:
    Mar 30, 2016
    Member:
    #182820
    Messages:
    2,559
    Gender:
    Male
    First Name:
    John
    Virginia --> Texas
    Vehicle:
    '05 Taco with not enough miles
    infound the top sizes on the icon parts sheet but can't find the bottom because everywhere says to reuse the bolt...:annoyed:
     
  12. Jun 23, 2016 at 2:57 PM
    #532
    deadhed61

    deadhed61 :notsure:

    Joined:
    Oct 23, 2011
    Member:
    #65723
    Messages:
    8,072
    Gender:
    Male
    First Name:
    Chris
    Santa Barbara, Ca
    Vehicle:
    The Black Pearl
    A little lift and a little armor
    They are 9mm x 25mm and 14mm x 80mm.

    At least that's what mine are.

    The bottom OEM ones have about 1/2" of a chamfer (not really sure what the technical term is) so you could probably get away with a 70mm
     
    DaVikes and HCJ[QUOTED] like this.
  13. Jun 23, 2016 at 4:49 PM
    #533
    HCJ

    HCJ Well-Known Member

    Joined:
    Mar 30, 2016
    Member:
    #182820
    Messages:
    2,559
    Gender:
    Male
    First Name:
    John
    Virginia --> Texas
    Vehicle:
    '05 Taco with not enough miles
    Awesome! Thanks
     
  14. Dec 5, 2016 at 1:03 PM
    #534
    Beast Boy

    Beast Boy Member

    Joined:
    Apr 20, 2012
    Member:
    #77282
    Messages:
    12
    Gender:
    Male
    Westminster, CO
    Vehicle:
    2012 Tacoma TRD Sport DCSB
    So would you follow this same procedure if you were removing the coilovers on an already lifted truck? For example a Toytec Boss or King coilover? Thanks!
     
  15. Dec 5, 2016 at 1:15 PM
    #535
    At The Helm

    At The Helm ATH Fab Vendor

    Joined:
    Mar 25, 2015
    Member:
    #151787
    Messages:
    1,319
    Gender:
    Male
    First Name:
    Morgan
    Gardnerville, NV
    Vehicle:
    2015 AC 4x4 TRD OR & 2019 T4R
    Kings, TC UCAS, SCS SR8's, ATH bumpers
    Yes
     
    Beast Boy[QUOTED] likes this.
  16. Jan 28, 2017 at 5:32 PM
    #536
    TacoSupremeo

    TacoSupremeo Well-Known Member

    Joined:
    Jan 13, 2017
    Member:
    #207427
    Messages:
    274
    Gender:
    Male
    First Name:
    Michael
    Vehicle:
    2005 Tacoma Double Cab 4x4
    this thread was HUGELY helpful!!! most of the threads on the front strut replacement i read described loosening the LCA bolts and having to have an alignment done afterwards... the procedures in this thread were quicker, easier and didnt require another alignment since nothing removed was adjustable. thanks guys!
     
  17. Jan 30, 2017 at 2:00 PM
    #537
    bgsmith

    bgsmith Well-Known Member

    Joined:
    Sep 19, 2011
    Member:
    #63802
    Messages:
    735
    Gender:
    Male
    First Name:
    Brian
    Hingham, MA
    Vehicle:
    06 Speedway Blue TRD Sport 4x4 DCSB
    ATX Mojaves with 265/75 16 Hankook Dynapro ATMs, Spidertrax 1.25" spacers (front and rear), Bilstein 5100 all around up front set at 1.75", Blacked out badges, Pioneer AVIC D3 DVD/NAV Head Unit, K&N Air Filter, Tyger Tri Fold Tonneau Cover, Rockford Fosgate Punch Speakers.
    NEVERMIND, I found the pics, almost seems too simple.

    Are the instructions with pics posted again somewhere in this thread, will be replacing my front shocks and coils soon and it would be awesome if I could avoid and alignment.
     
    Last edited: Jan 30, 2017
  18. Jan 30, 2017 at 4:48 PM
    #538
    TacoSupremeo

    TacoSupremeo Well-Known Member

    Joined:
    Jan 13, 2017
    Member:
    #207427
    Messages:
    274
    Gender:
    Male
    First Name:
    Michael
    Vehicle:
    2005 Tacoma Double Cab 4x4
    here are some pics of my install...
    [​IMG]Untitled by boostdcoupe, on Flickr

    i got the SenSen "el cheapo" shock and spring assemblies because i didtn have access to a compressor and wanted to keep this as simple as possible. i kept the original stuff, so if i decide i dont like the SenSen's i will get the Bilsteins everyone else gets, build mine and return the SenSen's.
    side to side comparison...
    [​IMG]Untitled by boostdcoupe, on Flickr

    old out...
    [​IMG]Untitled by boostdcoupe, on Flickr

    in with the new...
    [​IMG]Untitled by boostdcoupe, on Flickr
     
  19. Feb 3, 2017 at 9:47 PM
    #539
    DaVikes

    DaVikes Well-Known Member

    Joined:
    Feb 26, 2013
    Member:
    #98580
    Messages:
    344
    Gender:
    Male
    First Name:
    Ross
    Denver
    Vehicle:
    Colorado Sports Car
    Arb front bumper, warn winch, All Pro rear bumper, OME up front, OME and All Pro Standard in Back, ARB locker, 34 x 10.5 KO2's, 17" Level 8 Trackers, and fancy single piece driveshaft.
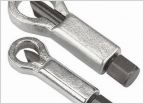
    For those who live in areas where things rust, I learned some things that might be helpful. I just put in 6112's and rear leafs and B110's. Both rear lower shock bolts were seized, one front lower shock bolt, and one rear shackle bolt. And I only have 75k on the truck. The bolts seize to the to the bushing sleeve. I was spraying regularly with WD40 rust penetrate and it didn't matter. I was unable to pound any out, so I cut them.

    I cut the rear shackle bolt with a sawzall with a metal blade. Not too bad. I cut the rear shock bolts with a 4.5" thin metal cutting disk mounted in my mini grinder. These disks don't last too long, so bring several.

    I chose to loosen the LCA to remove the spring because I needed an alignment anyway, and to get the alignment, I had to make sure the LCA bushings weren't sized. It turns out that if your lower shock bolt is seized, lowering the LCA makes it much easier to cut the bolt.

    When I first realized the bolt was seized, I tried tapping it out with a hammer. When that didn't work, I used a bigger hammer. That was a mistake. As you can see, the bolt was so thoroughly seized to the sleeve that the sleeve came out of the shock and bent the backside of the shock mount. I was so happy to be hitting something with a big hammer that I didn't notice until it was bent. Later I took the LCA off and used the big hammer to bend the mount flat again.

    A better solution is to drop the LCA with the shock still attached. That creates some space and I could cut the bolt with my cutting wheel.

    Also, you can see in the picture that I didn't remove the sway bar link from the spindle. It turns out that you don't have to remove them, and that saves a few minutes. I removed the sway bar mounting brackets, and then slid the bar forward a couple of inches, and then I used a bungee to keep it forward. That got the links and bar ends out of the way.

    For reference, you might need these bolts:
    Rear spring bolts - 14mm x 120mm. I used grease-able 9/16 x 4.5" bolts, and cut them down a bit.
    Rear shock lower bolt - 12mm x 60mm. 7/16 x 2.5" or 3" will work.
    Front lower shock bolt - 14mm x 80mm.

    IMG_1191.jpg IMG_1192.jpg
     
    Last edited: Feb 3, 2017
    Crikeymike and frejil like this.
  20. Feb 13, 2017 at 1:59 PM
    #540
    Crikeymike

    Crikeymike ExitOffroad.com Vendor

    Joined:
    Oct 17, 2016
    Member:
    #199985
    Messages:
    1,870
    Gender:
    Male
    First Name:
    Mike
    Jax Beach, Florida
    Wow dude, you had a fun time with that one!! Kudos to you, and also for giving all these instructions for anyone else that has this problem in the future.
     

Products Discussed in

To Top