1. Welcome to Tacoma World!

    You are currently viewing as a guest! To get full-access, you need to register for a FREE account.

    As a registered member, you’ll be able to:
    • Participate in all Tacoma discussion topics
    • Communicate privately with other Tacoma owners from around the world
    • Post your own photos in our Members Gallery
    • Access all special features of the site

GoPro mount repurposing

Discussion in '3rd Gen. Tacomas (2016-2023)' started by EvilBetty, Jun 30, 2016.

  1. Jun 30, 2016 at 8:12 PM
    #1
    EvilBetty

    EvilBetty [OP] Well-Known Member

    Joined:
    Apr 24, 2007
    Member:
    #1409
    Messages:
    388
    Gender:
    Male
    Kansas City, MO
    Vehicle:
    07 SR5 Access Cab
    Visor CD Holder
    3D printed an adapter to go from the GoPro mount, to a cheap dash cam.

    IMG_20160630_201340.jpg

    Going to look into running a direct wire 5-volt connection to something under the sun glasses / map light area.
     
    Socal562, bblake00, Phoosa and 13 others like this.
  2. Jun 30, 2016 at 8:17 PM
    #2
    tacobeliever

    tacobeliever Member

    Joined:
    Jun 21, 2016
    Member:
    #190189
    Messages:
    19
    Gender:
    Male
    First Name:
    Javier
    mckinney tx
    Vehicle:
    16' trdOR black
    workin on it
    thats badass dude! i should get my brother in law to print me out one for my dash cam too lol.
     
    ChadsPride likes this.
  3. Jun 30, 2016 at 8:25 PM
    #3
    pruchai

    pruchai KAMA3

    Joined:
    May 8, 2014
    Member:
    #129398
    Messages:
    1,788
    Gender:
    Male
    First Name:
    Igor
    San Diego, CA
    Vehicle:
    '14 TRD TX Baja
    Not enough...
    Thats pretty sweet. My dashcam came with a 3M stick-on mount, but it looks like its not going to last though the summer here in CA. I've been trying to come up with a better way to mount it, but I got a 2nd gen, so no sweet GoPro mount.
     
    ChadsPride and EvilBetty[OP] like this.
  4. Jun 30, 2016 at 10:53 PM
    #4
    EvilBetty

    EvilBetty [OP] Well-Known Member

    Joined:
    Apr 24, 2007
    Member:
    #1409
    Messages:
    388
    Gender:
    Male
    Kansas City, MO
    Vehicle:
    07 SR5 Access Cab
    Visor CD Holder
    This is the camera I bought.
    https://www.amazon.com/dp/B01F0NJ56G/ref=cm_sw_r_tw_dp_zeGDxbT6S5EP2

    Found an existing G1W mount and a 2 blade GpPro part and meshed them, but the G1W mount isn't wide enough for this camera. I widened it up a bit and tried again.

    Snap28.jpg

    And then printed it out...

    Snap29.jpg IMG_20160630_194647.jpg


    Turned out a bit too wide, but a little sand paper fixed that.

    If anyone wants to print it for their use, I shared it here:
    http://www.thingiverse.com/thing:1653915
     
    bigmw, Skydvrr, JJ TACO and 3 others like this.
  5. Jul 1, 2016 at 9:23 AM
    #5
    MrSmithsTaco

    MrSmithsTaco Well-Known Member

    Joined:
    Feb 25, 2016
    Member:
    #179370
    Messages:
    401
    Gender:
    Male
    First Name:
    Mike
    Oklahoma City, OK
    Vehicle:
    2016 Super White Tacoma TRD OR
    Me in the driver seat.
    You should do a write up for the hard wire. I want to get a dash cam but I don't want to take that mount up. My father-in-law wired his to his sunroof switch. Unfortunately I don't have a sunroof. I figure I will have to run the wire along the headliner and down the A pillar.
     
    corgimas likes this.
  6. Jul 1, 2016 at 9:31 AM
    #6
    colinb17

    colinb17 If at first you don't succeed, don't try skydiving

    Joined:
    Jan 6, 2008
    Member:
    #4127
    Messages:
    19,206
    Gender:
    Male
    First Name:
    Colin
    Charleston, SC
    Vehicle:
    '07 TRD Sport 4x4
    Build thread in sig...
    pull power from the IG1 fuse behind the dash. when you turn the key, it gets power, which means your camera will turn on and off with the truck. all you need to do is turn the 12 volts from the truck into the 5 volts that a cig lighter puts out. just crack open the cigarette lighter plug that comes with about every dash cam, and solder some wires into it.


    red goes to IG1 fuse, and black gets grounded. power cable coming out of the left side goes to the camera

     
    a400ryan and Dr Dirt like this.
  7. Jul 1, 2016 at 9:38 AM
    #7
    pruchai

    pruchai KAMA3

    Joined:
    May 8, 2014
    Member:
    #129398
    Messages:
    1,788
    Gender:
    Male
    First Name:
    Igor
    San Diego, CA
    Vehicle:
    '14 TRD TX Baja
    Not enough...

    Or you just get one of these :)

    https://www.amazon.com/Dash-Camera-Vehicle-Hard-Wire/dp/B00MH4ZVHO
     
    loveinyourmouth and IronPeak like this.
  8. Jul 1, 2016 at 10:01 AM
    #8
    DRJ1014

    DRJ1014 Well-Known Member

    Joined:
    Sep 11, 2015
    Member:
    #164009
    Messages:
    1,269
    Gender:
    Male
    CA
    Before I got the Mobius camera, I was trying to figure out how to mount a normal dash cam and couldnt find anything like you have printed.

    I would suggest listing it on eBay, you may get some bites from people like us who were looking for one.
     
    This site contains affiliate links for which the site may be compensated.
    #8
  9. Jul 1, 2016 at 10:49 AM
    #9
    EvilBetty

    EvilBetty [OP] Well-Known Member

    Joined:
    Apr 24, 2007
    Member:
    #1409
    Messages:
    388
    Gender:
    Male
    Kansas City, MO
    Vehicle:
    07 SR5 Access Cab
    Visor CD Holder

    I'm not looking to make any money from it. If someone where wants one bad enough, I might be willing to help some guys out.

    This one was just a prototype in PLA. After I get the dimensions printing right, the final one will be in black ABS. I might even add a 17mm ball mount in the middle so it's more adjustable, but judging from the first videos I pulled this morning, it's not needed.
     
    This site contains affiliate links for which the site may be compensated.
    #9
    FarmerJB and Dr Dirt like this.
  10. Jul 1, 2016 at 10:54 AM
    #10
    EvilBetty

    EvilBetty [OP] Well-Known Member

    Joined:
    Apr 24, 2007
    Member:
    #1409
    Messages:
    388
    Gender:
    Male
    Kansas City, MO
    Vehicle:
    07 SR5 Access Cab
    Visor CD Holder
    The lighter plug that came with mine has a curled cord. The other ones I have around the house (that I'm willing to sacrifice) have low A output AND curled cords. I thought about replacing the coiled cable with a standard micro-usb cable, but as pruchai mentioned above, the fused direct connection kits are not that expensive. And the circuitry is probably a little better than whats in these cheap 12v adapters. I'm going to find one that takes USB A, so I can swap it out to other cables (Micro, C) if needed later.

    I don't want to run cabling all the way down to the fuse panel, but I might. But there is both always on, and switch 12v power at the map light switch, so that would theoretically be a sound place to tap power for this. Might even put a USB A port on the back of the sunglasses drawer.
     
    Last edited: Jul 1, 2016
  11. Jul 1, 2016 at 11:28 AM
    #11
    colinb17

    colinb17 If at first you don't succeed, don't try skydiving

    Joined:
    Jan 6, 2008
    Member:
    #4127
    Messages:
    19,206
    Gender:
    Male
    First Name:
    Colin
    Charleston, SC
    Vehicle:
    '07 TRD Sport 4x4
    Build thread in sig...
    t4daddy likes this.
  12. Jul 1, 2016 at 12:30 PM
    #12
    axisofoil

    axisofoil Rocket Surgeon

    Joined:
    Mar 25, 2016
    Member:
    #182306
    Messages:
    652
    Gender:
    Male
    Gilbert, AZ
    Vehicle:
    2016 TRD OR Dcsb 4x2

    How the heck did you spend that much in solder for two darn wires? Using pure gold?

    That said, I use a multisafer and fuse taps for dash cam hardwiring. Crimped butt connections for me at the moment, but it'll get soldered nice and neat when it's not 2000 degrees or so outside.
     
  13. Jul 4, 2016 at 7:36 AM
    #13
    MrSmithsTaco

    MrSmithsTaco Well-Known Member

    Joined:
    Feb 25, 2016
    Member:
    #179370
    Messages:
    401
    Gender:
    Male
    First Name:
    Mike
    Oklahoma City, OK
    Vehicle:
    2016 Super White Tacoma TRD OR
    Me in the driver seat.
    So I threw all caution to the wind and tried the least invasive route possible. I put in an add-a-fuse in the spot for the power outlet in the bed. Then wired a cigarette lighter receptacle. All I had to do was run the cord down to the drivers side kick plate and plug it in. The only pain was getting the cord behind the side curtain airbag. No w I just need to find someone with a 3D printer to make that mount piece.
     
  14. Jul 4, 2016 at 8:44 AM
    #14
    axisofoil

    axisofoil Rocket Surgeon

    Joined:
    Mar 25, 2016
    Member:
    #182306
    Messages:
    652
    Gender:
    Male
    Gilbert, AZ
    Vehicle:
    2016 TRD OR Dcsb 4x2

    Go pro also makes adapters for all sorts of things. If you get their bag of mounts, I'd be shocked if you couldn't cobble something together.
     
  15. Jul 4, 2016 at 8:49 AM
    #15
    Newlife

    Newlife Well-Known Member

    Joined:
    Jun 22, 2013
    Member:
    #106845
    Messages:
    8,574
    Gender:
    Male
    First Name:
    Adam
    Knoxville TN
    Vehicle:
    2020 t4r orp
    Bone f’n stock for now
    How much would you charge for a mount? I have a go pro mount on my windshield already and I have been wanting to add a camera for a while.
     
  16. Jul 4, 2016 at 11:23 AM
    #16
    bcnu

    bcnu Active Member

    Joined:
    Jul 4, 2016
    Member:
    #191198
    Messages:
    37
    Gender:
    Male
    The Big Island, Hawaii
    Vehicle:
    2016 SR5 4x4 Access Cab / V-6 A/T Quicksand
    Anyone wanting to use the GoPro mount for anything on-road needs to be careful. As crazy at it may sound, Tacoma put the mount in an area of the windshield that many (probably most) states do not allow to be used for mounting anything. The idea behind the laws is that things mounted in that area could obstruct vision. Typically there are limited areas of the windshield on which items may be mounted, and then only certain types of items may be mounted. The top, center of the windshield (behind the rear view mirror) and lower left and lower right corners of the windshield are the most likely to be legal mounting areas. Here is a link to a site that has some info on GPS mounting, and those laws generally address other electronic devices: http://www.poi-factory.com/node/34521

    I guess Toyota put the GoPro mount where they did so the selfie-obsessed crowd could shoot videos of them and their passengers squealing while bashing around offroad, and not with any thought of actual utility.
     
    Socal562 and ndoldman59 like this.
  17. Jul 4, 2016 at 10:19 PM
    #17
    EvilBetty

    EvilBetty [OP] Well-Known Member

    Joined:
    Apr 24, 2007
    Member:
    #1409
    Messages:
    388
    Gender:
    Male
    Kansas City, MO
    Vehicle:
    07 SR5 Access Cab
    Visor CD Holder
  18. Jul 18, 2016 at 9:02 PM
    #18
    EvilBetty

    EvilBetty [OP] Well-Known Member

    Joined:
    Apr 24, 2007
    Member:
    #1409
    Messages:
    388
    Gender:
    Male
    Kansas City, MO
    Vehicle:
    07 SR5 Access Cab
    Visor CD Holder
    Gentex Homelink mirror installed, and no more wires. :cool:

    IMG_20160718_221408_b2a207b31ce7e4ced7e8b97e3b38035599bf42e0.jpg
     
    AlphaDog1974 and 415raf like this.
  19. Jul 18, 2016 at 9:39 PM
    #19
    EvilBetty

    EvilBetty [OP] Well-Known Member

    Joined:
    Apr 24, 2007
    Member:
    #1409
    Messages:
    388
    Gender:
    Male
    Kansas City, MO
    Vehicle:
    07 SR5 Access Cab
    Visor CD Holder
    My how-to on installing a overhead 5v connection.

    Parts:
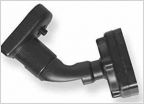
    • Right-Angle USB A --> USB Micro B
    • 5v direct wire --> female USB A socket
    • 18-22 AWG splice connectors
    Tools:
    • 10mm socket
    • Panel / Trim tools
    • Philips Screw Driver
    • Wire strippers
    • Zip Ties
    Time: About 1.5 Hours

    Headliner
    1. Grip the center console in the headline at the two corners toward the back of the truck, and pull until the two clips on that end release.
    2. Grip the opposite end toward the windshield and pull until the console comes loose.
    3. Unplug the harness from the console, and set it aside.
    4. Using a panel tool, remove the bolt covers from the drivers side windshield pillar.
    5. Remove bolt covers from passenger side "Oh S### Handle" bolt covers.
    6. Remove all three 10mm bolts.
    7. Pull trim away from headliner a bit.
    8. Remove both Philips screws holding each sun visor.
    9. Gently pull sun visor to release retention clip
    10. Disconnect vanity light plugs and set aside sun visors.
    11. Twist each sun visor clip 45 degrees and pull to remove.
    12. GENTLY pull head liner away from sun visor clip sockets.
    IMG_20160718_203938_505a37d05054c386ab2cb01449beca4bd3307c1a.jpg

    IMG_20160718_221156_9431960f291e40a9b054e4b015bf97fe6ced96e6.jpg

    IMG_20160718_203953_051ed1df716fbf5aa02e1f73090a7bb1d4516642.jpg


    Direct 5v connection:

    1. Since I was installing a Gentex Homelink mirror that came with a 8" adapter cable, I spliced into this. (I had originally planned to use the switched or always-on wires running to the map / dome lights. Others run to the fuse box.)
    2. Normally I would solder and shrink wrap, but I got lazy. I used splice connectors to connect the 5v adapter leads to the Gentex adapter cable.
    3. I used a right-angle USB Micro B to USB A cable to connect the camera to the 5v adapter.
    4. I zip tied the adapter and leads to the console support bracket to keep it from rattling.
    IMG_20160718_214702_9ab3ec22c254ff83327e53ea56face2be5cf5392.jpg


    IMG_20160718_214824_9c9ab060e5bf95a965fa056cdd3cd0cb9c84df13.jpg

    IMG_20160718_214832_e224e8ba9981a34df265e8b08ae3cc33b31cf156.jpg

    IMG_20160718_215542_c80fb5d3b139df4d58b5c1a7ab3a800743e57d4a.jpg

    Button it back up:
    1. Push the headliner back over the sun visor clip anchors.
    2. Push the sun visor clips straight back into their sockets.
    3. Reinstall console wire harness.
    4. Push console clips back into their resting place.
    5. Tuck headliner into door weather stripping (if it came loose).
    6. Reinstall pillar trim, also tucking it under weather stripping.
    7. Reinstall bolts and bolt covers.
    8. Plug in vanity light connectors into sun visors and tuck into recess.
    9. Reinstall sun visors (4 bolts).
    IMG_20160718_220906_c1cbdca2fac1a23ae0c5620a2f1e9fd93cd61e86.jpg

    IMG_20160718_221349_767b7a23439c483eec9f8dd9c41bcfb1f5025d95.jpg
     
  20. Jul 19, 2016 at 3:28 AM
    #20
    Taco Fan

    Taco Fan Well-Known Member

    Joined:
    Jul 24, 2013
    Member:
    #108980
    Messages:
    299
    Gender:
    Male
    Fort Worth, TX
    Vehicle:
    2017 White TRD PRO AT 5 ft bed
    Console Organizer, black tailgate letters, chrome glove box letters.
    Nice work!
     
    EvilBetty[OP] likes this.

Products Discussed in

To Top