1. Welcome to Tacoma World!

    You are currently viewing as a guest! To get full-access, you need to register for a FREE account.

    As a registered member, you’ll be able to:
    • Participate in all Tacoma discussion topics
    • Communicate privately with other Tacoma owners from around the world
    • Post your own photos in our Members Gallery
    • Access all special features of the site

2nd gen UCA install

Discussion in '2nd Gen. Tacomas (2005-2015)' started by Abecker, Jul 12, 2016.

  1. Jul 12, 2016 at 6:22 AM
    #1
    Abecker

    Abecker [OP] Well-Known Member

    Joined:
    Feb 19, 2015
    Member:
    #149054
    Messages:
    77
    Gender:
    Male
    First Name:
    Aaron
    Rhode Island
    Vehicle:
    2015 BRM DCLB 4X4 V6 TRD Sport
    Front Toytec at 1.75, deaver AAL, 255/80r17 BFG KM2s, no diff drop no spacers.
    So, I found 4 hours of free time yesterday and overambitiously planned to install a lift at 1 hour per corner.

    I ran into an issue that I haven't found much search results for so I wanted to post this up for future users and to get an answer on something that has been bothering me. I'm sure its well known I just didn't type the right search words I guess.

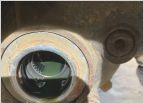
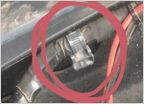
    When I replaced the UCAs, the long ass bolt slid out in the front bumper direction and smacked some body piece/rib flange/apron thingy preventing it from coming out. So I beat the shit of that to make room to remove the bolt.

    When reinstalling, i just put it in the other way, from the back sliding towards front.

    Whats bothering me is why didn't toyota install them in that direction at the factory....or were they supposed to be installed in that direction originally?

    Anyway, this slowed me down and took 3 hours to do just the front. Now i'm temporarily bro style with goofy street tires.

    ...to be continued
     
    el_turks likes this.
  2. Jul 12, 2016 at 6:37 AM
    #2
    Arailt

    Arailt Well-Known Member

    Joined:
    Jun 21, 2013
    Member:
    #106777
    Messages:
    1,260
    Dallas, TX
    Vehicle:
    2019 GX460
  3. Jul 12, 2016 at 6:40 AM
    #3
    Abecker

    Abecker [OP] Well-Known Member

    Joined:
    Feb 19, 2015
    Member:
    #149054
    Messages:
    77
    Gender:
    Male
    First Name:
    Aaron
    Rhode Island
    Vehicle:
    2015 BRM DCLB 4X4 V6 TRD Sport
    Front Toytec at 1.75, deaver AAL, 255/80r17 BFG KM2s, no diff drop no spacers.
  4. Jul 12, 2016 at 6:42 AM
    #4
    tan-ishman

    tan-ishman Well-Known Member

    Joined:
    Jul 27, 2015
    Member:
    #160442
    Messages:
    414
    Gender:
    Male
    San Diego,CA
    Vehicle:
    2005 DCSB
    a bunch of new/used parts....and some skids.
    ha! sounds like last time i did anything on my truck... ever
     
    BassAckwards likes this.
  5. Jul 12, 2016 at 6:44 AM
    #5
    Abecker

    Abecker [OP] Well-Known Member

    Joined:
    Feb 19, 2015
    Member:
    #149054
    Messages:
    77
    Gender:
    Male
    First Name:
    Aaron
    Rhode Island
    Vehicle:
    2015 BRM DCLB 4X4 V6 TRD Sport
    Front Toytec at 1.75, deaver AAL, 255/80r17 BFG KM2s, no diff drop no spacers.
    Maybe I should have cut it... didn't think of that. substantial bolt, sparks.. painted my apron body work though to try to protect it. :fingerscrossed:

    good to know it was assembled per their plan though. not sure how i would have felt if my truck was assembled incorrectly...
     
  6. Jul 12, 2016 at 6:45 AM
    #6
    O906

    O906 Well-Known Member

    Joined:
    Apr 14, 2016
    Member:
    #184276
    Messages:
    1,066
    I'd say the stock UCA's were put on before the body panels. Auto manufactures don't really care about making working on stuff easier for the average guy.

    If I was a betting man I would say that the factory service manual used at the dealership calls for the side front quarter panels to be removed to replace the UCA.

    I just bent the sheet metal and installed backwards like everyone else here.
     
  7. Jul 12, 2016 at 6:50 AM
    #7
    qxrtz4321

    qxrtz4321 Well-Known Member

    Joined:
    Jan 17, 2012
    Member:
    #70821
    Messages:
    931
    Gender:
    Male
    First Name:
    Mitch
    Montana / Washington
    Just said F it and cut the bolt on my 3rd gen... same situation where it hits when trying to pull it out.
     
  8. Jul 12, 2016 at 7:00 AM
    #8
    Abecker

    Abecker [OP] Well-Known Member

    Joined:
    Feb 19, 2015
    Member:
    #149054
    Messages:
    77
    Gender:
    Male
    First Name:
    Aaron
    Rhode Island
    Vehicle:
    2015 BRM DCLB 4X4 V6 TRD Sport
    Front Toytec at 1.75, deaver AAL, 255/80r17 BFG KM2s, no diff drop no spacers.
    Thanks guys, these are good responses.
     
  9. Jul 12, 2016 at 10:16 AM
    #9
    Crom

    Crom Super-Deluxe Member

    Joined:
    Jun 22, 2009
    Member:
    #18782
    Messages:
    9,648
    Gender:
    Male
    First Name:
    Nick
    San Diego, CA
    Vehicle:
    2009 4x4 DCSB Camp Supreme
    Millions
    Bend the sheet metal out of the way and install the bolt the right way, same as factory.

    Bending the sheet metal is easy with big 16" channel locks.

    If you install the bolt upside down and nut becomes loose and falls off, it could be a catastrophe if the bolt were to slide out at interstate speeds... as the front end would collapse.

    If you do choose to install the bolt updside down consider double nutting the bolt and lock tight.
     
    CementTRDOffRoad likes this.
  10. Jul 12, 2016 at 10:24 AM
    #10
    Silverspool

    Silverspool Come at me Bro!

    Joined:
    Jul 6, 2016
    Member:
    #191387
    Messages:
    8,271
    Gender:
    Male
    First Name:
    Frank
    DFW
    Vehicle:
    18T4RORP 17GT350
    Anyone seen my wallet?
    I always consider, and prefer, double nutting.
     
  11. Jul 12, 2016 at 10:34 AM
    #11
    DaveInDenver

    DaveInDenver Not Actually in Denver

    Joined:
    May 18, 2013
    Member:
    #104390
    Messages:
    3,619
    Gender:
    Male
    First Name:
    David
    Grand Junction
    Vehicle:
    2008 Super White TRDOR AC 6MT
    Unexceptional
    Exactly, the body is dropped onto the chassis at some point after the driveline is already in place.
    The FSM doesn't describe how they intended this to happen.
    The steps they list:
    1. Remove front wheel
    2. Inspect UCA for damage or loose ball joint
    3. Separate skid control (ABS) wire
    4. Remove upper arm (support, use ball joint SST)
    5. Remove skid control bracket
    6. Remove bolt, 2 washers, nut
    7. Remove arm
    Badda bing, batta boom, just that easy.

    Thing is Toyota also decided that replacing the upper ball joint means replacing the whole upper control arm, so it's something that had to come up at some point, if not during the design engineering then when they wrote the service instructions or preparing any classes they would do for techs. I could see a detail like this being overlooked on 2005 models but why not add a notch to later sheet metal?
     
  12. Jul 12, 2016 at 12:30 PM
    #12
    Lord Humongous

    Lord Humongous The Ayatolah Of RockNRolla

    Joined:
    Jan 14, 2016
    Member:
    #174960
    Messages:
    2,317
    Gender:
    Male
    AZ
    Vehicle:
    Inferno 3rd gen trd offroad 4x4
    https://www.tacomaworld.com/threads/lord-humongous-gigahorse-build.436524/
    Boonie is correct. With that said I cut mine out reinstalled backwards with locktite and torqued to spec. I'm not stressing about it but I frequently inspect my truck. There is always the risk they fall out.
     
    scottalot likes this.
  13. Jul 12, 2016 at 12:32 PM
    #13
    Boonie Buster

    Boonie Buster Well-Known Member

    Joined:
    Nov 10, 2013
    Member:
    #116316
    Messages:
    292
    Gender:
    Male
    PNWet
    Vehicle:
    2014 Access Cab TRD
    Whoops, I deleted what i said, I noticed it had been repeated above, but you should install it the way it came out, if the nut falls off, the bolt could slide out and you lose your UCA.
     
    Lord Humongous likes this.
  14. Jul 13, 2016 at 6:24 AM
    #14
    Abecker

    Abecker [OP] Well-Known Member

    Joined:
    Feb 19, 2015
    Member:
    #149054
    Messages:
    77
    Gender:
    Male
    First Name:
    Aaron
    Rhode Island
    Vehicle:
    2015 BRM DCLB 4X4 V6 TRD Sport
    Front Toytec at 1.75, deaver AAL, 255/80r17 BFG KM2s, no diff drop no spacers.
    Oh, I'm glad I posted this just for the contacts... I was lurking for a few months on a bunch of you guys' posts. I may have even spent two entire days reading Crom's thread while at work. but you guys are giving me the heebie jeebies now. I already re-installed backwards and repaired my aprons/bodywork. I'll add lock-tite and double nut but no way I'm yanking those things now and reversing them.
     
    Crom likes this.
  15. Jul 19, 2016 at 2:42 PM
    #15
    Abecker

    Abecker [OP] Well-Known Member

    Joined:
    Feb 19, 2015
    Member:
    #149054
    Messages:
    77
    Gender:
    Male
    First Name:
    Aaron
    Rhode Island
    Vehicle:
    2015 BRM DCLB 4X4 V6 TRD Sport
    Front Toytec at 1.75, deaver AAL, 255/80r17 BFG KM2s, no diff drop no spacers.
    know whats cool? guy showing me how to add a leaf without taking leaf pack off.

    know what sucks? adding a leaf and not paying attention to the new shim, and cutting the center pin when done [with original shim].

    know whats really cool? guy in first line having 20 center pins on hand :eek:

    tires and pics thursday am.
     

Products Discussed in

To Top