1. Welcome to Tacoma World!

    You are currently viewing as a guest! To get full-access, you need to register for a FREE account.

    As a registered member, you’ll be able to:
    • Participate in all Tacoma discussion topics
    • Communicate privately with other Tacoma owners from around the world
    • Post your own photos in our Members Gallery
    • Access all special features of the site

Russtty's 2016 double cab build.

Discussion in 'Audio & Video' started by Russtty, Aug 5, 2016.

  1. Aug 5, 2016 at 6:08 PM
    #1
    Russtty

    Russtty [OP] Well-Known Member

    Joined:
    Apr 10, 2016
    Member:
    #183912
    Messages:
    64
    Gender:
    Male
    First Name:
    Steve
    Ontario
    Vehicle:
    2020 Cement TRD sport DCSB 6MT
    BakFlip MX4 Fuel Vector 17x8.5 -6ET 265/70R17 KO2 TRD Pro Grill OV tune - pending
    So I decided to start my own audio build thread. I’m pretty new to full audio builds. I’ve never installed an amp or replaced speakers. I’ve done a head unit in a 2009 VW Jetta, and that’s about it! I’m not afraid to pull apart cars though. I took out the entire center console of my 2010 Audi S4 for a short shifter install. The Jetta had to have the ignition switch replaced too. There are a couple of really good discussions on here that helped me out. The most notable being “2016 BBP audio build in the sticky section started by 1sttruckguy78.

    My first step was deciding on my criteria and choosing components. I decided to upgrade speakers and amp while maintaining the factory head unit, and then leave the sub to another day. I, like most people, had to balance out quality and cost. Being up in Canada, and in a bit of a more rural area at that, I don’t have a lot of options to shop around. I ended up buying my major components from visions.ca. Most of my installation items came from Amazon. I got the Metra front speaker adaptors from Crutchfield. What I ended up choosing:

    My components:
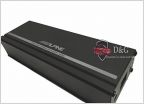
    Alpine PDX4 4-channel amp
    Hertz HSK165 6.5” component system up front
    Hertz HCX165 6.5” 2-way in the back
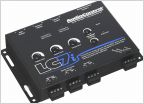
    Audiocontrol LC7i
    KnuKoncepts Kolossus 4 AWG wiring kit
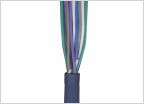
    Stinger SGW9920 9 conductor speedwire
    Metra 71-1761 wiring harness
    Metra 70-1761 wiring harness
    Dynamate Xtreme door Kit
    Metra 82-8147 front door speaker adaptors (6x9 to 6.5”)

    First issue: I had originally purchased a Rockford Fosgate RF-HLC4 Line Converter to get the signal to the amp. The PDX4 does not have high level inputs, but I got a pretty good deal on it. (40% off MSRP) After doing a bit more research, I got concerned that I would not be happy with the standard line convertor. I also would have a more difficult time adding a sub, so I ordered the LC7i. I didn’t even open the box, and sent the HLC4 back.

    To get started, I wired up the Metra harnesses with the speed wire using the wiring diagram I found in the 3rd Gen forums and the BBP audio thread. I don’t have any soldering experience so I used splice connectors and verified everything with an ohm meter.

    Second item was to decide on amp mounting location. I tried playing with the amp under the front seats, but it was tight, and I’m worried about the snow and salt coming into the cab during the winter. That and kids in the back kicking with their dirty boots! So, behind the back driver’s side seat it will go. I may go with the LC7i under the back driver’s side seat. I like the look of that setup. The delivery of the LC7i is a bit behind due to the change of mind so I will wait until it arrives to decide.


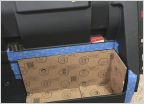
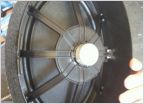
    Next order of business: Rear speaker brackets. I picked up some ¾” MDF and decided to make my own. I got home before everyone else yesterday so I pulled apart my rear passenger side door using the OEMaudioplus video as a guide. No issues. The door was apart in about 15 mins. I pulled out the rear speaker and traced it on the MDF. I compared the Hertz speaker. It is pretty tight! I will end up making the adaptor a larger diameter than the OEM speaker bracket to ensure I have a good mounting surface.

    I spent some time on the adapters when I got home tonight. Here is the finished product.
    image.jpg
     
  2. Aug 5, 2016 at 9:16 PM
    #2
    solscooter

    solscooter Sh!t Outta Luck

    Joined:
    Nov 8, 2015
    Member:
    #169056
    Messages:
    1,935
    Gender:
    Male
    First Name:
    Brian
    Minnesota
    Vehicle:
    2016 TRD OR DCSB 4x4
    i found there was plenty of room under the driver and passenger seats, even if there are going to be passengers in the back. I placed the amp and LC7i above the rear foot vents. Still have to make brackets to keep them in place but that will come shortly and they haven't moved around that much in the short time they've been located there.

    build is looking good so far! nice making your own speaker mounts, impressive!

    enough of us have done a 3rd gen install now that there is plenty of good advice if you run into any problems. my speakers need some more time to break in, I'm pushing them, but they are starting to sound really good. any plans for a sub in your install?
     
  3. Aug 6, 2016 at 8:40 AM
    #3
    Russtty

    Russtty [OP] Well-Known Member

    Joined:
    Apr 10, 2016
    Member:
    #183912
    Messages:
    64
    Gender:
    Male
    First Name:
    Steve
    Ontario
    Vehicle:
    2020 Cement TRD sport DCSB 6MT
    BakFlip MX4 Fuel Vector 17x8.5 -6ET 265/70R17 KO2 TRD Pro Grill OV tune - pending
    No sub right now. I'm going to see how it sounds without and then decide. If I do go with the sub it will have to wait until spring. I need winter tires still!

    I made the mounting boards for the amp and LC7i today. Also got the 4awg power cable from the engine bay to the cab. What a pain that was! Maybe this is where my inexperience shows, or maybe it was because I have a manual but it took me a good 5-6 attempts, 45 mins and two bloody knuckles!

    Taking a break to run out and get some holds, speaker connectors and tape/Velcro for mounting the crossovers and fuse holders. I'll then work on routing the power along the drivers side and getting the speaker wiring done. image.jpg
     
  4. Aug 6, 2016 at 10:03 AM
    #4
    rob feature

    rob feature Tacos!

    Joined:
    Aug 10, 2011
    Member:
    #61468
    Messages:
    1,797
    Gender:
    Male
    Colorado
    Vehicle:
    2003 4x4 V6 X-Cab SR5
    Shocks. Pegs. Lucky.
    Make sure you seal the snot out of those MDF adapters before installing them.

    That's some nice gear you've picked out. Subbed for the build. Have fun!
     
  5. Aug 6, 2016 at 11:20 AM
    #5
    Russtty

    Russtty [OP] Well-Known Member

    Joined:
    Apr 10, 2016
    Member:
    #183912
    Messages:
    64
    Gender:
    Male
    First Name:
    Steve
    Ontario
    Vehicle:
    2020 Cement TRD sport DCSB 6MT
    BakFlip MX4 Fuel Vector 17x8.5 -6ET 265/70R17 KO2 TRD Pro Grill OV tune - pending
    Sounds good. I didn't think about sealing them. Just use paint or is there something else you suggest?

    First struggle. Ant I feel like an idiot. I can't get the damn power cable into the grommet and holder for the fuse block! Seems like I got the wrong size block. Any tips for how to do this? I just keep fraying the hell out of the cable. image.jpg
     
  6. Aug 6, 2016 at 11:40 AM
    #6
    rob feature

    rob feature Tacos!

    Joined:
    Aug 10, 2011
    Member:
    #61468
    Messages:
    1,797
    Gender:
    Male
    Colorado
    Vehicle:
    2003 4x4 V6 X-Cab SR5
    Shocks. Pegs. Lucky.
    Paint might work, but the big story is keeping moisture out. If you don't seal them they will swell and deform. A lot of people have them sprayed with bedliner. I flat out refuse to put MDF in my doors either way & use cutting boards as material for adapters.

    On the grommet, looks like you need a bigger one. Or find another way to seal that up.
     
  7. Aug 6, 2016 at 3:31 PM
    #7
    Russtty

    Russtty [OP] Well-Known Member

    Joined:
    Apr 10, 2016
    Member:
    #183912
    Messages:
    64
    Gender:
    Male
    First Name:
    Steve
    Ontario
    Vehicle:
    2020 Cement TRD sport DCSB 6MT
    BakFlip MX4 Fuel Vector 17x8.5 -6ET 265/70R17 KO2 TRD Pro Grill OV tune - pending
    Day one done. Front drivers side speaker replaced. Power cable routed. Rear drivers side ready for speaker wire routing.

    The rear speaker adapters have been painted twice and I will do a clear coat in the morning. I'll keep an eye on them. They are soaking up the paint. I may need to switch out to plastic in the future.

    A new issue:
    The Hertz crossover is big. No room for it up by the drivers door. I've decided to place them under the front seats.

    I've also lost one of the white panel clips some how...

    I've gained a lot of respect for people who do this regularly. Routing that speaker cable into the door was a PITA!
     
  8. Aug 6, 2016 at 3:58 PM
    #8
    rob feature

    rob feature Tacos!

    Joined:
    Aug 10, 2011
    Member:
    #61468
    Messages:
    1,797
    Gender:
    Male
    Colorado
    Vehicle:
    2003 4x4 V6 X-Cab SR5
    Shocks. Pegs. Lucky.
    Doors are a poor location for crossovers anyway. Good call. You may have room behind the kick panels up front. I do, but I have a 1st gen.

    And good onya for doing the install on your own. :thumbsup:
     
  9. Aug 7, 2016 at 9:16 AM
    #9
    Russtty

    Russtty [OP] Well-Known Member

    Joined:
    Apr 10, 2016
    Member:
    #183912
    Messages:
    64
    Gender:
    Male
    First Name:
    Steve
    Ontario
    Vehicle:
    2020 Cement TRD sport DCSB 6MT
    BakFlip MX4 Fuel Vector 17x8.5 -6ET 265/70R17 KO2 TRD Pro Grill OV tune - pending
    Pretty good morning so far. Finally sitting for a break for a few hours. I had to run out and get some small gauge wire for the tweeters. The leads off the hertz tweeters look like they are 22awg.

    I got the new tweeter bracket in the driver side. The Hertz bracket bolt hole were small so I had to open them up a bit with a dremmel. Both rear speakers are in and wired. I found the rear doors ALOT easier to wire. Combination of less wires in the bundle and I used a 12awg up front that came with my amp kit. I'm thinking I should have used the 14 I used for my rears.

    Time for a drink and a swim!
     
  10. Aug 7, 2016 at 3:17 PM
    #10
    Russtty

    Russtty [OP] Well-Known Member

    Joined:
    Apr 10, 2016
    Member:
    #183912
    Messages:
    64
    Gender:
    Male
    First Name:
    Steve
    Ontario
    Vehicle:
    2020 Cement TRD sport DCSB 6MT
    BakFlip MX4 Fuel Vector 17x8.5 -6ET 265/70R17 KO2 TRD Pro Grill OV tune - pending
    The truck is going back together! All speakers in and doors back together. I ran the speedwire down the passengers side and tied it into the LC7i. I was getting ready to cut the holes needed to run all the cables into the rear drivers side cargo hold when I ran into a planning issue. Not sure wher to connect the ground! The ring terminal I have is too small for the bolts holding in the seatbelts. There is one bracket on the rear set elf I was thinking of using but there is some wiring too it. Will using this bolt mess anything up?

    image.jpg

    I guess the other option is to open up the ring clamp. I've read a good ground is critical so I didn't want to reduce the surface area. Thoughts?

    thanks!

    Steve
     
  11. Aug 7, 2016 at 6:57 PM
    #11
    SlowComa666

    SlowComa666 Well-Known Member

    Joined:
    Nov 3, 2012
    Member:
    #90408
    Messages:
    395
    Gender:
    Male
    San Antonio TX
    Vehicle:
    2014 SR5 Access Cab 2WD
    I may be a bit paranoid, but i've never attached anything to my seat belt mounts. they are engineered to save my life.
     
    RacecarGuy likes this.
  12. Aug 9, 2016 at 8:29 PM
    #12
    KRich

    KRich Well-Known Member

    Joined:
    Dec 11, 2008
    Member:
    #11490
    Messages:
    149
    Gender:
    Male
    BC, Canada
    Vehicle:
    07 Black DCSB TRD Sport 4x4
    I've opened up the connector to make my ground fit on the seat belt bolts and haven't had any issues.
     
  13. Aug 10, 2016 at 12:36 PM
    #13
    Russtty

    Russtty [OP] Well-Known Member

    Joined:
    Apr 10, 2016
    Member:
    #183912
    Messages:
    64
    Gender:
    Male
    First Name:
    Steve
    Ontario
    Vehicle:
    2020 Cement TRD sport DCSB 6MT
    BakFlip MX4 Fuel Vector 17x8.5 -6ET 265/70R17 KO2 TRD Pro Grill OV tune - pending
    Got busy with the kids and summer so I haven't had a chance to post!

    Anyways, everything is back together for now. I ended up using the bottom middle panel mounting bolt location on the rear drivers side back panel for a ground location. No issues with noise.

    A few things I do need to address:
    Looking back, I should have spent more time sealing my speakers when mounting them. I put in a few strips of Dynamat but not one solid piece all away around. So I will want to pull those back out and fix that.

    As I mentioned, I have the week off with the kids so getting the truck back together was a priority. I didn't adjust any of my LC7i or amp settings for the first drive. I was getting some popping at mid volume from the front speakers. I'm thinking the Metra brackets are flexing. So, I also picked up some nice cuisenart cutting boards on sale! I think I will make new adapters for all 4 speakers and remount them.

    I found the highs piercing on several songs so I used the cross overs to adjust the tweeters to -2db. Will they soften up over time?

    I've since played with my settings. Amp gains are all down. The LC7i gains are about 1/8 of a turn from max. I haven't played with the Accubass much. Where are people seeing the best point for the threshold? I've seen a few indications that it should be turned full up for our head units.

    I'll need to find some time to sit in the truck to just listen to music so I can adjust it. I also found a couple of apps that send tones and have oscilloscopes so I may use those to try and find a good setpoint.

    Other than that, I need to do some more cleanup for my LC7i mounting. I struggled getting the clips off for the under seat storage unit, so I need to revisit that. I also need to get shorter RCA cables and trim some of the wire leading to the amp. Is also like to pretty it all up by carpeting or spraying the amp and LC7i mounts.

    Overall I'm happy with the setup and confident I can get more out of it, especially with the speaker mounting. I figure I spent about 25 man hours on it so far. That could have been a lot less. I learned a lot about fishing the speaker wire. I also spent more time than I would have liked on stupid things: clamping the terminal rings on the 4awg wire and getting the fuse block setup were areas that my lack of experience showed!
    image.jpg
    image.jpg
     
    Last edited: Aug 10, 2016
  14. Aug 10, 2016 at 11:50 PM
    #14
    SlowComa666

    SlowComa666 Well-Known Member

    Joined:
    Nov 3, 2012
    Member:
    #90408
    Messages:
    395
    Gender:
    Male
    San Antonio TX
    Vehicle:
    2014 SR5 Access Cab 2WD
    Accubass = fake bass. treat it like a bass boost knob.
     

Products Discussed in

To Top