1. Welcome to Tacoma World!

    You are currently viewing as a guest! To get full-access, you need to register for a FREE account.

    As a registered member, you’ll be able to:
    • Participate in all Tacoma discussion topics
    • Communicate privately with other Tacoma owners from around the world
    • Post your own photos in our Members Gallery
    • Access all special features of the site

My 3rd gen install

Discussion in 'Audio & Video' started by Choops, Sep 3, 2016.

  1. Sep 3, 2016 at 7:46 AM
    #1
    Choops

    Choops [OP] Well-Known Member

    Joined:
    Oct 11, 2015
    Member:
    #166368
    Messages:
    157
    Gender:
    Male
    Twin Cities
    Vehicle:
    2017 DCLB TRD Sport
    I'm getting close to finishing what started a few weeks ago. I've been planning on upgrading my non-JBL Entune system since I bought the truck. I used to install for a living back in the 90's and even competed on the IASCA circuit for a few years. The system in my Tacoma is nothing special, just a simple system for an older guy that enjoys a nice system in his vehicle. With that said, the focus of this thread is to maybe pass on some tips and details that may help others with their install.

    I already had a lot of the equipment that I used in this install. I knew I wanted to keep the factory head unit because of the functionality with the gauge cluster screen and the fact that I have a lifetime subscription to XM but I'm unable to transfer it to anything else at this point (they give you 3 transfers). For this reason I chose the JL Audio FIX 86 processor to handle the level processing. Its relatively new and replaces the Cleansweep which I really liked in one of my previous cars. Other than that, the only thing I had to buy was some sound deadening and wiring.

    All of the speakers are Alpine from the Type R series. I believe its first gen Type R from 10 to 15 years ago if memory serves me right. The 6x9's were used in a previous install, otherwise everything else is new in the box. I'm torn on whether to use the two Alpine 10's or go with a single JL Audio 10. I'll figure that out when I get to laying out the back end for the box and amp rack. The amp is an Alpine MRD-F752 5 channel Class T amp. 75x4 +250x1 for the sub. THis amp has been in numerous systems and is a workhorse, one of the best amps I've ever owned.

    image.jpg

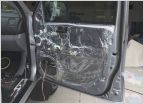
    On to the first step, sound deadening. I picked up 2 packs total from the group buy put on by @manethon earlier this spring. I used this in conjunction with some Raam mat and ensolite that I already had laying around. I used the Raam mat on the outer door skins and the Shok product everywhere else. The two products are very similar but I prefer the Shok product because it seems to stick better and is a little more pliable.


    image.jpg image.jpg

    I covered the upper portion of the rear wall including the vents with acoustic carpet. That way when the box is finished and covered in the same material, it should blend in well.

    image.jpg

    Door progression:

    image.jpg image.jpg image.jpg

    Finished front door:

    image.jpg

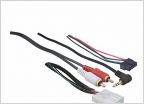
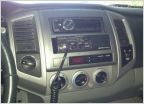
    With the sound deadening finished and the doors buttoned up, I pulled the head unit to work on wiring and mount the controller for the FIX 86. Like others here, I used speed wire and the Metra harnesses to avoid cutting any factory wires. I bought a blank switch panel from the dealer and used that to mount the master volume/sub control. As you can see, it was a tight fit with the knob and the status LED.

    image.jpg image.jpg
    image.jpg

    My truck was pretty well optioned so there were no available openings in the switch panel below the HVAC controls. I never liked the fact that the USB access for the radio was out in the open. With my Ipod connected, I was always dealing with wires visible and getting in the way. I bought a USB extension from Amazon and installed it in the glovebox. This simply plugs in to the factory USB port which I now have hiding behind the dash. This frees up a spot for the volume control and allows me to hide my Ipod while connected to the Entune head unit. Win!

    https://www.amazon.com/gp/product/B00VAIEAUM/ref=oh_aui_detailpage_o05_s00?ie=UTF8&psc=1

    image.jpg
    image.jpg

    And while I was at it, I added another USB charging outlet to the back of the center console.

    image.jpg image.jpg
    image.jpg

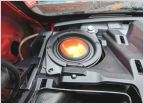
    As mentioned, I 'm using speakers that I already had. The front 6x9's are technically component speakers as they have an external crossover mounted in the door.

    image.jpg

    For the rear doors, I mounted the 5.25 mid and moved the tweeters all the way up to the dash location. I ran all new wire into the doors so this wasn't a big deal. I have my crossovers located in the front kickpanel. It works well, the mids in the rear doors are just fill, they add a little depth to the sound. The tweeters up on the dash bring the stage up and I can just use the fader to control how bright they are. I did set the tweeter to -6db on the crossover just to tone it down a bit.

    image.jpg
    image.jpg

    I wrapped the crossover in some synthetic chamois material to eliminate any rattles. This also allows the crossover to fit snugly in the void behind the factory kick panels.

    image.jpg
    image.jpg

    The tweeters were mounted in the dash with some backstrap I bent to match the factory mounts.

    image.jpg
    image.jpg

    That's where I'm at for now. I did splice in the speedwire to the new speaker wire temporarily until I can get the amp and sub in. It puts the factory system to shame already and its motivated me to get it done asap. Maybe next weekend...
     
    Last edited: Sep 27, 2016
  2. Sep 3, 2016 at 7:04 PM
    #2
    Dug1967

    Dug1967 Active Member

    Joined:
    Jun 30, 2016
    Member:
    #190948
    Messages:
    29
    Gender:
    Male
    First Name:
    Doug
    Vehicle:
    2016 TRD Off-road ACLB
    Very impressive install, the way you did the door looks really nice. Do you feel the sound deadening was worth it? I keep debating if I want to do some sound deadening or not....

    I too want to relocate or add a USB port into the center console box like you added to the glove box. Did you ever look into the idea of keeping the stock USB port as is and adding another one that taps off of the stock one? I would think it would be possible but haven't run across anybody that has done it or enough info about the stock plug to figure it out.

    Also did you remove the entire plastic piece that the USB mounts in? If so how did you get it loose?

    Again, very impressive install. Keep sharing the details as you continue I want to see it all.
     
  3. Sep 3, 2016 at 8:04 PM
    #3
    Choops

    Choops [OP] Well-Known Member

    Joined:
    Oct 11, 2015
    Member:
    #166368
    Messages:
    157
    Gender:
    Male
    Twin Cities
    Vehicle:
    2017 DCLB TRD Sport
    Thanks, sound deadening when done correctly is definitely worth it, even my wife was impressed.

    I did keep the stock port and just tied into it, exactly as you mentioned. I didn't modify the port at all, I simply pulled it from the switch panel, relocated it behind the dash, and plugged in the extension.

    I did not remove the switch panel, I was able to get access by pulling the radio and the HVAC panel below it. Then it was a matter of just popping the USB port out, unplug it, pull the wire back inside the dash, and plug the port back in. From there, I mounted the new port in the glove compartment and plugged the new port into the stock port as seen in the pictures.
     
  4. Sep 3, 2016 at 8:27 PM
    #4
    Dug1967

    Dug1967 Active Member

    Joined:
    Jun 30, 2016
    Member:
    #190948
    Messages:
    29
    Gender:
    Male
    First Name:
    Doug
    Vehicle:
    2016 TRD Off-road ACLB
    Damn, I was really hoping you would say the sound deadening made the truck vear to the right whenever Aerosmith played on the radio..... I don't want to install deadening but I think I might regret it if I don't.

    I also just thought about the second USB charging outlet you installed in the center console back side. What did you hook that up to?
     
  5. Sep 3, 2016 at 8:39 PM
    #5
    Choops

    Choops [OP] Well-Known Member

    Joined:
    Oct 11, 2015
    Member:
    #166368
    Messages:
    157
    Gender:
    Male
    Twin Cities
    Vehicle:
    2017 DCLB TRD Sport
    I tied it into the constant power for the radio so that I can charge when the truck is off.
     
  6. Sep 4, 2016 at 5:39 AM
    #6
    rob feature

    rob feature Tacos!

    Joined:
    Aug 10, 2011
    Member:
    #61468
    Messages:
    1,687
    Gender:
    Male
    Colorado
    Vehicle:
    2003 4x4 V6 X-Cab SR5
    Shocks. Pegs. Lucky.
    Good stuff. You're a freakin' artist with that deadener. Nice job on the rear carpet too. Subbed for the rest.
     
  7. Sep 6, 2016 at 7:52 AM
    #7
    Choops

    Choops [OP] Well-Known Member

    Joined:
    Oct 11, 2015
    Member:
    #166368
    Messages:
    157
    Gender:
    Male
    Twin Cities
    Vehicle:
    2017 DCLB TRD Sport
    Haha, thanks. That's just my OCD showing a little.

    Started the box last night. Initially I planned on going with the 2 Alpine 10's but due to the size of the amp, I'm going to use a single JL 10w0v3.

    image.jpg
    image.jpg
    image.jpg
    image.jpg
    image.jpg
     
  8. Sep 6, 2016 at 2:20 PM
    #8
    Choops

    Choops [OP] Well-Known Member

    Joined:
    Oct 11, 2015
    Member:
    #166368
    Messages:
    157
    Gender:
    Male
    Twin Cities
    Vehicle:
    2017 DCLB TRD Sport
    image.jpg
    image.jpg
    image.jpg
    image.jpg

    And that's all for today. I'll try and finish this weekend.
     
  9. Sep 8, 2016 at 9:11 PM
    #9
    hookembevo

    hookembevo Well-Known Member

    Joined:
    Feb 11, 2016
    Member:
    #177856
    Messages:
    1,564
    Gender:
    Male
    Austin, TX
    Vehicle:
    2016 Tacoma DCSB with 6MT
    Snugtop Rebel with some options Body Armor Rock Steps Rhino Mats Weathertech Mudflaps Radar detector hardwired to rear view mirror. Stereo upgrade: Amp: Arc Audio XDI805 LOC: AudioConnect LC7i Front Speakers: Hybrid Audio Technologies Claris 6.5 Rear Speakers: Hybrid Audio Technologies Mirus 5.25 Sub: Pioneer TS-SW2502S4 Box: Pioneer Ud-SW250T Bilstein 5100s OME 885 Springs Single Add-A-Leaf BFG KO2 265/75/16
    Sound deadener is definitely worth it. I first installed the speakers without it for a couple of weeks. It sounded great, but I knew it could be better. I bought a 2 door kit from Best Buy and used it for all 4 doors. I also removed the plastic nuts that the factory speakers were bolted into and put a nylon lock nut on the back of each of the bolts for the speaker mounts and torqued them down snugly. It was absolutely worth the trouble.

    Here's the kit I bought. I did a fair amount around all 4 door speakers.
    http://www.bestbuy.com/site/ballist...lack/8685029.p?id=1219359707391&skuId=8685029
     
  10. Sep 12, 2016 at 10:47 AM
    #10
    Choops

    Choops [OP] Well-Known Member

    Joined:
    Oct 11, 2015
    Member:
    #166368
    Messages:
    157
    Gender:
    Male
    Twin Cities
    Vehicle:
    2017 DCLB TRD Sport
    I didn't get to spend as much time as I would have liked this past weekend but I did make a little progress. Just a few more details and I'll get it in the truck.

    image.jpg
     
  11. Sep 12, 2016 at 10:58 AM
    #11
    newb13

    newb13 Well-Known Member

    Joined:
    Feb 29, 2016
    Member:
    #179777
    Messages:
    5,814
    Gender:
    Male
    First Name:
    greg
    winter park florida
    Vehicle:
    2016 sr5 DCSB v6 blue
    de-badge and tint,tri-fold tonneau,rims and tires
    that is very impressive! great skills!
     
  12. Sep 16, 2016 at 6:05 AM
    #12
    Choops

    Choops [OP] Well-Known Member

    Joined:
    Oct 11, 2015
    Member:
    #166368
    Messages:
    157
    Gender:
    Male
    Twin Cities
    Vehicle:
    2017 DCLB TRD Sport
    Moving at a snail's pace. I bought a scrap piece of matte black laminate from a local supplier to use for the amp rack. Glued it up and trimmed it up with the router. I added a couple of grommets for wiring to pass through. I also sealed the inside of the enclosure with some undercoating.

    I need to notch out the front of the box to accommodate the center seatbelt and then I have a little more router work on the edges and then carpet this thing and get it in the truck.

    IMG_1632.jpg IMG_1634.jpg IMG_1635.jpg IMG_1638.jpg
     
  13. Sep 22, 2016 at 10:16 AM
    #13
    Choops

    Choops [OP] Well-Known Member

    Joined:
    Oct 11, 2015
    Member:
    #166368
    Messages:
    157
    Gender:
    Male
    Twin Cities
    Vehicle:
    2017 DCLB TRD Sport
    A final test fit before carpet revealed that the enclosure is a little closer to the seats than I would like. To alleviate, I decided to notch the box on the backside to clear the metal tabs along the bottom of the back wall. The wife wasn't home so I grabbed a nice shade of lipstick from a bin that had hundreds so hopefully she doesn't notice it missing...lol. I marked the back wall and then put the box in to get the location of the tabs. I used the router to carve out 3/8" of material and the box sits a little tighter now, I gained a little less than 1/4" total.

    IMG_1651.jpg

    IMG_1650.jpg

    IMG_1649.jpg

    Next up is to rabbit the speaker opening to get the sub to sit flush with the face of the box. I already made the template, I just ran out of time. I'm off to Vegas for the weekend so I won't get a chance to work on it until mid next week.
     
    93jeepman, hirod and Greenbean like this.
  14. Sep 22, 2016 at 7:24 PM
    #14
    Jalos2004

    Jalos2004 Well-Known Member

    Joined:
    Oct 27, 2015
    Member:
    #167870
    Messages:
    76
    Gender:
    Male
    First Name:
    Juan
    Vehicle:
    2016 tacoma sr5
    How much was the box and how is it was it to build
     
  15. Sep 24, 2016 at 8:53 AM
    #15
    Choops

    Choops [OP] Well-Known Member

    Joined:
    Oct 11, 2015
    Member:
    #166368
    Messages:
    157
    Gender:
    Male
    Twin Cities
    Vehicle:
    2017 DCLB TRD Sport
    $29 for a sheet of MDF at lowes. If you have access to a table saw, it's not tough at all.
     
  16. Sep 24, 2016 at 9:23 AM
    #16
    Jalos2004

    Jalos2004 Well-Known Member

    Joined:
    Oct 27, 2015
    Member:
    #167870
    Messages:
    76
    Gender:
    Male
    First Name:
    Juan
    Vehicle:
    2016 tacoma sr5
    Not bad i always wanted to do my own box
     
  17. Sep 26, 2016 at 2:33 PM
    #17
    hirod

    hirod Well-Known Member

    Joined:
    Jun 3, 2013
    Member:
    #105540
    Messages:
    1,245
    Gender:
    Male
    hawaii
    Vehicle:
    16 double cab short bed OR
    I never thought about the lipstick idea to transfer marks before. Good idea.
     
  18. Sep 27, 2016 at 9:24 PM
    #18
    Choops

    Choops [OP] Well-Known Member

    Joined:
    Oct 11, 2015
    Member:
    #166368
    Messages:
    157
    Gender:
    Male
    Twin Cities
    Vehicle:
    2017 DCLB TRD Sport
    So back on track this afternoon. I broke out the router again and rabbit bit. In order to gain a little more space between the sub and the rear seat, I used the rabbit bit and a template to flush the sub into the face of the box.

    IMG_1680.jpg

    When doing this after the sub box is built, you really need beef up the mounting points where you screw the sub to the box. As you can see there is only about a quarter inch of wood for the screw to bite which in my opinion, isn't enough. To correct this, I cut some blocks of wood to place behind the mounting points, drilled some holes to line up with the existing mounting holes, and glued them in place.

    IMG_1693.jpg
    IMG_1696.jpg
    IMG_1697.jpg

    I also put a round over bit in the router and went at all the edges on the box. This small detail goes a long way in making the box look better and applying the carpet a little easier in my opinion.

    IMG_1681.jpg
    IMG_1688.jpg
    IMG_1687.jpg
    IMG_1686.jpg
     
    93jeepman and jkirkpatrick like this.
  19. Sep 27, 2016 at 9:44 PM
    #19
    Choops

    Choops [OP] Well-Known Member

    Joined:
    Oct 11, 2015
    Member:
    #166368
    Messages:
    157
    Gender:
    Male
    Twin Cities
    Vehicle:
    2017 DCLB TRD Sport
    From there I started to finish the amp rack. As mentioned, I used a matte black laminate for the face of the rack. I also chose to use the laminate on the bottom to make it easier to vacuum up the hair from my dog who rides in the backseat. For the sides, I used black acoustic carpet which is what the rest of the box will be covered in.

    IMG_1703.jpg

    IMG_1701.jpg

    And with the face board installed.

    IMG_1705.jpg

    With the board removed, you'll notice I created channels to help with the wire routing but also to give a firm foundation to mount the 22lb amp. These channels are on the far right and left and painted in black so that with the face board in place, you won't notice the wood thru the grommets for the wiring. I also paint any seam/joint or corner so the when it comes time to carpet or glue laminate down, you won't see or notice the wood behind it.

    IMG_1640.jpg

    Where the wires come through.

    IMG_1689.jpg

    And I decided to install a blue led strip because... why not!

    IMG_1706.jpg

    And the finished product, minus the gear, trimmed out in black carpet.

    IMG_1707.jpg

    IMG_1708.jpg

    IMG_1709.jpg

    IMG_1710.jpg

    More tomorrow...
     
  20. Sep 28, 2016 at 3:31 PM
    #20
    Choops

    Choops [OP] Well-Known Member

    Joined:
    Oct 11, 2015
    Member:
    #166368
    Messages:
    157
    Gender:
    Male
    Twin Cities
    Vehicle:
    2017 DCLB TRD Sport
    Spent some time this afternoon and got it in the truck. It's a very snug fit but I decided to secure it anyway. I ran three #14 screws through the box into the channel that runs across the back wall of the truck. If you do this, be very careful when picking your screws. Too long and you'll go through the back wall.

    IMG_1715.jpg

    IMG_1717.jpg

    IMG_1719.jpg

    And here you get a good look at the sub sitting flush with the face of the box.

    IMG_1718.jpg

    Now to finish the wiring under the rear seat, hopefully Monday.
     

Products Discussed in

To Top