

-
Welcome to Tacoma World!
You are currently viewing as a guest! To get full-access, you need to register for a FREE account.
As a registered member, you’ll be able to:- Participate in all Tacoma discussion topics
- Communicate privately with other Tacoma owners from around the world
- Post your own photos in our Members Gallery
- Access all special features of the site
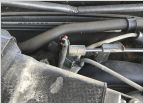 Could you please identify this connector?
 Gear oil
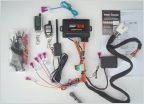 Has anybody installed their own remote start / security system? Looking at the Viper 5806v.
 Considering buying a complete rubber hose kit for my 2015...
 Heat shield
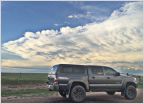 Camper shell extensions for camping
Polyurethane Radiator Support Mounts (Cab Also)
Discussion in '2nd Gen. Tacomas (2005-2015)' started by 12TRDTacoma, Feb 1, 2015.
Page 48 of 79
Page 48 of 79
Products Discussed in


