

-
Welcome to Tacoma World!
You are currently viewing as a guest! To get full-access, you need to register for a FREE account.
As a registered member, you’ll be able to:- Participate in all Tacoma discussion topics
- Communicate privately with other Tacoma owners from around the world
- Post your own photos in our Members Gallery
- Access all special features of the site
 Owner's Manual Pouch?
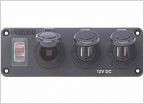 In bed electronics, canopy lights/usb charge ports
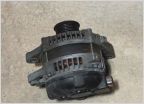 Alternator for 2006 Tacoma Burning Out
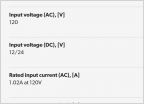 I need help determing gauge wire and fuse size
 Vibration at 30-40 mph
Calling All Wiring Gurus (Driving Lights Installation Help)
Discussion in 'Technical Chat' started by Rooty, Jan 26, 2010.


