1. Welcome to Tacoma World!

    You are currently viewing as a guest! To get full-access, you need to register for a FREE account.

    As a registered member, you’ll be able to:
    • Participate in all Tacoma discussion topics
    • Communicate privately with other Tacoma owners from around the world
    • Post your own photos in our Members Gallery
    • Access all special features of the site

Warrior Products Sideplate, Removable Installation

Discussion in '2nd Gen. Tacomas (2005-2015)' started by C7mb, Nov 26, 2016.

  1. Nov 26, 2016 at 7:17 PM
    #1
    C7mb

    C7mb [OP] Well-Known Member

    Joined:
    Feb 13, 2016
    Member:
    #178110
    Messages:
    145
    Gender:
    Male
    First Name:
    Chris
    Vehicle:
    Black 2010 DCSB TRD Off Road
    I figured I would post a quick write up on how I installed my WP sideplates, since I could not find any similar threads.

    The original installation method called for the use of rivets (included with the kit), however I wanted a non-permanent solution so that I could remove the plates. This required the use of "nutserts" which essentially are threaded rivets. The nutserts that I used are threaded for M5x0.8, which is the size of the original holes in the plates (so you dont have to drill them out). You could use something bigger if you wanted, but I figured that the original hole size was adequate.

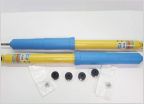
    Below are the tools and parts that are required. I have included Amazon links to all of the items that I purchased, however you can substitute parts as long as you make sure that the bolts, nutserts and nutsert tool mandrels match up.

    Tools:
    -Sharpie/Paint Marker
    -Tape
    -Measuring Tape (a cloth tape measure is recommended)
    -Chalk Line/Straight Edge
    -Drill
    -5/16 Drill Bit (a step drill bit is recommended)
    -Nutsert Tool. MUST INCLUDE M5 MANDREL! (Amazon Link)
    -Silicon Sealant
    -Loctite Threadlocker (blue)
    -1/8 Hex Driver (if you purchased the bolts listed below)

    Parts:
    -Warrior Products Side Plate Kit (duh)
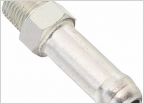
    -M5 Nutserts (Amazon Link)
    -M5 x 12mm Bolts (Amazon Link)

    Step 1:
    Gather all of the required materials and begin prepping the doors and plates. I used a 50/50 mix of denatured alcohol and distilled water to wipe down the doors and the plates. Once everything has been wiped down, separate out the plates so that you know where each one goes.

    Step 2:
    Starting with the drivers side front door, measure 7" up from the forward most bottom edge of the door and make a mark with a Sharpie or paint marker. This mark will serve as the forward reference point for your chalk line.

    Step 3:
    Next, mark the rear reference point by measuring 7" up from the rear most bottom edge of the rear door. Make sure that the measurement is taken from the flat portion of the door edge and not the section that curves upwards near the corner.

    Step 4:
    Using your front and rear reference points, snap a chalk line across the side of the door(s). This will give you a straight line to set your plates on, thus ensuring both plates are in-line with each other.

    20161125_115836_zpsl8396qmz_a1748bf52cf8240c2806a4fc7d5cc3135bff74c4.jpg

    Step 4:
    Attach two pieces of tape to the drivers side front plate and tape the plate to the door, so that the top edge of the plate lines up with the chalk line. Adjust the plate horizontally so that the right edge of the plate is about 1/8" from the edge of the door.

    20161125_120123_zpsewgbhtcm_68218d4c2dfd60c4ca28f6c7383319ac1b2757d6.jpg

    Step 5:
    While holding the plate against the door, double check the fit and alignment of the plate; adjust as necessary. After you are satisfied with the mock-up location, grab your marker and mark the six drilling locations where the nutserts will be inserted.

    Step 6:
    Remove the plate from the door and grab your drill. Drill the six mounting holes and double check that the holes align with the holes in the plate. If everything checks out, you can begin inserting the nutserts.

    20161125_120901_zpsisjqdkcy_28820e5d490b903721bbf17b507f25b0e6c90550.jpg

    Step 7:
    Set up your nutsert tool (read the directions!) and start by threading a nutsert onto the mandrel, and complete a test compression OUTSIDE OF THE DOOR. This will both show you how the tool works and will also make sure that the compression is set correctly. If the compression is too high, the threads of the nutsert can strip out rendering it useless.

    Step 8:
    After you have completed a compression test, thread on another nutsert and coat it with a thin layer of silicon (this will prevent future rust problems by sealing the nutsert to the door itself). Insert the silicon coated nutsert into the first hole and apply light downward pressure to keep the nutsert against the bottom edge of the pilot hole. Gently compress the tool while making sure that the mandrel face stays parallel with the door, thus preventing tear out and bending of the door sheet metal.

    20161125_121515_zpshhvmjg5t_bf1699f736a82ceefdc2b1520ae774a8a53af42d.jpg

    Continue working your way around the door until all six nutserts have been inserted. Wipe off access silicon as necessary.

    Step 9:
    With all of the nutserts installed, grab a bolt and hand screw the plate to the door through the top center mounting hole. Make sure that all of the nutserts line up with the mounting holes in the plate. If some are slightly off, you can widen the holes in the plates to compensate.

    Step 10:
    With everything lined up, remove the temporary bolt and wipe off all of the chalk. Apply a drop of thread locker to each bolt and start bolting the plate to the door.

    20161125_122955_zpsabicohs5_e51d2a99bf0593a286386c29fb9890acc65035fa.jpg

    Step 11:
    Congratulations, you should now have one completed door! Repeat steps 4-10 for the drivers side rear door and steps 2-10 for the passenger side.

    20161125_123441_zpsxkxiywov_ca558c71cb0d220b74fc9715eb92bce719160ccf.jpg
    20161125_145741_zpsp7mfylnp_e2662d4424ee92bcb5c5691554fa90a4bb247119.jpg
     
    TacoPretzel89 likes this.
  2. Nov 26, 2016 at 7:23 PM
    #2
    ChemDawg

    ChemDawg Well-Known Member

    Joined:
    May 15, 2015
    Member:
    #155296
    Messages:
    2,456
    Gender:
    Male
    Maine
    Vehicle:
    2005 sr5 4x4
    Not my thing.. but i can appreciate the balls it took to drill into your door!!:eek:
     
    1Shifter likes this.
  3. Nov 26, 2016 at 7:30 PM
    #3
    C7mb

    C7mb [OP] Well-Known Member

    Joined:
    Feb 13, 2016
    Member:
    #178110
    Messages:
    145
    Gender:
    Male
    First Name:
    Chris
    Vehicle:
    Black 2010 DCSB TRD Off Road
    Haha thanks. Yeah I didnt want to drill into the door either but the double sided tape that I originally used wasnt cutting it.
     
  4. Nov 26, 2016 at 7:56 PM
    #4
    Toy4me

    Toy4me Well-Known Member

    Joined:
    Aug 19, 2012
    Member:
    #85061
    Messages:
    3,735
    Gender:
    Male
    First Name:
    Tom
    NNJ
    Vehicle:
    '10 DCLB TRD Sport MGM
    Thread title is kinda misleading. You might be able to remove the panels, but that's a pretty permanent mod.
     
  5. Nov 26, 2016 at 7:59 PM
    #5
    nd4spdbh

    nd4spdbh Well-Known Member

    Joined:
    Oct 7, 2013
    Member:
    #114055
    Messages:
    13,879
    Gender:
    Male
    SoCal
    Vehicle:
    13 DCSB TRD OR v6 Auto
    drilling your doors! you crazy bastard!

    Would of rather seen a proper set of sliders with filler panel to avoid rock chips in the rocker panels than drilling into the doors.
     
    Pigpen likes this.
  6. Nov 26, 2016 at 8:33 PM
    #6
    C7mb

    C7mb [OP] Well-Known Member

    Joined:
    Feb 13, 2016
    Member:
    #178110
    Messages:
    145
    Gender:
    Male
    First Name:
    Chris
    Vehicle:
    Black 2010 DCSB TRD Off Road
    Thanks for the feedback, switched it to "removable."

    Sliders are on the way! I bought these to protect the doors against door dings and so that I can close the doors with my feet when my hands are full.
     
  7. Nov 27, 2016 at 12:09 AM
    #7
    TacoPretzel89

    TacoPretzel89 Well-Known Member

    Joined:
    Aug 26, 2016
    Member:
    #195624
    Messages:
    531
    Gender:
    Male
    Vehicle:
    '07 Tacoma
    How much were these? Got a far away pic? In your pics it seems like it doesn't even go all the way to the fender flares?
     
  8. Dec 3, 2016 at 2:44 PM
    #8
    C7mb

    C7mb [OP] Well-Known Member

    Joined:
    Feb 13, 2016
    Member:
    #178110
    Messages:
    145
    Gender:
    Male
    First Name:
    Chris
    Vehicle:
    Black 2010 DCSB TRD Off Road
    The plates were $110. I can grab a picture for you but you are correct, they do not go all the way to the fender. This is due to the curvature of the door, which would require additional forming techniques in order to fit perfectly.
     

Products Discussed in

To Top