

-
Welcome to Tacoma World!
You are currently viewing as a guest! To get full-access, you need to register for a FREE account.
As a registered member, you’ll be able to:- Participate in all Tacoma discussion topics
- Communicate privately with other Tacoma owners from around the world
- Post your own photos in our Members Gallery
- Access all special features of the site
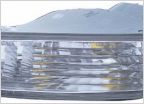 Fog Light/ Blinker Swap melting housing
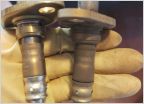 Wrong O2 sensor?
 1996 TACO Needs Tail light assembly
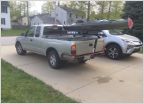 T slot roof rails?
 Heads up Deal!!!
 Source for Rear Cable Adjusting Nut [SOLVED]
Crankshaft pulley bolt removal and the harmonic balancer
Discussion in '1st Gen. Tacomas (1995-2004)' started by tercel89, Nov 25, 2016.
Page 2 of 2
Page 2 of 2


