1. Welcome to Tacoma World!

    You are currently viewing as a guest! To get full-access, you need to register for a FREE account.

    As a registered member, you’ll be able to:
    • Participate in all Tacoma discussion topics
    • Communicate privately with other Tacoma owners from around the world
    • Post your own photos in our Members Gallery
    • Access all special features of the site

Help me get through the blasted firewall!

Discussion in 'Lighting' started by Caduceus, Jan 24, 2010.

  1. Jan 24, 2010 at 8:17 PM
    #1
    Caduceus

    Caduceus [OP] Well-Known Member

    Joined:
    Oct 6, 2009
    Member:
    #23889
    Messages:
    1,848
    Gender:
    Male
    in the Bluegrass
    Vehicle:
    09 DCSB TRD 4x4
    I'm trying to get the switch to my new aux. lights past the firewall but can't find a good spot.

    It's an 09 DC. Every wire bundle has a really nice gasket around it - I've tried the coat hanger but it's almost too thick to open it. I did manage to put a piece through, but came out through the rubber gasket on the other side, then the wire fell off as it tried to pass through.

    So any good spots to pass wiring through? I'm afraid if I push through a wire bundle I'm just going to start cutting through them with the relatively sharp coat hanger edge.

    Thanks
     
  2. Jan 24, 2010 at 8:22 PM
    #2
    BradleyScottETC

    BradleyScottETC Class IV Category 8 Elite VIP Member (Only)

    Joined:
    Aug 2, 2009
    Member:
    #20521
    Messages:
    1,749
    Gender:
    Male
    First Name:
    Bradley
    Lake County, FL
    Vehicle:
    10 4.0 AC 4x4
    The boot for the wiring harness on the drivers side- instead of going through the boot with the rest of the wires, go between the boot and the metal with your coathanger.
     
  3. Jan 24, 2010 at 8:33 PM
    #3
    S-M-R-T

    S-M-R-T Well-Known Member

    Joined:
    Feb 12, 2009
    Member:
    #13548
    Messages:
    121
    Gender:
    Male
    I don't recommend this as the wire will wear quicker and possibly short. If there is no room to force one more wire through any of the existing grommets then you can always buy some small grommets and drill your own hole.
     
    Tactical_Panda and HillJackJDS like this.
  4. Jan 24, 2010 at 8:34 PM
    #4
    Caduceus

    Caduceus [OP] Well-Known Member

    Joined:
    Oct 6, 2009
    Member:
    #23889
    Messages:
    1,848
    Gender:
    Male
    in the Bluegrass
    Vehicle:
    09 DCSB TRD 4x4
    I hate how easy you made that.

    I owe you a beer. That's been driving me nuts for 45 minutes.:cheers:
     
  5. Jan 24, 2010 at 8:35 PM
    #5
    Viet2100

    Viet2100 Well-Known Member

    Joined:
    Jun 27, 2007
    Member:
    #1930
    Messages:
    2,505
    Gender:
    Male
    First Name:
    Viet
    South Florida
    Vehicle:
    2016 Prius 4T
    What I do is carefully cut a slit in the boot. It acts kind of like... well, a vagina. Use a coat hanger (or antenna which I don't use) and use really good duct tape and tape the wire(s) to the coat hanger or antenna. It might take a few tries. I did this for my 4 AWG amp wire.
     
    paranoid56, VA SOFTACO and Stewzz like this.
  6. Jan 24, 2010 at 8:38 PM
    #6
    colinb17

    colinb17 If at first you don't succeed, don't try skydiving

    Joined:
    Jan 6, 2008
    Member:
    #4127
    Messages:
    19,186
    Gender:
    Male
    First Name:
    Colin
    Charleston, SC
    Vehicle:
    '07 TRD Sport 4x4
    Build thread in sig...
    i stuck a pair of needle nose pliers as far through the grommet as i could and then spread them appard....gave me enough room to fit a battery cable through if i wanted
     
    Hotrodroxie and Manfred like this.
  7. Jan 24, 2010 at 9:00 PM
    #7
    Veccster

    Veccster bass turds

    Joined:
    Aug 8, 2008
    Member:
    #8407
    Messages:
    2,181
    Gender:
    Male
    First Name:
    Eric
    Pittsburgh - The City of Champions
    Vehicle:
    2020 Pro
    I attached the wire to a coat hanger and slide it right through the boot. It made its own hole.

    Red wire for my bed lights. It goes to a switch in my console.
    IMG_6701_f9cee004aea349276b1efeaccf6ccbe0eb002759.jpg

    IMG_6706_0029af60aab49fb6bd10ba61da39e5065105562d.jpg
     
  8. Jan 24, 2010 at 9:10 PM
    #8
    brutalguyracing

    brutalguyracing BIG DADDY

    Joined:
    Jun 28, 2009
    Member:
    #19000
    Messages:
    24,052
    Gender:
    Male
    F.U> GUYZ
    broken mods
    you can use the extra black plugs on the driver side remove the rubber plug and drill a hole in the rubber plug and reinstall it then run your wire or wires through it...it lets u out right near the fuse panel area
    ill take some pics tomm...
     
  9. Jan 24, 2010 at 10:21 PM
    #9
    Caduceus

    Caduceus [OP] Well-Known Member

    Joined:
    Oct 6, 2009
    Member:
    #23889
    Messages:
    1,848
    Gender:
    Male
    in the Bluegrass
    Vehicle:
    09 DCSB TRD 4x4
    Thanks guys. I just ended up shoving the hanger through the boot, a la vagina method. Seems to work.

    Trying to get the last little bit done - connecting the power and headlights.

    Geez, you'd think it wouldn't take me 4 hours, huh?:(
     
  10. Jan 25, 2010 at 3:27 AM
    #10
    BradleyScottETC

    BradleyScottETC Class IV Category 8 Elite VIP Member (Only)

    Joined:
    Aug 2, 2009
    Member:
    #20521
    Messages:
    1,749
    Gender:
    Male
    First Name:
    Bradley
    Lake County, FL
    Vehicle:
    10 4.0 AC 4x4
    Wear from WHAT? They sit in their so tightly there is no way that vibrations are going to wear a hole in the insulation and short the wire, I don't agree with your theory.
     
  11. Jan 25, 2010 at 4:15 AM
    #11
    fibertop

    fibertop Well-Known Member

    Joined:
    Sep 17, 2009
    Member:
    #22912
    Messages:
    543
    Gender:
    Male
    First Name:
    roger
    Ontario, Wasaga beach
    Vehicle:
    2010 sport DC
    my boot has a nipple at the bottom that can see if feel around. cut the end off this nipple and use it as a conduit for your wire. I think thats why its there
     
    Hotrodroxie likes this.
  12. Feb 1, 2010 at 7:54 PM
    #12
    S-M-R-T

    S-M-R-T Well-Known Member

    Joined:
    Feb 12, 2009
    Member:
    #13548
    Messages:
    121
    Gender:
    Male
    No, different boot then I pictured. This way works fine. I thought that you meant between the outer edge of the boot and the metal of the firewall.
     
    HillJackJDS likes this.
  13. Feb 1, 2010 at 8:08 PM
    #13
    WATacoRider

    WATacoRider Well-Known Member

    Joined:
    Nov 24, 2009
    Member:
    #26479
    Messages:
    539
    Gender:
    Male
    Vehicle:
    TRD Sport 4x4
    Tip for next time. Use the tube body of a BIC pen.
     
  14. Feb 2, 2010 at 6:57 AM
    #14
    colinb17

    colinb17 If at first you don't succeed, don't try skydiving

    Joined:
    Jan 6, 2008
    Member:
    #4127
    Messages:
    19,186
    Gender:
    Male
    First Name:
    Colin
    Charleston, SC
    Vehicle:
    '07 TRD Sport 4x4
    Build thread in sig...

    aw man, great call, i'm doing that from now on:thumbsup:
     
  15. Feb 2, 2010 at 1:45 PM
    #15
    jward2331

    jward2331 Well-Known Member

    Joined:
    Dec 5, 2008
    Member:
    #11313
    Messages:
    541
    Gender:
    Male
    First Name:
    John
    Fleming Island, Fl
    Vehicle:
    '08 PreRunner SR5 TRD Sport
    Debadged, tinted windows, upper/lower Grillcraft (horns relocated), Hella 500's with HID Mod (55W 5000) behind grill, shorty antenna, WeatherTech side window deflectors, suspension TSB, Westin Signature Nerf bars, JVC KD A-615 Head Unit with Sirius Direct tuner, Blacked out headlights, DTDL Mod (Switch for on/off), Hard Wired GPS, NOKYA Arctic Hyper Yellow Fog lights, Fog lights on anytime Mod, Michelin LTX M/S2 (P265/65R17), Powder coated OEM wheels. LED ANZO tail lights, Weather Tech FloorLiners.
    Exactly what I did. Works perfect. I have to admit though, I stumbled across the nipple and figured that was what it was for.
     
  16. Mar 12, 2012 at 5:05 PM
    #16
    ETAV8R

    ETAV8R Out DERP'n

    Joined:
    Feb 20, 2008
    Member:
    #4832
    Messages:
    4,675
    Gender:
    Male
    Republik of Commiefornia
    Vehicle:
    MGM 09 AC 4WD V6 TRD-OR w/ Tradesman Shell
    Just the basics
    Solved my dilemma.
    Thank you!!!!

    Well I thought my problems were solved. Got through the little nipple fine with the coat hanger but every time I try to tape the connectors for the interior switch and pull them through they slide off the hanger. Driving me NUTS!
     
    Hotrodroxie likes this.
  17. Feb 28, 2014 at 4:55 PM
    #17
    ThomasMore66

    ThomasMore66 We can't stop here, this is bat country!

    Joined:
    Feb 9, 2013
    Member:
    #97155
    Messages:
    7,289
    Gender:
    Male
    Dallas/Fort Worth & Durango
    Vehicle:
    Supercharged 2013 TRD Offroad 4wd
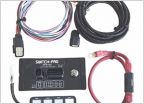
    TRD Supercharger, TRD exhaust, Leather seats, running boards removed (why it came with them I cannot imagine), Salex organizers, BAMF behind-the-grill light bar, Rigid SR-20 and SR-Q - Spots mounted behind stock grill, color-matched grill, WeatherTech FloorLiner DigitalFit floor mats, Tech Deck, Avid bolt-on slider/step converted to weld on by TW member Achirdo, Diaz Fabrication Model T, Icon Stage 4 with OME Dakar rear leaf springs, OME Driveshaft spacer, Toytec 1" Front Diff Drop, FN BFD 18"x9" GMG Wheels, BFG KO2 285-65-18 tires, Ultragauge mounted above mirror, Tuffy Box lockable storage, MattGecko rear window security bar, Relentless Fab tailgate protector, CSJumper 700 lumen flood pattern back-up LED's, modified BeeRadd under-hood lighting with two KC Cyclones; KB Voodoo cargo management system and standard rails, AllPro hi-lift jack mount, 48" hi-lift, RCI Metalworks aluminum front skid, Flyzeye 3VP-RS in glovebox and console, AFE CAI, Coupe fuse box cover, battery hold-down bracket and CAI air-box cover, Wurton pod led's installed as bed lights on Lowbrow Customs motorcycle fork brake line aluminum brackets, Pop-n-Lock PL5400, Extang Solidfold 2.0, Rechelon Retro's, Moromoto LED fogs, URD Y-pipe, Walbro 255lph fuel pump, Speedhut AFR and Boost gauges, Cravenspeed gauge holder, CMC by Tandem Automotive, 70mm throttle body, CSF radiator, Doug Thorley shorties, Vibrant 7101 cats, SOS Offroad front and rear bumpers, Smoothflow 2.5” SC pulley, Steeda SC belt tensioner, roostfactor belt wrap kit, switch Pro 9100 in custom Tandem Automotive holder, WAT trans valvebody, FIC 650cc injectors, HP Tuner.
    So, I'm having the same issue as some of these other folks. Yes, I searched through a bunch of threads. Maybe I'm a moron, but I've been trying the coat hanger method to pull my wire through on my 2013 and I just keep pulling the wires off. I have three wired with connectors (bought the harness for the LED light) that to to the switch. One wire would have pulled right through, but three with the connectors is a bit large. Other than cutting a little slit, can someone post a picture of how they solved this?
     
  18. Feb 28, 2014 at 5:17 PM
    #18
    ThomasMore66

    ThomasMore66 We can't stop here, this is bat country!

    Joined:
    Feb 9, 2013
    Member:
    #97155
    Messages:
    7,289
    Gender:
    Male
    Dallas/Fort Worth & Durango
    Vehicle:
    Supercharged 2013 TRD Offroad 4wd
    TRD Supercharger, TRD exhaust, Leather seats, running boards removed (why it came with them I cannot imagine), Salex organizers, BAMF behind-the-grill light bar, Rigid SR-20 and SR-Q - Spots mounted behind stock grill, color-matched grill, WeatherTech FloorLiner DigitalFit floor mats, Tech Deck, Avid bolt-on slider/step converted to weld on by TW member Achirdo, Diaz Fabrication Model T, Icon Stage 4 with OME Dakar rear leaf springs, OME Driveshaft spacer, Toytec 1" Front Diff Drop, FN BFD 18"x9" GMG Wheels, BFG KO2 285-65-18 tires, Ultragauge mounted above mirror, Tuffy Box lockable storage, MattGecko rear window security bar, Relentless Fab tailgate protector, CSJumper 700 lumen flood pattern back-up LED's, modified BeeRadd under-hood lighting with two KC Cyclones; KB Voodoo cargo management system and standard rails, AllPro hi-lift jack mount, 48" hi-lift, RCI Metalworks aluminum front skid, Flyzeye 3VP-RS in glovebox and console, AFE CAI, Coupe fuse box cover, battery hold-down bracket and CAI air-box cover, Wurton pod led's installed as bed lights on Lowbrow Customs motorcycle fork brake line aluminum brackets, Pop-n-Lock PL5400, Extang Solidfold 2.0, Rechelon Retro's, Moromoto LED fogs, URD Y-pipe, Walbro 255lph fuel pump, Speedhut AFR and Boost gauges, Cravenspeed gauge holder, CMC by Tandem Automotive, 70mm throttle body, CSF radiator, Doug Thorley shorties, Vibrant 7101 cats, SOS Offroad front and rear bumpers, Smoothflow 2.5” SC pulley, Steeda SC belt tensioner, roostfactor belt wrap kit, switch Pro 9100 in custom Tandem Automotive holder, WAT trans valvebody, FIC 650cc injectors, HP Tuner.
    I found the little nipple under the main wire loom opening! Somebody commented on not being able to see it and that's right. Boom! Tomorrow's project.
     
    Hotrodroxie likes this.
  19. Feb 28, 2014 at 5:59 PM
    #19
    ABA180

    ABA180 It burns when I pee....

    Joined:
    Oct 8, 2012
    Member:
    #88520
    Messages:
    22,663
    Gender:
    Male
    First Name:
    Chris
    East Bridgewater MA
    Vehicle:
    2010 Tacoma Regular Cab Slider
    Pioneer CD, Megaloud/JBL amps, Rockford/Polk speakers.
    Or just duct tape the wires to a screwdriver, that's how I did mine
     
  20. Jun 24, 2016 at 12:14 PM
    #20
    Dho2011

    Dho2011 New Member

    Joined:
    Jun 23, 2016
    Member:
    #190392
    Messages:
    2
    Gender:
    Female
    Can someone post a pic of this boot with a nipple? I can't seem to find it in my truck
     

Products Discussed in

To Top