1. Welcome to Tacoma World!

    You are currently viewing as a guest! To get full-access, you need to register for a FREE account.

    As a registered member, you’ll be able to:
    • Participate in all Tacoma discussion topics
    • Communicate privately with other Tacoma owners from around the world
    • Post your own photos in our Members Gallery
    • Access all special features of the site

Subway4X3 Shameless Copycat Build

Discussion in '2nd Gen. Builds (2005-2015)' started by Subway4X4, Nov 7, 2016.

  1. Dec 8, 2016 at 6:42 PM
    #101
    Nimble9

    Nimble9 visit squareonecreations.com Vendor

    Joined:
    Oct 20, 2015
    Member:
    #167184
    Messages:
    11,153
    Gender:
    Male
    Lebanon, PA
    Vehicle:
    2006 4x4 DCSB
    enough to have fun

    I need to measure a little more, but I'm not sure how much timberens compress
     
  2. Dec 8, 2016 at 6:43 PM
    #102
    Manual man74

    Manual man74 Well-Known Member

    Joined:
    Jun 13, 2015
    Member:
    #157349
    Messages:
    842
    Gender:
    Male
    First Name:
    Garrett
    Goshen NY
    Vehicle:
    2015 trd off road dcsb mt
    Just getting started
    I like this kind of shit. it's like a riddle or puzzle, once you figure it out, it's awesome. :headbang:
     
  3. Dec 8, 2016 at 6:44 PM
    #103
    Manual man74

    Manual man74 Well-Known Member

    Joined:
    Jun 13, 2015
    Member:
    #157349
    Messages:
    842
    Gender:
    Male
    First Name:
    Garrett
    Goshen NY
    Vehicle:
    2015 trd off road dcsb mt
    Just getting started
    I have the same bumps, but not for long. joining the super bump crew.
     
    Nimble9[QUOTED] likes this.
  4. Dec 8, 2016 at 7:18 PM
    #104
    Subway4X4

    Subway4X4 [OP] Shameless Copy Cat

    Joined:
    Nov 10, 2015
    Member:
    #169260
    Messages:
    11,652
    Gender:
    Male
    First Name:
    Lloyd
    NY/NJ
    Vehicle:
    05 Speedway Blue DCSB OR TRD
    Everything TW members recommend
    This? I'll do it this weekend.
    IMGP6664.jpg

    I'll also do this weekend. It's gonna have to be the passenger side, because the drivers side still has my rigged up limiting strap. I haven't broken loose my brake lines yet for extended lines.

    I might have to go this route because it's just causing Tim and Steve @Wheelspinner major brain hurt.

    I have same Ubolt flip and SuperBumps + half an inch spacer EDIT: NO SPACER

    . So I'm good and actually ahead of the game here.

    Me too. It's a riddle that I've been trying to solve for a couple months now.
    I've had the Archive shackle flip kit still in the same ship box since summer. Need to solve the riddle before install. Or sell it.
     
    Last edited: Dec 8, 2016
  5. Dec 8, 2016 at 7:21 PM
    #105
    stairgod

    stairgod NOOB

    Joined:
    Aug 16, 2015
    Member:
    #161924
    Messages:
    7,965
    Gender:
    Male
    First Name:
    Jo n
    PA/NJ
    Vehicle:
    2011 MGM Trail Limo
    Locked Boosted 35s
    Exactly. Then I can compare with my numbers.

    Also, if you have shcok travel left at full bump, why do you have a half inch spacer on your bumps?
     
    Subway4X4[QUOTED][OP] likes this.
  6. Dec 8, 2016 at 7:23 PM
    #106
    Subway4X4

    Subway4X4 [OP] Shameless Copy Cat

    Joined:
    Nov 10, 2015
    Member:
    #169260
    Messages:
    11,652
    Gender:
    Male
    First Name:
    Lloyd
    NY/NJ
    Vehicle:
    05 Speedway Blue DCSB OR TRD
    Everything TW members recommend
    I'm gonna have search for this. Give me time.
    It was a straight six. He bought it brand spanking new when he retired from the US Navy as a gift to himself. It was his baby.
     
  7. Dec 8, 2016 at 7:29 PM
    #107
    Boogyman

    Boogyman Well-Known Member

    Joined:
    Aug 17, 2012
    Member:
    #84975
    Messages:
    13,320
    Gender:
    Male
    First Name:
    Phoenix
    Corpus Christi, TX
    Vehicle:
    2022 Lunar Rock Trail Edition
    I've got one myself. Check my build. You NEVER see them anymore. Such great trucks. What color? One or 3 piece grill?
     
    Subway4X4[QUOTED][OP] likes this.
  8. Dec 8, 2016 at 7:47 PM
    #108
    Subway4X4

    Subway4X4 [OP] Shameless Copy Cat

    Joined:
    Nov 10, 2015
    Member:
    #169260
    Messages:
    11,652
    Gender:
    Male
    First Name:
    Lloyd
    NY/NJ
    Vehicle:
    05 Speedway Blue DCSB OR TRD
    Everything TW members recommend
    I double checked. I DON'T have a have a half inch spacer added to the bumps. (I'll edit my post)
    I used this as my guide for rear bumpstop height.
     
    stairgod[QUOTED] and Nimble9 like this.
  9. Dec 10, 2016 at 7:26 PM
    #109
    Subway4X4

    Subway4X4 [OP] Shameless Copy Cat

    Joined:
    Nov 10, 2015
    Member:
    #169260
    Messages:
    11,652
    Gender:
    Male
    First Name:
    Lloyd
    NY/NJ
    Vehicle:
    05 Speedway Blue DCSB OR TRD
    Everything TW members recommend
    Sna- Do you know why the OME 886's won't work with these?
    Are there peeps that have actually used the 700# Eibach's with plate bumpers/winch.
    I just want to verify stuff before I go ahead and order.
    Thanks.
     
  10. Dec 10, 2016 at 7:31 PM
    #110
    Sna

    Sna Well-Known Member

    Joined:
    Mar 21, 2015
    Member:
    #151425
    Messages:
    1,395
    Gender:
    Male
    Alberta
    Vehicle:
    ‘15 trd sport 6MT dcsb, mostly stock?
    I can't remember specifically....not fitting around the shock or length maybe??

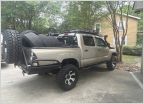
    @Dajeepman has these on his truck. Here is a pic of his truck with the 700# Eibach springs.
     
  11. Dec 13, 2016 at 8:20 PM
    #111
    Subway4X4

    Subway4X4 [OP] Shameless Copy Cat

    Joined:
    Nov 10, 2015
    Member:
    #169260
    Messages:
    11,652
    Gender:
    Male
    First Name:
    Lloyd
    NY/NJ
    Vehicle:
    05 Speedway Blue DCSB OR TRD
    Everything TW members recommend
    Jigsaw puzzle has arrived.
    I might have to do this in the spring. Temps too cold for me.

    Pallet fit just between the wheel wells, with an inch to spare.
    IMG_0867.jpg

    Front Plate Bumper with standard winch mount, full hoops and dual pair LED Pod cut-outs and custom 2" receiver. Rear HC Plate Bumper with single pair LED Pod cut-outs, Tire Swing-out, Dual Can Fuel Carrier, Fold down table
    IMG_0872.jpg


    Small parts and hardware. Photographed and Inventoried.

    I'll try to document the installation.
    Feel free to identify the lettered parts and provide installation tips or tricks, cautionary input, etc.

    IMG_0880.jpg
     
    bski22 and Nimble9 like this.
  12. Dec 13, 2016 at 9:16 PM
    #112
    HolyHandGrenade

    HolyHandGrenade NOOB

    Joined:
    Mar 25, 2013
    Member:
    #100579
    Messages:
    11,800
    Gender:
    Male
    First Name:
    Tim
    Garage Most Likely
    Vehicle:
    DCFB (RIP)
    Some Stuff
    A: bed side side supports. Replace the ones you cut off when you do the bed sides. One side bolts to factory bracket holes. Other end clamps to bed sides.

    L: front bumper frame braces.

    C&D: front frame plates. Strengthen frame where the bolts go through.

    M: self explanatory.

    I don't have any of the other pieces.

    I: looks like a bearing cap.

    J: Spring latch for the swingout?

    K: Cable to support table when it's folded down?
     
    bski22 and Subway4X4[QUOTED][OP] like this.
  13. Dec 13, 2016 at 11:54 PM
    #113
    stairgod

    stairgod NOOB

    Joined:
    Aug 16, 2015
    Member:
    #161924
    Messages:
    7,965
    Gender:
    Male
    First Name:
    Jo n
    PA/NJ
    Vehicle:
    2011 MGM Trail Limo
    Locked Boosted 35s
    L is not needed. Send to Stairgod for repurposing.
     
  14. Dec 14, 2016 at 12:27 AM
    #114
    fatfurious2

    fatfurious2 IG: great_white_taco

    Joined:
    Jun 28, 2014
    Member:
    #132884
    Messages:
    49,631
    Gender:
    Male
    First Name:
    David
    Ashburn, VA
    Vehicle:
    2010 TRD OR Access Cab
    Those timken bearings are for the swingout. This is the order from the bottom to the top:


    Then "I" gets rubber malleted into the top of the swingout
    Tapered bearing
    Swingout
    Tapered bearing
    Seal
    Start reading from here, and go up
     
    bski22 and Subway4X4[OP] like this.
  15. Dec 14, 2016 at 4:51 AM
    #115
    Subway4X4

    Subway4X4 [OP] Shameless Copy Cat

    Joined:
    Nov 10, 2015
    Member:
    #169260
    Messages:
    11,652
    Gender:
    Male
    First Name:
    Lloyd
    NY/NJ
    Vehicle:
    05 Speedway Blue DCSB OR TRD
    Everything TW members recommend
    Good stuff guys. Keep the input coming!
    @bski22 @Crom
     
    fatfurious2[QUOTED] and bski22 like this.
  16. Dec 14, 2016 at 4:51 AM
    #116
    Subway4X4

    Subway4X4 [OP] Shameless Copy Cat

    Joined:
    Nov 10, 2015
    Member:
    #169260
    Messages:
    11,652
    Gender:
    Male
    First Name:
    Lloyd
    NY/NJ
    Vehicle:
    05 Speedway Blue DCSB OR TRD
    Everything TW members recommend
    Best one yet. Less work for me :)
     
    fatfurious2 and bski22 like this.
  17. Dec 14, 2016 at 5:58 AM
    #117
    bski22

    bski22 Shaka Zulu \000/

    Joined:
    Feb 14, 2016
    Member:
    #178123
    Messages:
    6,775
    First Name:
    Rob
    Vehicle:
    Toyota
    Whoa you spaced each leaf?
    I thought just between the 1st and 2nd leaf was the problem. Let me know. I have extras if I have to I'll do them all.
     
    Last edited: Dec 14, 2016
    Subway4X4[QUOTED][OP] likes this.
  18. Dec 14, 2016 at 8:21 AM
    #118
    Crom

    Crom Super-Deluxe Member

    Joined:
    Jun 22, 2009
    Member:
    #18782
    Messages:
    9,634
    Gender:
    Male
    First Name:
    Nick
    San Diego, CA
    Vehicle:
    2009 4x4 DCSB Camp Supreme
    Millions
    For spindle component assembly do this:

    Insert greasy bearing into bottom of gate (cage) taper side up,
    Then tap seal in, Rubber seal with long rubber part down,
    then hang gate on bumper spindle.
    Then install second greasy bearing with taper side down,
    washer,
    nut, You'll need a 1-7/16" socket. Tighten, so gate opens with slight resistance.
    screw aluminum cage lid on by hand, it's threaded, do not use a rubber mallet to hit as someone else suggested.

    Visual representation of what it looks like with seal and first bearing.
    [​IMG]
     
    HolyHandGrenade likes this.
  19. Dec 14, 2016 at 8:42 AM
    #119
    fatfurious2

    fatfurious2 IG: great_white_taco

    Joined:
    Jun 28, 2014
    Member:
    #132884
    Messages:
    49,631
    Gender:
    Male
    First Name:
    David
    Ashburn, VA
    Vehicle:
    2010 TRD OR Access Cab
    @Crom my lid was not threaded
     
    Crom likes this.
  20. Dec 14, 2016 at 8:47 AM
    #120
    Subway4X4

    Subway4X4 [OP] Shameless Copy Cat

    Joined:
    Nov 10, 2015
    Member:
    #169260
    Messages:
    11,652
    Gender:
    Male
    First Name:
    Lloyd
    NY/NJ
    Vehicle:
    05 Speedway Blue DCSB OR TRD
    Everything TW members recommend
    Nice!!!
     

Products Discussed in

To Top