

-
Welcome to Tacoma World!
You are currently viewing as a guest! To get full-access, you need to register for a FREE account.
As a registered member, you’ll be able to:- Participate in all Tacoma discussion topics
- Communicate privately with other Tacoma owners from around the world
- Post your own photos in our Members Gallery
- Access all special features of the site
 Rear View Camera
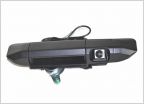
 2015 Backup Camera 86790-04021
 Rusted bumper reinforcement
 What else is new....Tires and lift question
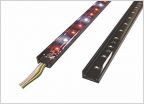 Rear LED Amber light strip for turn signals
 Phone Holder
my cap lights install.
Discussion in '2nd Gen. Tacomas (2005-2015)' started by df001, Jan 20, 2017.
