1. Welcome to Tacoma World!

    You are currently viewing as a guest! To get full-access, you need to register for a FREE account.

    As a registered member, you’ll be able to:
    • Participate in all Tacoma discussion topics
    • Communicate privately with other Tacoma owners from around the world
    • Post your own photos in our Members Gallery
    • Access all special features of the site

Going Broke the Fun Way

Discussion in '2nd Gen. Builds (2005-2015)' started by Tralen, Apr 5, 2017.

  1. Apr 5, 2017 at 2:36 PM
    #1
    Tralen

    Tralen [OP] Member

    Joined:
    Apr 5, 2017
    Member:
    #215443
    Messages:
    18
    Gender:
    Male
    First Name:
    David
    Opelika, Alabama
    Vehicle:
    2013 Tacoma TRD Off Road
    Im not quite sure how to start this build thread because this build has lasted two trucks. I traded in my 2006 tacoma trd off road for a 2013. Same color, same everything and I swapped most of the stuff over to the new truck. Most people never realize the truck I have today is not the same truck I had 6 months ago. This is where I will start. I originally started building up my 2006 for looks. It was a prerunner so it was 2wd. I put a 4" zone spacer lift on it with 285 bfg ko2's and I put the leer cap on it. The lift was terrible and it rode like a school bus. I knew nothing about lifts and I went with what was cheapest. Screen Shot 2017-04-05 at 3.03.54 PM.jpg
    I slowly started adding other things to it (for looks) and it turned into a fairly nice looking truck. I added a grillcraft mesh grill with a rigid radiance 20" lightbar behind it. I mounted the light bar with a BAMF mount. I also changed out the aged headlights and fog lights. Screen Shot 2017-04-05 at 3.04.31 PM.jpgScreen Shot 2017-04-05 at 3.04.43 PM.jpg
    When I got the cap I realized it was near impossible to see behind me at night so I got Rigid SR-Q flush mount backup lights. These things are extremely nice. Screen Shot 2017-04-05 at 3.04.16 PM.jpg
    Around this time I went on a camping trip and saw and old friend there (dcoursler). Most of the guys there were into overlanding and off roading. Seeing their rigs is what hooked me. This is where my knowledge of building up trucks and their capabilites grew immensely. DCOURSLER helped me out a lot. Ive always been able to design and build almost anything but he helped me break into the world of trucks and overlanding. I was invited to Overland Expo east so I started making rush preparations to build my truck up a bit more. I started with ordering a prinsu rack for my cap. Screen Shot 2017-04-05 at 3.05.46 PM.jpg
    I think it was this forum that I saw a picture of a prinsu rack with orange painted washers. I stole that idea and painted mine red. Whoever came up with that idea....genius. It looks great.
    Screen Shot 2017-04-05 at 3.06.00 PM.jpg
    Next I realized I needed to build some type of drawer system for the bed of my truck. I had been sleeping on my sofa cushions in the back and all of my stuff piled around me. Im an organization freak so that wouldnt do. I worked on a design and I ordered all of the material needed. I bought a queen size 4" memory foam mattress and cut it to fit.
    Screen Shot 2017-04-05 at 3.05.21 PM.jpgScreen Shot 2017-04-05 at 3.05.34 PM.jpg
    I wanted it to become a functional part of my truck so I decided to run power through it also.
    IMG_1406.jpg
    Next I bought 60" light strips and modified them to fit inside the cap and on the glass gate. There is one along the edge of the glass gate and one on each side running along the length of the windows. I added a dimmer to the lights so I can set them to a comfortable brightness. Theyre capable of turning darkness into day when theyre all the way up. All the way down and they offer a nice night light. I dont have a very good pictures of the lights at the moment. Ill have to add them later.
    Screen Shot 2017-04-05 at 3.07.09 PM.jpgScreen Shot 2017-04-05 at 3.32.27 PM.jpg
    When I got to Overland Expo East I went broke. I went crazy buying stuff. I ended up with 55" and 79" CVT awnings and I also bought the rooms that attach to them. Along with those I bought a CVT shower. Screen Shot 2017-04-05 at 3.06.27 PM.jpg
    This picture has an Eno rainfly attached between the two awnings.
    Screen Shot 2017-04-05 at 3.06.49 PM.jpg
    That brings me to the trade-in. My truck was not 4wd so I was thinking of SAS'ing my truck. After considering finances, I asked my friends to look out for a truck that matches mine that is 4wd and later model. DCOUSLER texted me a link to a 2013, 4wd, same color and trd off road. I drove 7 hours to go pick it up. After spending forever taking everything off of my old truck I realized the spindles on the zone lift wouldnt let me put the factory wheels back on it. I had to leave the wheels and tires on it. I was pissed. Screen Shot 2017-04-05 at 3.07.20 PM.jpg
    I got a truck that is 7 years newer and 150,000 less miles on it.
    First thing I did was add most of the stuff I took off of the old truck. Next was a Toytec 1" body lift. Then came 3" lift, tires and wheels. This is where DCOURSLER stepped up and started really showing me the ropes. Im not a mechanic but I catch on fast. He brought me up to his house and we had a wrench party. I went with OME springs on front and rear. I sprayed the black coils red just because Im a fan of red. Its the only red OME coils ive ever seen. We also added Icon upper control arms.
    Screen Shot 2017-04-05 at 3.41.29 PM.jpg
    I went with Dakar rear leafs with an add-a-leaf and timbren bump stops. BTW, the timbren bump stops are a dream. Not cheap but money well spent.
    Screen Shot 2017-04-05 at 3.41.49 PM.jpg
    The shocks were changed out to bilsteins.
    I ordered Toyo M/T 285's and a set of Raceline wheels.
    Screen Shot 2017-04-05 at 3.42.14 PM.jpg
    The wheels looked ok but I wanted them to be a little different so I sprayed them. I couldnt be more happy with them.
    Screen Shot 2017-04-05 at 3.42.28 PM.jpg Screen Shot 2017-04-05 at 3.42.38 PM.jpg Screen Shot 2017-04-05 at 3.49.11 PM.jpg
    Next I ordered a set of All Pro Off Road Rock Sliders. I got them in bare metal and sprayed them myself.
    Screen Shot 2017-04-05 at 3.50.50 PM.jpg Screen Shot 2017-04-05 at 3.51.01 PM.jpg Screen Shot 2017-04-05 at 3.51.13 PM.jpg
    I had plans of doing a lot of wiring work under the hood so my first project under the hood was to add under-hood lighting. I used the same light strips that I used in the cap and I added a switch.
    Screen Shot 2017-04-05 at 3.52.32 PM.jpg
    At this point I had multiple small projects going. I was building up the components for my dual battery system and I was trying to figure out the best way to add switches inside the cockpit without it looking bad. What I came up with was adding a switch panel in the upper console to replace on of the sunglasses holders. I build kydex things for a living so I built it out of kydex and I fiberglassed the joints.
    Screen Shot 2017-04-05 at 3.56.58 PM.jpg
    Screen Shot 2017-04-05 at 3.57.11 PM.jpg
    Next up, Dual Battery System.
    I used the battery trays from Off Grid Engineering. They came as bare aluminum but I decided to spray them. If you havent noticed by now, I spray EVERYTHING.
    Screen Shot 2017-04-05 at 3.59.50 PM.jpg

    Screen Shot 2017-04-05 at 4.00.01 PM.jpg

    Screen Shot 2017-04-05 at 4.00.39 PM.jpg

    Screen Shot 2017-04-05 at 4.00.26 PM.jpg

    Screen Shot 2017-04-05 at 4.00.50 PM.jpg
    Screen Shot 2017-04-05 at 4.01.01 PM.jpg
    After wiring up the battery system I saw a hot chick get out of her benz one night at the store. I saw the light underneath her door come on as she opened the door. I said "I want to do that". I took a few of the scraps I cut off of the 60" light strips I used in the cap and under the hood. I soldered wires onto them and used heat shrink to make the ends look good. I wired them into the dome light wire in the A-Pillar. IMG_4459 2.jpg
    Now the Lights come on whenever my dome light comes on.
    Screen Shot 2017-04-05 at 4.03.33 PM.jpg
    DCOURSLER and I were talking about rear swing-out bumpers one day and decided to build our own instead of paying $2K for them. We ordered the material and over two weekends we got them built. We built his bumper out of scrap. Then I decided I liked his All Pro Off Road bumper so we chose to modify it to accommodate the swing arm we would build for it. I chose to have my jerry cans behind the spare in an effort to shorten the swing arm. An unanticipated positive to this is my caps glass gate will open without opening the swing arm. I like it much more than I ever thought I would. The swing arm will also lock open and lock closed.
    Screen Shot 2017-04-05 at 4.09.38 PM.jpg
    Screen Shot 2017-04-05 at 4.09.49 PM.jpg
    Screen Shot 2017-04-05 at 4.10.14 PM.jpg
    This past weekend I built a mounting plate to accommodate my arb compressor. It turned out nicely but the part to come is the part im most excited about.
    Screen Shot 2017-04-05 at 4.16.13 PM.jpg
    When we were building the swing arm for the rear bumper, we built it with something else in mind other than holding the jerry cans and spare tire. We built it completely sealed off so I can use it as a tank for the air compressor. I will be tapping the swing arm sometime soon. The swing arm offers right at 1 gallon of volume so itll be perfect. I havent got the compressor wired yet but Ill update as I go.

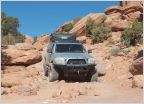
    I ordered a Demello Offroad front bumper last week and I ordered a snorkel and baja lights last night. I will be ordering a winch next week and Im hoping to have full skid plates soon. Im racing time because we leave for Moab and Overland Expo West in 3 weeks.


    I still have a lot planned for the build and I figure its only about half complete. Stay tuned!!!
    Screen Shot 2017-04-05 at 4.21.52 PM.jpg
    Photo Credit: DCOURSLER
    Screen Shot 2017-04-05 at 4.22.37 PM.jpg


    UPDATE:

    Last night I decided to build adapters to allow the attachment of maxtrax to my prinsu rack. It took about 2 hours to get it completed. The result is solid mounting points that hold the maxtrax secure and allow me to mount additional maxtrax if needed.
    IMG_1380.jpg
    IMG_2995.jpg

    UPDATE: 4-20-17

    Ive done quite a bit since my last update. I have added an UltraGauge that I use with my ipad. I will be fiberglassing the ipad into my dash in the near future.

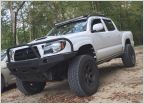
    I also got my Demello front bumper in and sprayed it. I installed Baja Designs Squadron Sport fogs and a Warn VR-10000-S winch.
    IMG_9600 2.jpg
    IMG_0675 2.jpg
    IMG_6617 2.jpg
    IMG_8234 2.jpg
    The next step was a bit difficult as I didnt really know what I needed to do. I have a 1" body lift so there was space between the top of the bumper and the bottom of the grill. I eventually decided to take my factory bumper and cut 2" off the top of it to use as a spacer.
    IMG_4325.jpg
    I also Plasti-Dipped my grill surround black while I was at it.
    IMG_0277.jpg
    My next step is the one I was most excited about but also most dreading. The snorkel. I searched high and low looking for one that I liked. I wanted the arb but I didnt like how big they are. I finally decided to go with a snorkel made for the hilux by a company in which I cant pronounce their name. It came with no instructions and the pattern was for the wrong snorkel. I made my own out of cardboard.
    IMG_3526.jpg
    IMG_3833.jpg
     
    Last edited: Apr 20, 2017
    asudevil, tuttle161, Nate87 and 23 others like this.
  2. Apr 5, 2017 at 2:43 PM
    #2
    Rod03

    Rod03 Well-Known Member

    Joined:
    Jul 27, 2016
    Member:
    #193089
    Messages:
    2,177
    Gender:
    Male
    Vehicle:
    14 DCSB OR 300k+ Miles DD
    22 T4R OR, 12 TX Pro, 21 Taco Skewp!, 02 Taco OR (All Sold)
    Nice Truck OP Welcome to TW!
     
  3. Apr 5, 2017 at 2:46 PM
    #3
    THROTTLE231

    THROTTLE231 Well-Known Member

    Joined:
    Aug 16, 2014
    Member:
    #136297
    Messages:
    1,619
    Gender:
    Male
    First Name:
    Shane
    High Dez,Comifornia
    Vehicle:
    2011MGMDCSB6MT With Not So So Cool Shit...
    I LIKE BEER....
    Sub'd...You have a killer build going man!Looks Great...:cheers:
     
    ChadsPride, Rod03 and Tralen[OP] like this.
  4. Apr 5, 2017 at 2:47 PM
    #4
    Tralen

    Tralen [OP] Member

    Joined:
    Apr 5, 2017
    Member:
    #215443
    Messages:
    18
    Gender:
    Male
    First Name:
    David
    Opelika, Alabama
    Vehicle:
    2013 Tacoma TRD Off Road
    Thanks. Ive made a lot of progress in a short amount of time but its starting to slow down a bit. If only I could hit the powerball...
     
  5. Apr 5, 2017 at 2:48 PM
    #5
    e30guy12

    e30guy12 Member

    Joined:
    Mar 28, 2017
    Member:
    #214670
    Messages:
    14
    Gender:
    Male
    Bro, you are killing it! Truck looks great!! Sub'd
     
  6. Apr 5, 2017 at 2:50 PM
    #6
    THROTTLE231

    THROTTLE231 Well-Known Member

    Joined:
    Aug 16, 2014
    Member:
    #136297
    Messages:
    1,619
    Gender:
    Male
    First Name:
    Shane
    High Dez,Comifornia
    Vehicle:
    2011MGMDCSB6MT With Not So So Cool Shit...
    I LIKE BEER....
    I would say so, very cool you took pictures along the way and shared with us! :hattip:Keep her going...:bananadance:
     
  7. Apr 5, 2017 at 3:00 PM
    #7
    92PathSE

    92PathSE Well Known "member"

    Joined:
    Feb 18, 2017
    Member:
    #210882
    Messages:
    133
    GA
    You're going to find that 1 gallon of air at 60psi or whatever isn't a whole lot of air if you air down often. Since you have all that space where the spare used to be, you could fit a big tank there if needed.

    And uh... War Eagle and whatnot.
     
    ChadsPride and Tralen[OP] like this.
  8. Apr 5, 2017 at 3:09 PM
    #8
    Tralen

    Tralen [OP] Member

    Joined:
    Apr 5, 2017
    Member:
    #215443
    Messages:
    18
    Gender:
    Male
    First Name:
    David
    Opelika, Alabama
    Vehicle:
    2013 Tacoma TRD Off Road
    Im hoping itll help enough to make it worth the time of sealing it off. My original worry was time spent re-inflating the tires. I wanted the twin compressor but couldnt afford it at the time. I guess im going to have to make do with it or find another spot for a secondary tank. Im hoping to add another fuel cell in the old spare tire location though. So far it appears im going to have to fab one since i cant find any for sale anywhere.
     
    asudevil and ChadsPride like this.
  9. Apr 5, 2017 at 3:14 PM
    #9
    Pirhett

    Pirhett Instagram @pirhett_ship

    Joined:
    Jan 29, 2015
    Member:
    #147498
    Messages:
    5,219
    Gender:
    Male
    First Name:
    Rhett
    San Diego
    Vehicle:
    2014 TRD Sport 4x4 DCLB MGM
    Stock...
    Badass build man! Love the bed drawers and that dual battery kit. Was that the $800 one?
     
  10. Apr 5, 2017 at 3:17 PM
    #10
    Tralen

    Tralen [OP] Member

    Joined:
    Apr 5, 2017
    Member:
    #215443
    Messages:
    18
    Gender:
    Male
    First Name:
    David
    Opelika, Alabama
    Vehicle:
    2013 Tacoma TRD Off Road
    I just bought the battery trays from off grid. I sourced everything else from different places. I used a 1 gauge cable which is overkill but i was unsure what type of draw i would have in the future so i wanted to accommodate any possibility.
     
  11. Apr 5, 2017 at 3:18 PM
    #11
    Pirhett

    Pirhett Instagram @pirhett_ship

    Joined:
    Jan 29, 2015
    Member:
    #147498
    Messages:
    5,219
    Gender:
    Male
    First Name:
    Rhett
    San Diego
    Vehicle:
    2014 TRD Sport 4x4 DCLB MGM
    Stock...
    oh badass okay! Was gunna say the kit is sooo expensive but Ill prolly go your route
     
  12. Apr 5, 2017 at 3:40 PM
    #12
    Tralen

    Tralen [OP] Member

    Joined:
    Apr 5, 2017
    Member:
    #215443
    Messages:
    18
    Gender:
    Male
    First Name:
    David
    Opelika, Alabama
    Vehicle:
    2013 Tacoma TRD Off Road
    The parts you go with can vary your price significantly. The good thing about buying your components separately is you can buy a piece at a time and it doesnt hurt your wallet so much.
     
  13. Apr 5, 2017 at 3:45 PM
    #13
    Steves104x4

    Steves104x4 Well-Known Member

    Joined:
    Apr 17, 2010
    Member:
    #35468
    Messages:
    17,096
    Gender:
    Male
    First Name:
    Steve
    Buffalo NY
    Vehicle:
    2010 RC 2.7 4x4
    BUCKLE UP! It makes it harder for Aliens to pull you out of your Truck.
    Well done, David. Well done!
     
  14. Apr 5, 2017 at 3:48 PM
    #14
    musher

    musher Well-Known Member

    Joined:
    Nov 9, 2016
    Member:
    #201999
    Messages:
    568
    Gender:
    Male
    First Name:
    Chris
    Alabama(born) >(the world)>Alaska(now)
    Vehicle:
    2017 Tacoma
    I'd rather not think of all the $ spent :(
    Awesome job for a fellow Lee County boy! That all looks great. When you coming up to help me copy your bed boxes and power setup?
     
  15. Apr 5, 2017 at 3:52 PM
    #15
    Tralen

    Tralen [OP] Member

    Joined:
    Apr 5, 2017
    Member:
    #215443
    Messages:
    18
    Gender:
    Male
    First Name:
    David
    Opelika, Alabama
    Vehicle:
    2013 Tacoma TRD Off Road
    Thanks. I can get you any dimensions and part numbers you need. After I get back from Moab at the end of next month Im going to rebuild the box and drawers using aluminum. Theyre made out of 3/4" oak plywood now. Im hoping to save some weight. Im also needing to rebuild the passenger side drawer because Ive decided to go with a larger fridge than I originally planned.
     
    ChadsPride likes this.
  16. Apr 5, 2017 at 4:00 PM
    #16
    SuperBad

    SuperBad Well-Known Member

    Joined:
    Aug 13, 2016
    Member:
    #194456
    Messages:
    8,837
    Gender:
    Male
    First Name:
    Jason
    Dallas, TX
    Vehicle:
    2017 MGM Tacoma OR DCSB
    Truck stuff
    Great build and story! Maybe I'll get to meet you at Overland Expo W, I'm heading there from DFW TX.
     
    ChadsPride and Tralen[OP] like this.
  17. Apr 5, 2017 at 7:39 PM
    #17
    dcoursler

    dcoursler They call me Tater Salad

    Joined:
    Nov 3, 2014
    Member:
    #141632
    Messages:
    1,194
    Gender:
    Male
    First Name:
    Derrick
    Alabaster, AL
    Vehicle:
    2012 TRD Off Road
    Currie Rock Jock High Pinion 60, JD Fab EVERYTHING, Fox shocks, Radflo Shocks, Archive Garage all the other things, spinny thing on top of the motor
    @Tralen solid build page bro! And your welcome for helping you spend your money.
     
    ChadsPride and Tralen[OP] like this.
  18. Apr 5, 2017 at 9:10 PM
    #18
    Tralen

    Tralen [OP] Member

    Joined:
    Apr 5, 2017
    Member:
    #215443
    Messages:
    18
    Gender:
    Male
    First Name:
    David
    Opelika, Alabama
    Vehicle:
    2013 Tacoma TRD Off Road
    At least now I will never be homeless when I go broke. I can sleep in my truck
     
  19. Apr 10, 2017 at 2:07 PM
    #19
    JDEMELLO

    JDEMELLO Well-Known Member Vendor

    Joined:
    Feb 10, 2009
    Member:
    #13480
    Messages:
    1,356
    Gender:
    Male
    Corona Ca
    Vehicle:
    99
    none
    Looking good.
     
    ChadsPride and Tralen[OP] like this.
  20. Apr 20, 2017 at 2:28 PM
    #20
    Tralen

    Tralen [OP] Member

    Joined:
    Apr 5, 2017
    Member:
    #215443
    Messages:
    18
    Gender:
    Male
    First Name:
    David
    Opelika, Alabama
    Vehicle:
    2013 Tacoma TRD Off Road
    I have also added an UltraGauge that I run on my ipad
    IMG_6568.jpg
    Today I also received my new ARB 50qt fridge/freezer. It will be replacing my Yeti 50. I am going to need to modify the drawer and box to make it fit but Im ok with that.
    IMG_3986.jpg
    Another project Im working on is adding the Front Runner 10gal Upright water container to my truck. I am building a box in the access cab portion of my truck and the water container will be built into it.
    IMG_3822.jpg
    IMG_3858.jpg
     
    sbl23, Willtaco, asudevil and 3 others like this.

Products Discussed in

To Top