1. Welcome to Tacoma World!

    You are currently viewing as a guest! To get full-access, you need to register for a FREE account.

    As a registered member, you’ll be able to:
    • Participate in all Tacoma discussion topics
    • Communicate privately with other Tacoma owners from around the world
    • Post your own photos in our Members Gallery
    • Access all special features of the site

30" Light Bar Install - Easier Than You Might Think

Discussion in '3rd Gen. Tacomas (2016-2023)' started by rysingsun, Dec 16, 2015.

  1. Apr 26, 2017 at 9:10 AM
    #421
    Invid

    Invid Well-Known Member

    Joined:
    Dec 18, 2015
    Member:
    #172581
    Messages:
    1,075
    Gender:
    Male
    New Braunfels, Texas
    Vehicle:
    2016 Tacoma Limited
    I visited their site and the video for the 2016+ states that you need to cut the side valence to accommodate the light bar's overall length. I ended up getting the Rago Fabrications light bar and bracket setup and that needed trimming of the side valence too. I don't know why someone can't make a bracket that utilizes the single 14mm bolt on the inside of the aluminum bumper.
     
  2. Apr 26, 2017 at 11:20 AM
    #422
    waydago

    waydago Well-Known Member

    Joined:
    Dec 23, 2015
    Member:
    #172944
    Messages:
    104
    Gender:
    Male
    First Name:
    Jack
    Jensen Beach, FL
    Vehicle:
    '16 Taco, TRD-OR, DCSB, SSM
    TRD Pro Exhaust, aFe Filter, Hard Tonneau, Predator steps, Pro Grille, Pro Fogs, Pro Badges, Pro Skid, Decal Inserts, H9 headlight swap, tailgate light bar, !7 in 4-Runner Pro wheels, 265/65-17 Falken Wildpeaks, AVS Bug shield and window shades, WeatherTechs, Sill protectors, pistol holster, Home Link mirror, Power tailgate lock, Redline Tuning hood struts, Caliper covers, Rigid Radiance light bar.
    True, it is not the Cali Raised brackets that need cutting--it is the air dams that require the cutting to be able to fit back in after the brackets and light bar are mounted. I'm guessing that most brands of 30 inch light bars and their brackets require the air dams (side valences I guess is the correct term) to be trimmed when mounted as designed. Mine required no trimming because I mounted my light bar differently. The air dams fit right back in thanks to their flexibility.
     
    Invid[QUOTED] and obz[QUOTED] like this.
  3. Apr 26, 2017 at 6:49 PM
    #423
    Blue16TSS

    Blue16TSS Well-Known Member

    Joined:
    Nov 15, 2015
    Member:
    #169761
    Messages:
    144
    Gender:
    Male
    CORPUS CHRISTI,TX
    Vehicle:
    BBP 2016 TACOMA SR5/TSS 4x4
    Door seal covers, front window tint,,fox 2.0 front & rear shocks,TRD grill emblem,vent visors.
    I used the same light bar,harness and switch but the light to the switch stays on with the key off does yours.
     
  4. Apr 26, 2017 at 6:57 PM
    #424
    obz

    obz Well-Known Member

    Joined:
    Nov 8, 2016
    Member:
    #201908
    Messages:
    511
    Gender:
    Male
    Utah
    Vehicle:
    2017 Silver Sky TRD Sport 4x4
    You've probably got your wires reversed on the switch. Load and supply are probably reversed. Switch them around and see if that's still the case.
     
    pc3coyote likes this.
  5. Apr 26, 2017 at 7:28 PM
    #425
    Blue16TSS

    Blue16TSS Well-Known Member

    Joined:
    Nov 15, 2015
    Member:
    #169761
    Messages:
    144
    Gender:
    Male
    CORPUS CHRISTI,TX
    Vehicle:
    BBP 2016 TACOMA SR5/TSS 4x4
    Door seal covers, front window tint,,fox 2.0 front & rear shocks,TRD grill emblem,vent visors.
    Hum I'll try it thanx
     
  6. Apr 26, 2017 at 7:51 PM
    #426
    Konvict KROG

    Konvict KROG Live Free or Die Trying

    Joined:
    Aug 9, 2013
    Member:
    #110115
    Messages:
    3,466
    Gender:
    Male
    Louisiana
    Vehicle:
    Old Toyota's, Power Wagon, and a Tacoma
    Traded the 2015 TRD Pro 6spd Supercharged on a PowerWagon and could not be happier. My 2011 Tacoma with the TX Baja package (Added by me) is still treating me great. My 1985 Toyota never skips a beat.
    I have a 30 inch rigid E series in the bumper of my 2nd gen.

    My turd gen, I could put a 30 inch rigid E series, 6 midgets and a generator behind that grill.

    Anyway just poking fun. I like my 3rd almost as much as my 2nd.
     
  7. Apr 26, 2017 at 8:05 PM
    #427
    pc3coyote

    pc3coyote www.pc3coyote.com

    Joined:
    Sep 28, 2014
    Member:
    #139276
    Messages:
    1,627
    Gender:
    Male
    First Name:
    Paul
    SoCal
    Vehicle:
    17 BBP Sport DCSB 4x4
    My switch only lights up when the interior / headlights are on, fully lights up when pressed, and turns off when the headlights are turned off. You likely have the wiring wrong like @obz said. Check your wiring against the diagrams I posted. PM me if you need any assistance. Good luck!
     
    obz[QUOTED] likes this.
  8. Apr 28, 2017 at 6:41 AM
    #428
    nate_scarbrough

    nate_scarbrough Well-Known Member

    Joined:
    Feb 5, 2017
    Member:
    #209739
    Messages:
    71
    Gender:
    Male
    First Name:
    Nate
    Vehicle:
    2017 Mettalic Grey TRD Off-Road
    Help! The wiring harness from Cali raised doesn't make much sense to me. Needing some clarification unless I'm just stupid. Lol.

    I under stand where to mount the relay and hook up + and - to battery.

    What I don't understand is that the harness came with to female connectors on the end but the light bar only has one plug? Also the connection isn't very secure (doesn't clip) and then also making sense of the button inside cab on how to wire. Thanks.

    image.jpg
    image.jpg
     
  9. Apr 28, 2017 at 6:57 AM
    #429
    obz

    obz Well-Known Member

    Joined:
    Nov 8, 2016
    Member:
    #201908
    Messages:
    511
    Gender:
    Male
    Utah
    Vehicle:
    2017 Silver Sky TRD Sport 4x4
    If you look back through this thread there are plenty of instructions that should be able to help you sort that out. Pretty straight forward. Did it not come with any instructions?
     
  10. Apr 29, 2017 at 7:33 PM
    #430
    Blue16TSS

    Blue16TSS Well-Known Member

    Joined:
    Nov 15, 2015
    Member:
    #169761
    Messages:
    144
    Gender:
    Male
    CORPUS CHRISTI,TX
    Vehicle:
    BBP 2016 TACOMA SR5/TSS 4x4
    Door seal covers, front window tint,,fox 2.0 front & rear shocks,TRD grill emblem,vent visors.
    Thank you for the help, turns out I had a bad switch. I opened it up and repaired it ( some want repaired it) I'll have to order a new one. She's all wired up 32 inch light bar in the lower grill and some Cali raised pods on the hood. I'll post up some pics tomorrow.:thumbsup:
     
    obz[QUOTED] likes this.
  11. Apr 29, 2017 at 11:25 PM
    #431
    Powell4x4

    Powell4x4 New Member

    Joined:
    Apr 29, 2017
    Member:
    #217705
    Messages:
    2
    Gender:
    Male
    First Name:
    Jamey
    Vehicle:
    2017 TRD off road
    Stock
    I did it today and love it. Very easy.

    IMG_0053.jpg
     
    waydago and pc3coyote like this.
  12. Apr 30, 2017 at 9:53 AM
    #432
    Blue16TSS

    Blue16TSS Well-Known Member

    Joined:
    Nov 15, 2015
    Member:
    #169761
    Messages:
    144
    Gender:
    Male
    CORPUS CHRISTI,TX
    Vehicle:
    BBP 2016 TACOMA SR5/TSS 4x4
    Door seal covers, front window tint,,fox 2.0 front & rear shocks,TRD grill emblem,vent visors.
    Gave her a wash,32 inch light bar and Cali raised pods love them!

    image.jpg
     
    waydago, pc3coyote and obz like this.
  13. Apr 30, 2017 at 12:55 PM
    #433
    CaliRaisedLed

    CaliRaisedLed Well-Known Member Vendor

    Joined:
    Apr 23, 2015
    Member:
    #153803
    Messages:
    9,014
    Gender:
    Male
    First Name:
    Jake
    Texas (DFW)
    :thumbsup:
     
  14. May 1, 2017 at 8:58 AM
    #434
    waydago

    waydago Well-Known Member

    Joined:
    Dec 23, 2015
    Member:
    #172944
    Messages:
    104
    Gender:
    Male
    First Name:
    Jack
    Jensen Beach, FL
    Vehicle:
    '16 Taco, TRD-OR, DCSB, SSM
    TRD Pro Exhaust, aFe Filter, Hard Tonneau, Predator steps, Pro Grille, Pro Fogs, Pro Badges, Pro Skid, Decal Inserts, H9 headlight swap, tailgate light bar, !7 in 4-Runner Pro wheels, 265/65-17 Falken Wildpeaks, AVS Bug shield and window shades, WeatherTechs, Sill protectors, pistol holster, Home Link mirror, Power tailgate lock, Redline Tuning hood struts, Caliper covers, Rigid Radiance light bar.
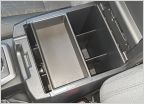
    Put the finishing touches on the light bar wiring. Opting for the Rigid Radiance (30 inch LED bar with an amber backlight) I waited for Gama Electronics three way Switches (on-off-on) and used a Carling three gang mount. Did not like the round switches supplied with the Radiance. They were functional but did not suit my eye and they are merely on-off. The Carling size switches fit nicely in the very under-utilized cubby hole. Removed the cubby and with just a minor trim in the corners the mount fit snugly in. Wired the backlight separately on one switch, the LED separately on another and used the third to trigger the light bar from the high-beam.

    I have an unused Toyota switchIMG_1550.jpg IMG_1551.jpg IMG_1554.jpg IMG_1557.jpg IMG_1558.jpg IMG_1559.jpg three gang mount from Shapeway (3-D printed) for sale now. Just opted not to use it and went with the Carling size. It is black and will fit in the exact slot of the cubby hole with the same four screws that hold the cubby in. $25 and I will pay the shipping.
     
  15. May 2, 2017 at 8:46 PM
    #435
    gargamel05

    gargamel05 Well-Known Member

    Joined:
    Jun 17, 2016
    Member:
    #189842
    Messages:
    1,269
    Gender:
    Male
    Bay Area,CA ---> Easton,PA

    I have the same lights that came with the original brackets. Trying to look at your pics closely to see where u end up mounting it. Any chance you have better pics? Any help would be greatly appreciated. Thx
     
  16. May 3, 2017 at 6:50 AM
    #436
    waydago

    waydago Well-Known Member

    Joined:
    Dec 23, 2015
    Member:
    #172944
    Messages:
    104
    Gender:
    Male
    First Name:
    Jack
    Jensen Beach, FL
    Vehicle:
    '16 Taco, TRD-OR, DCSB, SSM
    TRD Pro Exhaust, aFe Filter, Hard Tonneau, Predator steps, Pro Grille, Pro Fogs, Pro Badges, Pro Skid, Decal Inserts, H9 headlight swap, tailgate light bar, !7 in 4-Runner Pro wheels, 265/65-17 Falken Wildpeaks, AVS Bug shield and window shades, WeatherTechs, Sill protectors, pistol holster, Home Link mirror, Power tailgate lock, Redline Tuning hood struts, Caliper covers, Rigid Radiance light bar.
    I'll try to help but since the light bar is completely installed and buttoned up I'll try to get some close up pics and some written details. Once you have the grille and surround removed (directions in many threads including this one) you will see a black cross brace which has two plastic clips on either end near each headlight assembly. You will also see a couple of elongated holes in the brace a few inches or so from these. These are the holes I used for mounting the light bar. To get the light bar ready to install, put the Rigid-supplied brackets on the bar as detailed in their instructions but face them up and point the mounting portions to the inside facing the light bar. Then attach to these brackets a couple mending bars (they have pre-drilled holes in them) you can pick up at Ace or any big box store. Use stainless hardware and face these inward as well. I think I used 4 or 6 inch mending bars. I bought both sizes and returned the ones I didn't use. These brackets and mending bars will now be at the top of the light bar as you look at it. Before proceeding to get the light bar in place you must remove the two bolts holding the lower oil cooler and "gently" move it aside so the bar can be inserted carefully down in the space and rested on the crash bar. Then you can then lift the bar up and if the mending bars are in a good position one of the holes in it will line up with the elongated hole on the cross brace (on both sides). Seemed too good to be true when I first attempted this idea. I used 1 1/2 inch stainless bolts with associated washers and nuts. You can use what you want but I also used nylon spacers at the top. Essentially these two mounting points would be enough but I reinforced it by using the holes at the ends where the plastic clips were removed. If you didn't take them out they actually would get pushed up when you pull the light bar up into position. That is why I added an extra bolt on the ends. Depending on how the holes line up you may have to drill an extra hole in the mending bar. I did and I drilled them while the bar was secured with the other two bolts. Bear in mind though these outer clips are used to secure the lower bumper surround and the bolts, if you use them, would need to be removed to get the bumper off. I have no plans in that regard but even so it would be a short task to remove them and the light bar would still remain solid. If all goes as mine did the light bar should be in a perfect position behind the lower grille portion. Before tightening everything down there is room in the elongated mounting points to move the bar from side to side for centering. The vertical position is perfect due to the luck of the Rigid bracket dimensions (3 inches tall). Don't forget to reinstall oil cooler bolts. Good luck and post pics when you are finished.
    IMG_1571.jpg IMG_1572.jpg IMG_1573.jpg
     
    Last edited: May 3, 2017
    gargamel05[QUOTED] likes this.
  17. May 3, 2017 at 7:02 AM
    #437
    The hammer

    The hammer Who’s the Wrench?

    Joined:
    Mar 7, 2016
    Member:
    #180475
    Messages:
    3,880
    Gender:
    Male
    Vehicle:
    '16 Tacoma SR5 4X4 DCLB TSS Pkg 17X8" BSW-Cooper DIscoverer AT3 4s P265/65/17
    Underworld Flex trifold, tinted, TRDPRO grill, TRDPRO shift knob, etc,etc
    For $40 bucks?? I like it OP!
    For daily or light off-road I might just do it. I used to have a light bar with the lights on top like the one in back to the future to light up the place, but those were off-road only, these might come in handy down narrow dark two lane hwys without turning on the high beams.
    Beats paying $400.00 for a Rigid in my book!

    That helps cut the cost of a bar light!
    Cheers!
     
  18. May 3, 2017 at 7:46 AM
    #438
    Hagendazsss

    Hagendazsss Well-Known Member

    Joined:
    Apr 27, 2015
    Member:
    #154098
    Messages:
    1,425
    San Diego, CA
    Vehicle:
    2017 3.5 4x4 sr dcsb
    Does the light here get in the way of the transmission cooler?
     
  19. May 3, 2017 at 12:18 PM
    #439
    waydago

    waydago Well-Known Member

    Joined:
    Dec 23, 2015
    Member:
    #172944
    Messages:
    104
    Gender:
    Male
    First Name:
    Jack
    Jensen Beach, FL
    Vehicle:
    '16 Taco, TRD-OR, DCSB, SSM
    TRD Pro Exhaust, aFe Filter, Hard Tonneau, Predator steps, Pro Grille, Pro Fogs, Pro Badges, Pro Skid, Decal Inserts, H9 headlight swap, tailgate light bar, !7 in 4-Runner Pro wheels, 265/65-17 Falken Wildpeaks, AVS Bug shield and window shades, WeatherTechs, Sill protectors, pistol holster, Home Link mirror, Power tailgate lock, Redline Tuning hood struts, Caliper covers, Rigid Radiance light bar.
    The light bar does not impede the air flow to either the transmission fluid cooler or the engine oil cooler when it is mounted behind the lower grille opening.
     
  20. May 3, 2017 at 12:34 PM
    #440
    Hagendazsss

    Hagendazsss Well-Known Member

    Joined:
    Apr 27, 2015
    Member:
    #154098
    Messages:
    1,425
    San Diego, CA
    Vehicle:
    2017 3.5 4x4 sr dcsb
    Nice thanks. when I get some funds I think I will do this :)
     
To Top