

-
Welcome to Tacoma World!
You are currently viewing as a guest! To get full-access, you need to register for a FREE account.
As a registered member, you’ll be able to:- Participate in all Tacoma discussion topics
- Communicate privately with other Tacoma owners from around the world
- Post your own photos in our Members Gallery
- Access all special features of the site
Quick Links: Trying to find a Vacuum Valve for my Tacoma 97, and not finding the right part
 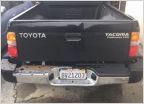 Trouble finding replacement for rear bumper. 2003 PreRunner SR5. HELP :/
 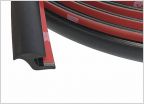 Universal fender flare seal
 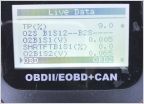 Code p0125
 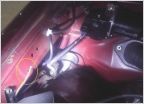 Cb Radio already installed. how do i use it?
  How hard is it to swap out your front bumper . . . .
Ripped Stud Bolt for O2 Sensor - WWYD
Discussion in '1st Gen. Tacomas (1995-2004)' started by Mschop, May 3, 2017.
Page 1 of 2
Page 1 of 2

