

-
Welcome to Tacoma World!
You are currently viewing as a guest! To get full-access, you need to register for a FREE account.
As a registered member, you’ll be able to:- Participate in all Tacoma discussion topics
- Communicate privately with other Tacoma owners from around the world
- Post your own photos in our Members Gallery
- Access all special features of the site
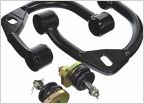 SPC UCA bushing clunk, anyone experience this?
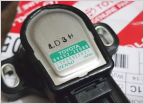 Tps 4 pin connector conversion to 3 pin Tps and new Throttle body (ADAPTER TPS)
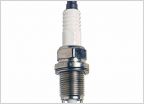 Dealer sold me plugs gapped at 0.025"
 17mm Flex Head Flare Wrench on Steering Rack
Couple of CV Axle Questions
Discussion in '1st Gen. Tacomas (1995-2004)' started by Ryan_3TacosIn, May 4, 2017.


