

-
Welcome to Tacoma World!
You are currently viewing as a guest! To get full-access, you need to register for a FREE account.
As a registered member, you’ll be able to:- Participate in all Tacoma discussion topics
- Communicate privately with other Tacoma owners from around the world
- Post your own photos in our Members Gallery
- Access all special features of the site
 Slightly more torque and horse power wanted
 2011 6spd Manual shift seat
 Hows fluid film do in winter?
 WoW How BAD did I just mess up? (possible dif fluid mishap)
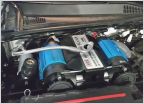 Simple On Board Air Discussion
"Official" Firestone RideRite + Lift Thread
Discussion in '2nd Gen. Tacomas (2005-2015)' started by littleblue81, May 28, 2013.
Page 18 of 51
Page 18 of 51
Products Discussed in


