

-
Welcome to Tacoma World!
You are currently viewing as a guest! To get full-access, you need to register for a FREE account.
As a registered member, you’ll be able to:- Participate in all Tacoma discussion topics
- Communicate privately with other Tacoma owners from around the world
- Post your own photos in our Members Gallery
- Access all special features of the site
 Garage/ Shop heater
 Anyone can help me find this tool?
 Whats the one power/hand tool you could not do w/out?
 Experience using towed auger/post hole digger?
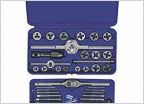 Large, Fine Thread Metric Tap and Die Set Recommendations?
 Plumbing issue achieved. What gremlin cut my pipe?
Home Improvement Today?
Discussion in 'Garage / Workshop' started by Hotdog, Jul 28, 2008.
Page 540 of 1810
Page 540 of 1810
Products Discussed in


