

-
Welcome to Tacoma World!
You are currently viewing as a guest! To get full-access, you need to register for a FREE account.
As a registered member, you’ll be able to:- Participate in all Tacoma discussion topics
- Communicate privately with other Tacoma owners from around the world
- Post your own photos in our Members Gallery
- Access all special features of the site
Quick Links: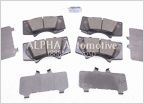 Importance of OEM pads/rotors? The amount of options and trims for the 2nd Gen Taco making my head spin
  URD Fuel Filter for Pump Upgrade Kits
 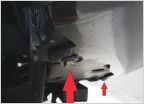 Need help on a PN for small clip that holes front splash guard
  Base 2WD Mud Flaps....IMPOSSIBLE to find!
  Can you fix takeoff shudder with stiff springs?
What Have You Done To Your 2nd Gen Tacoma Today?
Discussion in '2nd Gen. Tacomas (2005-2015)' started by kwalton, Feb 2, 2008.
Page 6436 of 12548
Page 6436 of 12548
Products Discussed in


