

-
Welcome to Tacoma World!
You are currently viewing as a guest! To get full-access, you need to register for a FREE account.
As a registered member, you’ll be able to:- Participate in all Tacoma discussion topics
- Communicate privately with other Tacoma owners from around the world
- Post your own photos in our Members Gallery
- Access all special features of the site
 DIY fix for 2GR-FKS timing cover leaks?
 Stereo Hacks?
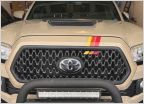 Custom Tri-color grille badge.
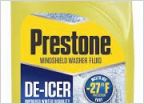 Best Windshield Washer fluid for cold weather
 2017 TRD PRO Part Numbers and Good Vin
 Steering Rack Leak
ARB Rated Recovery Point
Discussion in '3rd Gen. Tacomas (2016-2023)' started by Joe23, May 26, 2017.
Page 3 of 12
Page 3 of 12

