1. Welcome to Tacoma World!

    You are currently viewing as a guest! To get full-access, you need to register for a FREE account.

    As a registered member, you’ll be able to:
    • Participate in all Tacoma discussion topics
    • Communicate privately with other Tacoma owners from around the world
    • Post your own photos in our Members Gallery
    • Access all special features of the site

Let the weekend o' wrenching commence! Bumper and Kings install.

Discussion in '3rd Gen. Tacomas (2016-2023)' started by sagexp, Sep 14, 2017.

  1. Sep 14, 2017 at 7:27 PM
    #1
    sagexp

    sagexp [OP] Well-Known Member

    Joined:
    Feb 6, 2017
    Member:
    #209799
    Messages:
    512
    Gender:
    Male
    Back home, AZ
    Vehicle:
    2002 Tacoma DC 4X4 2017 Tacoma DC 4X4
    Taking off tomorrow to hit storage to pick up tools, and heading out to my house to wrench.

    C4 Lo Pro, reinforcement brackets, and king remote reservoir brackets powder coated, picked up today, and ready to go.

    The old reliable M8000 rebuilt, new synthetic line spooled up, and installed in bumper. BD S8-20 installed on bumper. Will get to wiring harness this weekend if there's time, but the Packers are playing Sunday night, the W coming back in from Detroit on Sunday, so there has to be limits!

    ECGS bushing and Energy Suspension radiator mounts going in as well while I'm there.

    Gonna be a long weekend, but truck will be ready for wheeling, hunting, and pulling myself out of stucks come Monday.

    20170914_183247.jpg

    20170914_183411.jpg

    20170914_184348.jpg


    If my recently bulged disc, supply of motrin and vicodin hold out, should be a good weekend of wrenching! Anxious to see how the compression adjusters work out. Familiar with Kings as I also have them on the gen1, but the adjusters will be new.

    Alignment scheduled for Monday.

    Should be pretty nice to wrench on a clean truck with 2800 miles for a change!
     
    Hank Heel, Doggman, Mi2CaMatt and 7 others like this.
  2. Sep 14, 2017 at 7:32 PM
    #2
    JoeCOVA

    JoeCOVA Well-Known Member

    Joined:
    Nov 15, 2016
    Member:
    #202463
    Messages:
    9,656
    First Name:
    Joe
    Colorado Springs
    Vehicle:
    Ford F350, Lexus RX450h, FZJ80, Jeep YJ, Jeep LJ
    Awesome. Take lots of pics of the install!!
     
  3. Sep 14, 2017 at 7:35 PM
    #3
    MESO

    MESO Major Modder Vendor

    Joined:
    Feb 16, 2015
    Member:
    #148809
    Messages:
    16,294
    Gender:
    Male
    State of Jefferson
    Vehicle:
    2016 DCLB TRD HELLCAT SWAP
    Nice. Good call on coating the resi brackets, never was a fan of the shiny mount... the kings are enough bling.
    The C4 frame brackets are beefy!
     
    mcharfauros, mauidogg and gargamel05 like this.
  4. Sep 14, 2017 at 7:38 PM
    #4
    JoeCOVA

    JoeCOVA Well-Known Member

    Joined:
    Nov 15, 2016
    Member:
    #202463
    Messages:
    9,656
    First Name:
    Joe
    Colorado Springs
    Vehicle:
    Ford F350, Lexus RX450h, FZJ80, Jeep YJ, Jeep LJ
    I never thought of powdering the brackets. Has me thinking now.
     
  5. Sep 14, 2017 at 7:46 PM
    #5
    sagexp

    sagexp [OP] Well-Known Member

    Joined:
    Feb 6, 2017
    Member:
    #209799
    Messages:
    512
    Gender:
    Male
    Back home, AZ
    Vehicle:
    2002 Tacoma DC 4X4 2017 Tacoma DC 4X4
    Purposely waited on having bumper done until I had the kings in because of this. Had them do it while they had the bumper. Not a fan of a lot o' shiny stuff and bling under there. And those brackets are just funky looking. Wanted to have them "disappear" as much as possible. I was tempted to have the kings themselves custom anodized black as well, but that wasn't worth the added expense to me. Blacked out kings would have been nice though!
     
  6. Sep 14, 2017 at 7:53 PM
    #6
    MESO

    MESO Major Modder Vendor

    Joined:
    Feb 16, 2015
    Member:
    #148809
    Messages:
    16,294
    Gender:
    Male
    State of Jefferson
    Vehicle:
    2016 DCLB TRD HELLCAT SWAP
    That would actually be pretty sick. Resi's, fittings and brackets all blacked out. Only think blue would be the stickers/coils/upper mount. Now you got me thinking damn you...
     
  7. Sep 14, 2017 at 8:04 PM
    #7
    JoeCOVA

    JoeCOVA Well-Known Member

    Joined:
    Nov 15, 2016
    Member:
    #202463
    Messages:
    9,656
    First Name:
    Joe
    Colorado Springs
    Vehicle:
    Ford F350, Lexus RX450h, FZJ80, Jeep YJ, Jeep LJ
    What amount of preload are you going to use. I think out of the box they are 3-4 threads?
     
  8. Sep 14, 2017 at 9:48 PM
    #8
    sagexp

    sagexp [OP] Well-Known Member

    Joined:
    Feb 6, 2017
    Member:
    #209799
    Messages:
    512
    Gender:
    Male
    Back home, AZ
    Vehicle:
    2002 Tacoma DC 4X4 2017 Tacoma DC 4X4
    Not sure yet. I'm running 700lb coils, and just could not find anything definitive on how much lift I'll get with the present factory settings. I believe (from what I've gathered by searching) at current settings I could potentially be looking at close to 2" with the 700's at minimum settings. But not sure since I'm adding 145lbs of bumper, brackets, light, and winch.

    I'd like to keep lift minimal. The Kings are all about handling the weight of the bumper and winch, and performing awesomely off road (not lift). Only reason I want any lift at all is to get the front skid / diff up higher. I know the 700's are the minimum I'd want to run with the way I drive and the added weight up front, and with those, I may need to anticipate close to 2" lift in front at near minimum pre-load. Ideally I want 1" to 1.5" or so in front, and 1/2" to 1" in rear. Want to maintain a near factory rake on the truck since I don't like the "bro lean" anytime I put a few pounds in the bed. I have a set of machined billet 1" blocks for the rear (the horror!) until I get everything on and figured out. Want to see just what the compression adjusters bring to the table before I decide on rear AAL (tend to stiffen ride) or leaf pack (best solution but manufacturers making new leafs with minimal lift don't seem to be a thing). A 1" tapered block should create near zero problems in the short term, and is a temporary solution until I wring this thing out and decide on the set up for the rear. So many options there. AAL, new leaf packs, stock leafs with firestone bags and Daystar cradles? Need to research more on that once I see how everything else comes together first.

    I'm okay with keeping stock UCA's, but that will depend on amount of minimum lift I get up front, and alignment numbers come Monday. Taking things one step at a time, and will ultimately want to wind up with a truck that I can run 33's on (once I burn through the 32's), minimal lift, great alignment numbers, and a suspension that can handle my driving style (point a to point b hauling ass on bad roads) and weight up front. If final heights and alignment number don't come out right, I'll start researching which UCA I want to get caster back where it needs to be.
     
  9. Sep 14, 2017 at 10:40 PM
    #9
    Azianwind

    Azianwind Well-Known Member

    Joined:
    Oct 2, 2016
    Member:
    #198770
    Messages:
    437
    Gender:
    Male
    First Name:
    Michael
    Orange county ca
    Vehicle:
    2017 Blazing Blue TRD Sport 2WD - 2021 TRD Off Road 4x4 Voodoo Blue
    Can you take a few pics of the lo pro bumper install especially the light. I just bought the exact one. Waiting til oct to get it. Looking forward to seeing your install for tips and tricks!
     
  10. Sep 15, 2017 at 11:01 AM
    #10
    JoeCOVA

    JoeCOVA Well-Known Member

    Joined:
    Nov 15, 2016
    Member:
    #202463
    Messages:
    9,656
    First Name:
    Joe
    Colorado Springs
    Vehicle:
    Ford F350, Lexus RX450h, FZJ80, Jeep YJ, Jeep LJ
    I think Deaver J66 is a full leaf replacement and only does about 1.5" of lift.

    I got my Kings for the exact same reason, handling all the weight offroad. My problem is that I have an excessive amount of weight so I had to do a full leaf replacement with the Deaver U402 which adds 3" of lift in the rear so I need at least 2" of lift in the front, otherwise I will have some crazy rake

    I almost got the compression adjusters but after getting more info it seemed that most people just used the middle setting and never really make that many adjustments. The saved money I put into SPC UCA, they seem ok are are made more for Endurance than race applications, I also have a hard time spending close to $1k on UCA so I avoided the uniballs.
     
  11. Sep 15, 2017 at 11:06 AM
    #11
    Midknight

    Midknight Well-Known Member

    Joined:
    Sep 7, 2016
    Member:
    #196733
    Messages:
    1,906
    Gender:
    Male
    Western Canada
    Vehicle:
    2018 TRD Off-Road
    Lots of goodies. I'm super jealous. Good luck with install and post pics when you're done :)
     
  12. Sep 15, 2017 at 11:42 AM
    #12
    dnlskier

    dnlskier Well-Known Member

    Joined:
    Dec 20, 2016
    Member:
    #205304
    Messages:
    3,114
    Gender:
    Male
    Vehicle:
    17' TRD SPORT MT
    Officially jealous! Pics please so I can drool
     
  13. Sep 15, 2017 at 11:56 AM
    #13
    Sand Shark

    Sand Shark I dont pub crawl.when I do,I use pub crawl control

    Joined:
    Feb 27, 2017
    Member:
    #211794
    Messages:
    545
    Gender:
    Male
    First Name:
    Erich
    Phoenix, AZ
    Vehicle:
    2017 Blazing Blue DCSB Off-Road (yes I get dirty)
    REI VIP Parking Pass,Pavement Avoidance System
    I've been eyeballing this bumper. picts and tips for the install.

    It's going to be a killer rig.
     
  14. Sep 15, 2017 at 12:01 PM
    #14
    Mike_Lowrey562

    Mike_Lowrey562 Well-Known Member

    Joined:
    Oct 26, 2015
    Member:
    #167704
    Messages:
    183
    Gender:
    Male
    Long Beach, CA
    Vehicle:
    2016 TRD OR MGM
    Nice!! Can't wait to see it when it's done..
     
  15. Sep 15, 2017 at 12:02 PM
    #15
    tacoflavoredkisses1

    tacoflavoredkisses1 Well-Known Member

    Joined:
    Apr 10, 2016
    Member:
    #183838
    Messages:
    2,564
    Vehicle:
    16 TRDOR DCSB (SOLD)
    Do yourself a favor and use penetrating fluid in all bolts ...

    Tried to change my oil last week and stripped one or the skid plate bolts. :|
     
  16. Sep 15, 2017 at 12:08 PM
    #16
    gargamel05

    gargamel05 Well-Known Member

    Joined:
    Jun 17, 2016
    Member:
    #189842
    Messages:
    1,269
    Gender:
    Male
    Bay Area,CA ---> Easton,PA
    Same here. Hate the bling on brackets on King lol.
     
  17. Sep 17, 2017 at 10:41 PM
    #17
    sagexp

    sagexp [OP] Well-Known Member

    Joined:
    Feb 6, 2017
    Member:
    #209799
    Messages:
    512
    Gender:
    Male
    Back home, AZ
    Vehicle:
    2002 Tacoma DC 4X4 2017 Tacoma DC 4X4
    Man, that was a lot of wrenching. I'm too old for this shit! But it's done. For now. Need to make some changes I think. The 1" block raised me up 1 3/4 to 2" in the rear. Not sure what accomplished that, but before and after measurements don't lie. I was expecting up to 1 1/4 as it's a tapered block (1" front to 1 1/4" rear). Installed correctly. Guess is the added compression of the King's over the Bilsteins helped the springs not sag quite so much! Don't know, but definitely up 2" measured at each wheel and the hitch.

    I will likely take it out and put a 1/2" shim in, back the fronts off a couple turns, and that may get the truck just where I want it. The rear shocks are about an inch too short with the rear at full droop, and I don't like the shock being the limiting factor in axle droop.

    Front came up 1 3/4 to 2" as well. 2" increase in height at the skid plate is very welcome, but would still like to back it off a half inch or so.

    So, as I suspected, the Kings at factory settings w/ 700 lb coils brought the truck up 1 3/4". I added a couple turns on the drivers side to bring that up a bit to compensate for the lean.

    With the standard tool, and King's T handle tool, I had no real issues making adjustments on the truck. Hit the spring contact points with PB blaster the evening before. Really did not have any difficulty adjusting.

    Started friday night cutting up the bumper. Saturday morning got the bumper installed. Moved on to the rear, then went for the front body mounts replacement, followed by the ECGS bushing install.

    I've replaced a few toyota CV axles in my time, so nothing new there. But pulling the needle bearing out was giving me a hassle for about 10 minutes. The ECGS tool just would not fit in between the bearing and carrier. Double checked video from their website. I was doing it correctly, but it just would not go in without forcing it, which I was not willing to do for fear of breaking off a piece of bearing race and losing it in the diff. Finally put the pulling end of the tool on the grinder.....

    b20170917_173846.jpg


    ....and it snicked right into place with no hassle, and had the needle bearing out and new bushing installed rather quickly after that. A pain in the ass side job, but one I know I was better off doing while I was already there, and better in the long run.

    Front Kings went in without too much difficulty, but did have to separate the tie rod end from the steering rack, unbolt the sway bar links, and drop the front of the sway bar to make it work.

    Were I to ditch the sway bar, this install (and future installs) would likely be a bit easier. I'm not ditching the sway bar. I can handle the truck without it, panic maneuvers and all, but the W drives it far too much for me to risk it with someone like her who is unfamiliar with an off road, near "trail ready" truck. Screw the improved off road articulation and ride...I kinda like her and would like to keep her around a while.

    b20170917_173553.jpg

    Glad I had the remote reservoir brackets powder coated black. I like the look much better than the silver bracket.


    b20170917_141959.jpg


    Unfortunately, as I thought when I was running over the job in my head late Friday night, the C4 Lo Pro reinforcement brackets and King remote reservoir brackets are not compatible. If I had a shop with some tools for modifying the brackets and some time, maybe I could have got them to work. I just didn't have the tools and time to do so, so for now the reinforcement brackets sit in the box.


    b20170916_150954.jpg

    Was extra cautious to not scratch the Kings during install or bugger up adjustment holes or the like because I wanted a nice, clean job. The kind of job where it looked like I'd been through this a time or three. Because I have.

    And then while installing passenger side front King, I was manipulating the sway bar, and it wasn't moving where I wanted it to. Went over to driver side, and "ahhhh, that's what it's hanging up on. God Damnit!!!!"

    b20170917_173658.jpg

    Oh well. A few minor scratches and a very tiny ding. Other than that it was a clean install, lol! Still, the hit to my "wrenching ego" pisses me off.

    Once everything on and all bolts checked and re-checked, hit everything with a good coat of Mavcoat. Will hit them every 6 months or so with this to keep them looking like they weren't drug out of a trash pile behind King's shop.

    b20170917_173636.jpg

    Now, on to the finished product!
     
    Last edited: Sep 28, 2017
    Danactive and MESO like this.
  18. Sep 17, 2017 at 10:57 PM
    #18
    sagexp

    sagexp [OP] Well-Known Member

    Joined:
    Feb 6, 2017
    Member:
    #209799
    Messages:
    512
    Gender:
    Male
    Back home, AZ
    Vehicle:
    2002 Tacoma DC 4X4 2017 Tacoma DC 4X4
    As it sits now. Right about 1 3/4 to 2" all around.

    b20170917_173454.jpg

    b20170917_173514.jpg

    b20170917_173815.jpg

    b20170917_173116.jpg

    b20170917_173146.jpg


    Pretty happy with my "quick on / quick off" front plate option I came up with after failing to find a single front plate option I liked. A couple 1/4-20 stainless steel nutserts, and a couple Harley Davidson black anodized seat bolts.

    I don't run a front plate often (never been stopped) but like the option to put it on if I'd rather not deal with getting stopped, or if I park on the street or at the airport. Meter maids at both those locations have nailed me a few times for no front plate. Best to have it on for the most part, but have it easily taken off for hitting the dirt.

    b20170914_193151.jpg

    b20170917_173312.jpg

    b20170917_173333.jpg

    b20170917_173353.jpg
     
  19. Sep 18, 2017 at 6:21 AM
    #19
    JoeCOVA

    JoeCOVA Well-Known Member

    Joined:
    Nov 15, 2016
    Member:
    #202463
    Messages:
    9,656
    First Name:
    Joe
    Colorado Springs
    Vehicle:
    Ford F350, Lexus RX450h, FZJ80, Jeep YJ, Jeep LJ
    Nice work!! Heck of a job. Truck looks awesome.
     
  20. Sep 25, 2017 at 10:20 PM
    #20
    sagexp

    sagexp [OP] Well-Known Member

    Joined:
    Feb 6, 2017
    Member:
    #209799
    Messages:
    512
    Gender:
    Male
    Back home, AZ
    Vehicle:
    2002 Tacoma DC 4X4 2017 Tacoma DC 4X4
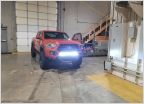
    Baja Designs S8-20 light bar and winch wired up Saturday. Ready to rumble!


    av 20170923_181509.jpg

    That shit is BRIGHT! Really loved the PIAA 80 Pro XT's on the Gen1 and was hesitant to go from incandescent to led, but this may just work. May likely end up yanking out the factory fogs and throwing a set of BD XL-R cornering lights in the future, but for now, I think this is quite workable.
     
    mcharfauros, Danactive and dskakie like this.

Products Discussed in

To Top