1. Welcome to Tacoma World!

    You are currently viewing as a guest! To get full-access, you need to register for a FREE account.

    As a registered member, you’ll be able to:
    • Participate in all Tacoma discussion topics
    • Communicate privately with other Tacoma owners from around the world
    • Post your own photos in our Members Gallery
    • Access all special features of the site

Long Travel BS Thread

Discussion in 'Long Travel Suspension' started by amaes, Aug 20, 2010.

  1. Jan 30, 2018 at 3:20 PM
    SilverGhost

    SilverGhost Well-Known Member

    Joined:
    Sep 16, 2013
    Member:
    #112635
    Messages:
    8,717
    Gender:
    Male
    First Name:
    RayRay
    Reunion, Co
    Vehicle:
    02,03 some 04, it's complicated
    #junkyardparts
    For those of you that have cab cages. Do you solid mount the cab and weld the cab to the cage? If you do where are the weak points in the cab? What takes the stress of frame flexing and vibes. Do you get cracks in the cab? Trying to educate myself on the cab cage and what to expect.
     
  2. Jan 30, 2018 at 3:29 PM
    tfeltz73

    tfeltz73 That's greasy Ricky

    Joined:
    Oct 20, 2012
    Member:
    #89405
    Messages:
    486
    Gender:
    Male
    central Wisconsin
    Vehicle:
    2013 supercharged long travel thing
    @erok81 did you haft to cut off your old bump stop mount? I have a old shock lying around and mocked it up and it looks like it will clear the stock bump stop by about a 1 1/2". I'm going to try to plasma out a hole on top and bottom of the mount to put a king bump stop in.
     
    Hawk373 likes this.
  3. Jan 30, 2018 at 4:12 PM
    Arcticelf

    Arcticelf Well-Known Member

    Joined:
    Jul 18, 2015
    Member:
    #159735
    Messages:
    7,653
    Gender:
    Male
    Vehicle:
    Gladiator
    Link for the Solo rack?
     
  4. Jan 30, 2018 at 4:31 PM
    erok81

    erok81 Well-Known Member

    Joined:
    Aug 15, 2016
    Member:
    #194699
    Messages:
    5,708
    Gender:
    Male
    Vehicle:
    Imposter
    Mine had to come off no question.

    With it off I couldn’t even fit a 2.0 king bump between the bypass and frame.

    To add the bypass I had to move it off the side. It wasn’t even close behind. My bypasses are 2.5’s if that matters. I don’t know what you were mocking up.

    I’ll check on the clearance when I get home.
     
  5. Jan 30, 2018 at 4:55 PM
    89ztrain

    89ztrain Well-Known Member

    Joined:
    Aug 11, 2012
    Member:
    #84569
    Messages:
    400
    Gender:
    Male
    North Carolina
    Vehicle:
    '11 TRD Sport 4x4
    Give em a call and talk to Bobby
     
    Coot83 and Dalandser like this.
  6. Jan 30, 2018 at 5:11 PM
    tfeltz73

    tfeltz73 That's greasy Ricky

    Joined:
    Oct 20, 2012
    Member:
    #89405
    Messages:
    486
    Gender:
    Male
    central Wisconsin
    Vehicle:
    2013 supercharged long travel thing
    I checked it with a 2.0 but went off of the shaft because that’s we’re the clearance issues should come from. And I checked it again and it’s more like a 3/4” of clearance. I wonder if the frame changed from the 2nd gen to 3rd because I have a lot more room between where the bypass will be and the frame.
     
  7. Jan 30, 2018 at 5:19 PM
    Caboose117

    Caboose117 foul mouthed Marine

    Joined:
    Aug 3, 2014
    Member:
    #135375
    Messages:
    4,578
    Gender:
    Male
    First Name:
    Chad
    Kentucky
    Vehicle:
    ;IGY6 Rescue Truck
    smashed this, broke that, covered it up with tape and paint
    Yes the frame is different
     
  8. Jan 30, 2018 at 5:21 PM
    MadTaco461

    MadTaco461 BRO runner

    Joined:
    Dec 30, 2009
    Member:
    #28470
    Messages:
    13,405
    Gender:
    Male
    First Name:
    Mike
    CA
    Vehicle:
    99 turbo 5 lug long travel
    Kinda stock
    My cab rest on the cage. It's mostly supported by the A pillar that runs up the window and out the back. Still have the body mounts. I have the A pillar at the window welded. Highly recommend that. The tubes coming in and out of the cab also hold some of the weight. Most of the weight is off the cab now. From there on out you weld parts that squeak to your cage.
     
    Wishbone Runner likes this.
  9. Jan 30, 2018 at 5:37 PM
    erok81

    erok81 Well-Known Member

    Joined:
    Aug 15, 2016
    Member:
    #194699
    Messages:
    5,708
    Gender:
    Male
    Vehicle:
    Imposter
    Here’s a third gen frame.

    A135ADD5-2F7E-430F-AFF9-BCE5EE619096.jpg
     

    Attached Files:

  10. Jan 30, 2018 at 6:19 PM
    SilverGhost

    SilverGhost Well-Known Member

    Joined:
    Sep 16, 2013
    Member:
    #112635
    Messages:
    8,717
    Gender:
    Male
    First Name:
    RayRay
    Reunion, Co
    Vehicle:
    02,03 some 04, it's complicated
    #junkyardparts
    Cool I was hoping you respond. Ok I'll weld the A pillar to the cage.

    Found it. Got ya.
    [/QUOTE]


    Another thing. My double cab rear cab mount is going to be in the way of my lower link up travel. I was hoping to remove it completely. I guess if I suppot it with the C pillar tube then I can remove the rear mount. What do you think about that? Or should I just trim the mount as much as I can to clear the up travel of the link.
     
    Last edited: Jan 30, 2018
  11. Jan 31, 2018 at 1:08 AM
    Anthony250

    Anthony250 Ex Fabricator

    Joined:
    Sep 29, 2010
    Member:
    #44016
    Messages:
    3,775
    Gender:
    Male
    First Name:
    Anthony
    Rialto CA
    Vehicle:
    99 Tacoma LT Prerunner
    LSK Race Kit, King Shocks, Methods, Glassworks, Baja Designs, Built by myself.
    I cut a hole in the cab and landed my C pillar tube to the top of the frame. And sealed it after. Makes for nothing in the way for lower link mounts.
     
    MadTaco461 and SilverGhost like this.
  12. Jan 31, 2018 at 1:21 AM
    Anthony250

    Anthony250 Ex Fabricator

    Joined:
    Sep 29, 2010
    Member:
    #44016
    Messages:
    3,775
    Gender:
    Male
    First Name:
    Anthony
    Rialto CA
    Vehicle:
    99 Tacoma LT Prerunner
    LSK Race Kit, King Shocks, Methods, Glassworks, Baja Designs, Built by myself.
  13. Jan 31, 2018 at 4:20 AM
    tfeltz73

    tfeltz73 That's greasy Ricky

    Joined:
    Oct 20, 2012
    Member:
    #89405
    Messages:
    486
    Gender:
    Male
    central Wisconsin
    Vehicle:
    2013 supercharged long travel thing
    It looks pretty close to the same but I had to cut way more out of my wheel well to get the bracket to fit.
     
  14. Jan 31, 2018 at 4:55 AM
    SilverGhost

    SilverGhost Well-Known Member

    Joined:
    Sep 16, 2013
    Member:
    #112635
    Messages:
    8,717
    Gender:
    Male
    First Name:
    RayRay
    Reunion, Co
    Vehicle:
    02,03 some 04, it's complicated
    #junkyardparts
    Ok cool. Yeah I was wondering why some C pillar tubes run at an angle instead of straight down. I’ll plan for the same thanks.
     
  15. Jan 31, 2018 at 7:18 AM
    Cr250jumper

    Cr250jumper Señor member

    Joined:
    Dec 2, 2010
    Member:
    #47033
    Messages:
    11,968
    Gender:
    Male
    The moon
    Vehicle:
    50 shades of tan©
    Tacoma with some stuff melted to it
    You'll want to cut a hole in the floor of the cab and go through, then gusset the cab to the cage at A and B pillar, and then I did above the door frame and above the windshield too. Easiest way is make plates to land on instead of to the top of the frame. This way you can tack the plate, build the cage, knock the plate off and the whole cage drops to weld *360. Then lift the cage back up and weld the plates in permanent. If you cut the hole in the floor way too big it makes it easier, then just trim and weld the piece you cut out back in after its all done. For the rear body mount as long as you gusset the cab to the cage it won't move, I hacked up my rear body mount pretty far. Still have stock body mounts and my cab doesnt move at all


    LTDSC, Hawk373, MadTaco461 and 7 others like this.
  16. Jan 31, 2018 at 10:55 AM
    MadTaco461

    MadTaco461 BRO runner

    Joined:
    Dec 30, 2009
    Member:
    #28470
    Messages:
    13,405
    Gender:
    Male
    First Name:
    Mike
    CA
    Vehicle:
    99 turbo 5 lug long travel
    Kinda stock
    My c pillar also lands on top of the frame for when links happen
     
    Dalandser and SilverGhost like this.
  17. Feb 4, 2018 at 7:18 AM
    snowsk8air2

    snowsk8air2 how hard can it be?

    Joined:
    Sep 16, 2011
    Member:
    #63607
    Messages:
    10,477
    Gender:
    Male
    First Name:
    Ryan
    Flagstaff, AZ
    Vehicle:
    Supercharged TX Pro
    2011 S/C and basic mods
    And some sweet power wheelie action from the dunes at sand hollow now that my buddy has started going through some footage.

    https://youtu.be/9CRnv2VOHcc
     
    tfeltz73, Coot83, LukeCC and 9 others like this.
  18. Feb 5, 2018 at 4:13 AM
    Coot83

    Coot83 DORKEL NATION

    Joined:
    Aug 9, 2016
    Member:
    #194134
    Messages:
    13,250
    Gender:
    Male
    First Name:
    Chris
    Scottsdale, Az
    Vehicle:
    2012 Baja TX
    TC 3.5 LT, RCV axles, Demello sliders, BD light bar/fogs, LP6, DMZ rear, SOS skids, custom bumper, King 16" triples, Locked-on hydro rear bumps...
    Dammit man, you make me want to move out there! You keep the super charge game strong! :thumbsup:
     
    snowsk8air2[QUOTED] likes this.
  19. Feb 5, 2018 at 7:42 AM
    dira1987

    dira1987 Well-Known Member

    Joined:
    Jan 5, 2011
    Member:
    #48740
    Messages:
    699
    Gender:
    Male
    First Name:
    David
    Chandler AZ
    Vehicle:
    2003 LT Prerunner
    Metal.
    So i have my battery grounded to my bed cage, and I ran the positive line to a 150 amp breaker and then up to the front where the original battery was. Where have you guys pulled a ground from in the engine bay?

    My plan was to leave the original battery connections that went to my battery and hook them up to this (http://www.jegs.com/p/JEGS-Performance-Products/JEGS-Remote-Battery-Jumper-Terminals/745300/10002/-1) but they are thicker than the standard connections.

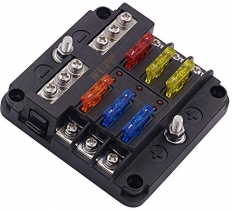
    Now I'm wondering if I should be using this (https://www.bluesea.com/products/2103/PowerPost_Plus_-_3_8in-16_Stud) for both the positive and and another one for the negative and delete the original battery terminal connection idea, add rings to the ends using a chisel and hammer like I did the other cables, and hook a ground from somewhere in the engine to this new post, and then connect the grounds to the post.

    I hope this makes sense. Do you guys have any suggestions on this? Im wondering if I should just run a negative from the battery up to the front and put that to one of those posts or if the ground out back and pull a new ground up front would work.

    Where are you guys pulling your ground connections in the engine bay from?

    Sorry for all the questions!
     
  20. Feb 5, 2018 at 7:49 AM
    anthony250f

    anthony250f Well-Known Member

    Joined:
    Feb 18, 2012
    Member:
    #73066
    Messages:
    16,699
    Gender:
    Male
    First Name:
    Anthony
    San Diego, CA
    Vehicle:
    2008 dcsb trd offroad 4wd
    On my first gen the battery was grounded to the frame and I used the second link that you posted to connect the wires in the engine bay
     

Products Discussed in

To Top