1. Welcome to Tacoma World!

    You are currently viewing as a guest! To get full-access, you need to register for a FREE account.

    As a registered member, you’ll be able to:
    • Participate in all Tacoma discussion topics
    • Communicate privately with other Tacoma owners from around the world
    • Post your own photos in our Members Gallery
    • Access all special features of the site
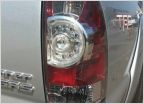
Installing a Currie Ford 9" in a Tacoma

Discussion in '2nd Gen. Tacomas (2005-2015)' started by jberry813, Apr 24, 2018.

  1. Apr 24, 2018 at 12:06 PM
    #1
    jberry813

    jberry813 [OP] Professional Fluffer Moderator

    Joined:
    Jan 21, 2011
    Member:
    #49636
    Messages:
    28,471
    Gender:
    Male
    First Name:
    Jason
    Lake Tahoe
    Vehicle:
    2012 DCSB Sport
    ...too much shit to list.
    671D4D36-0F93-47E2-BFEC-6E1A42803209.jpg

    Tired of breaking shit with your heavy truck, big tires, and a shitty 8" Toyota rear end? I know I was. Fortunately Currie came out with a couple of fabricated housing options specifically for our rigs: A F9 unit and a RockJock Dana 60 unit.

    https://www.currieenterprises.com/TA-F9325R
    https://www.currieenterprises.com/ta-rjiiir-2

    Both of these units are about as close to bolt-in housings as you can get off the shelf. I say "mostly" because a lot of the hard work is already done, but they are still a builder part. Some fabrication and definitely mechanical work is required. The kit is intended to re-use some factory parts including the stock Tacoma drums. The outer housing ends of the Currie housing accept the Tacoma axle bearings to reuse the factory speed sensors and drum brakes. Now it's really up to the owner, rig, and driving style to decide which axle to go with. I personally went with the F9 housing because it suits my needs. If you want to read all the nitty gritty reasons, take a look here: https://www.tacomaworld.com/threads...-a-tacoma-build.455075/page-119#post-17132583

    You can read the overview of the rear end units in the links above. But in short, the unit will ship with the housing, custom axles, bearings, bearing retainers, and oil seals. You will need to pick your favorite vendor and setup for the third member (if you go with the F9), fabricate and weld your own shock mounts, and cannibalize some parts off your factory housing. There are upgrade options as well with the Currie housing. I had mine upgraded to 3.5" axle tubes, back brace/truss, desert skid, fill/inspection port, and with a 68" WMS-WMS width instead of the stock 65.5" (to better match the width I have with the +2 Total Chaos long travel kit up front).

    So the whole reason I went this route is because I ended up shearing the driver's side axle shaft and put a fairly obvious torque bend in the shaft itself. R&P and side gears were all fine, but the axle was far was happy with me.

    IMG_2346.jpg

    IMG_2344.jpg

    Part of my goal with the new housing was to be able to sell the old axle as a drum to drum roller. Obviously the sheared axle shaft is going to break the value of that down, but I still didn't want to go through the process of removing the old drum backing plates and all the bullshit off the stock shafts. I also took this as an opportunity to get rid of the drum brakes. So I reached out to SOS Performance (same company I have for the Big Brake Kit on the front of my truck). SOS has a a few disk conversion kits available, one that uses 4Runner rear disks, but they also has a Big Brake Kit that uses Stoptech calipers and components for the rear and retain e-brake functionality. I'm stupid, so naturally I went with the BBK and went ahead and did his Sequoia master cylinder kit. The sequoia MS is properly proportioned for calipers in the rear rather than wheel cylinders.
    https://sosperformance.com/products...sion-with-parking-brake-fits-2005-2015-tacoma
    https://sosperformance.com/products/2005-2017-toyota-tacoma-master-cylinder

    IMG_2133.jpg

    IMG_2304.jpg

    I ordered my third member from ECGS. I've used them for a lot of gear work over the years and have had nothing but good interactions with them. Nodular Yukon case, 35 spline, big bearing, billet Daytona pinion support, billet 1350 yoke, ARB air locker, and 4.86 gears.

    IMG_2020.jpg

    IMG_2019.jpg

    Axle Assembly

    As mentioned, the new housing will come with custom axle shafts. These axle shafts are 35 spline and come with the 6x5.5 bolt pattern lug studs pre-pressed in. Again, if you are going to be retaining some of the stock axle parts (drum brakes), you will have to canibalize some parts. Take a look at the diagram and markings below (compliments of @tetten).

    axle parts.jpg

    As you can see from the markups, Currie will include the bearings, bearing retainers, axle shafts, and the lug studs. Everything else you will have to cannibalize from your stock housing, or order separately from Toyota. Now since I didn't want to disassemble my axle shafts, and I didn't reuse the stock brakes, and I wanted to keep the stock axle as much of a roller as possible, I decided to just buy the extra parts I needed from Camelback Toyota. The parts needed are as follows:

    90208-44001 Axle Shaft Bearing Washer x2
    90520-41019 Snap Ring x2
    42443-60010 Oil Deflector Gasket x2
    42441-35060 Oil Deflector x2

    The snap ring and gasket you should buy new no matter what as they are considered non-reusable parts. But that's for you to decide. In total the parts were less than $50 which was well worth it for me to not have to press out the old bearings from the stock shafts to get those parts out.

    The new Currie shafts have the lugs pre-pressed in. In order to install the oil deflector and gasket, you will need to press out the lugs.

    IMG_2333.jpg

    Once the studs are out, you can install the oil deflector and gasket. One thing to note, the knurl on the Currie studs are slightly larger than OEM Toyota studs. So the oil deflector started to deform when pressing the studs back in. So to prevent that, I drilled the oil deflector holes out with a step bit one size up and then pressed in the studs.

    IMG_2334.jpg

    IMG_2335.jpg

    IMG_2336.jpg

    The next step is to press in the new bearings, washer, and bearing retainer. It's important to note that each one of these parts is DIRECTIONAL. Meaning if you install it the wrong way and then press it onto the shafts, you're going to have to order new parts. The don't come off easy. So don't fuck this part up. Also you will see pictured my disk backing plates. Obviously if you are retaining the drums, you'll have the drum backing plates that will need to go on first. Assembly order is pictured in the above diagram, but in short it's drum backing plate, then bearing, then washer, then bearing retainer, then c-clip. The washer is slightly conical shape. The cone shape itself should be facing towards the snap ring (facing upwards as in my photo below). The bearing retainer is chamfered on one end. The chamfered end should also face towards the snap ring (again upwards as pictured).

    IMG_2363.jpg

    IMG_2364.jpg

    IMG_2365.jpg

    IMG_2366.jpg

    Once all that crap is put in the correct order and direction, it's time to press everything in. I used a 20 ton Harbor Freight press to do the dirty work. To protect the bearing retainer and to distribute the load as everything gets pressed in, I used a pipe fitting. A piece of 2" .120 wall DOM will also work. And to protect the axle face itself, I stacked up a few pieces of scrap steel. Then it's just a matter of putting the press to work little by little until the snap ring groove is exposed and you can install the snap ring. Once that's done, the axles are ready for install.

    IMG_2367.jpg

    IMG_2403.jpg

    IMG_2404.jpg

    Housing & Third Member

    Nothing overly complicated here. However I was not a fan of the drain option that Currie offers. It just hangs too low. So I removed one of the studs off the bottom of the housing. The housing itself is just drilled/threaded for the studs with nuts on the inside. So I welded a nut on the inside of the housing and using a standard bolt that will be removed when it's time to do gear oil changes. Simple solution Ford 9" guys have done for years.

    IMG_2361.jpg

    IMG_2362.jpg

    Then it's just a matter of installing your gasket (I went with a Lube Locker instead of the shitty felt and RTV), skid plate (if applicable), and you're off to the races. One thing I will note, the inspection port came in pretty handy for the install. The copper line used for the ARB is a really really tight fit going into the housing. I had to slightly move the copper line through the inspection port after install to ensure it didn't come in contact with anything. If you're going to add just 1 upgrade to your Currie housing, make sure it's the inspection port!

    https://youtu.be/ksuVwuVCAtE

    Now's where the fun starts. Remove the old axle from your rig. You can do this however you want, but it was easiest for me to drop the whole axle as a roller. It also made for a strategically timed Instagram post subtly making fun of the third gen guy who lost his whole axle off-road...in the worst recovery method I've ever seen in my life...but I digress.

    IMG_2340.jpg

    IMG_2349.jpg

    Once the old shit is out of the way, you can start assembling all the new goodies. Now I already mentioned the housing does not have shock mounts. Wouldn't matter for me anyways since I did my own shock hoops/relocation for 12" triple bypasses. As such, I also like to cycle my leaf packs to get proper bump and droop before welding in the lower shock mounts, so that's why you will see just a single leaf rather than the whole pack in some of these pix. I also took the opportunity to to upgrade to 5/8" u-bolts. The truss unfortunately was designed for 9/16" u-bolts. Nothing some quick work with a drill didn't resolve though. Also I needed new u-bolt plates to accommodate the larger (and wider) u-bolts. So Eric at @RelentlessFab cut me out some new u-bolt plates out of 1/2 steel...because why the hell not?!?! After that, just get your suspension cycled and set your shock mounts up.

    IMG_2506.jpg

    IMG_2495.jpg

    Currie will send two new axle seals that need to be pressed into the outer flanges of the housing. Straightforward as any axle seal, just press them in so they are flush.

    IMG_2468.jpg

    IMG_2471.jpg

    So the disk brake kit from SOS is pretty clever. It retains e-brake functionality similar to how the 4Runners are set up. That is you have a rotor with calipers and pads for the normal brakes. But inside the rotors are mechanical shoes that are used to press outward for an e-brake. It all uses the factory cables, just need to take out some slack in the adjustment under the center console.

    IMG_2417.jpg

    The Sequoia MS setup is pretty strait forward. Out with the old, in with the new and the adapter plate. The outlet ports are on the opposite side of the Tacoma MS, so they do include adapter brake lines, but you will have to bend them yourselves. A metal Tepui fest cup worked perfect for me to use to bend the lines around.

    IMG_2382.jpg

    IMG_2383.jpg

    IMG_2386.jpg

    Something to note is that the truss is hollow inside and dirt, mud, and shit can get in through the u-bolt holes and corrode it from the inside out. To combat this, I did the same thing I did with the truss I had on the Tundra axle I had on my first gen. And that is fill the truss and gaps with expanding foam you can get from any hardware store. When it dries, you just cut off the excess and run your drill through the foam for the u-bolts. It keeps out the vast majority of the shit out of the hollow voids.

    IMG_2496.jpg

    IMG_2499.jpg

    Brake Lines, Speed Sensors, Breather, and Air Line

    Nothing on the housing from Currie is tabbed for any of the brakes, or sensor wires. It does come with a driver’s side diff breather, so if you've already done a diff breather relocation, you are golden here. My old breather reroute slid right onto the breather nipple provided in the new Currie housing. But for the rest of the stuff, you as the builder make the decision how to route things. For the brake lines, I cut off the landing pad on the stock housing and welded it to the truss roughly in the same place on the housing (driver side of the pumpkin). Now given my axle is wider than stock, you definitely have to get a little creative if you want to reuse the brake lines that were on the stock housing. The lines were long enough, but I had to remove some of the bends and make some different bends to accommodate the new routing. Not difficult, but time consuming. Speed sensors were an even tighter fit. The axle tubes themselves are notched on the fore and aft side so the speed sensors can be placed either on the front or the rear of the axle. With the SOS kit, you're only choice is to clock the bearings so the speed sensors will install on the front side of the axle. There's no room on the rear. Again since my axle is wider, i had just enough slack to route the sensor wires without having to extend them.

    IMG_2572.jpg

    IMG_2573.jpg

    IMG_2575.jpg

    IMG_2576.jpg

    IMG_2570.jpg

    https://youtu.be/7oUbXD55Eic

    The last bit is again a bit of a builder decision. I wanted a 1350 yoke on the third member, but also like the flexibility of the 1330 u-joints used in Toyota driveshafts. So I got a crossover u-joint which converts the last 1330 u-joint in the driveshaft to half 1330 (connected to the Toyota driveshaft) but the other half of the u-joint is 1350. The last flange of the driveshaft is removed with this route.

    https://www.amazon.com/gp/product/B00CXAMVNO

    Physically this all bolted up. But there just isn't enough length in the slip yoke. I've got less than 1/2" of splines that are actually engaged in the slip yoke. So...as of the time of writing this, I'm going to have the second half of the driveshaft extended and balanced to put the slip yoke back where it's supposed to be. I've got a local gear and driveshaft shop that's re-tubed, shortened, balanced various driveshafts in the past. Plan on at least $150 for the driveshaft work.

    IMG_2579.jpg

    IMG_2578.jpg

    Bleed the brakes, fill it with fluids, and hit the road. Piece of cake...right?

    Oh and make sure to torque everything down. Nobody wants to be this guy.....

    ubolts.jpg
     
  2. Apr 24, 2018 at 3:45 PM
    #2
    EatSleepTacos

    EatSleepTacos Well-Known Member

    Joined:
    Mar 24, 2015
    Member:
    #151688
    Messages:
    59,637
    Gender:
    Male
    First Name:
    Randy
    West Valley, AZ
    Vehicle:
    2017 4Runner
    Did Ray Ch......never mind :anonymous:


    Good work man, that’s impressive.
     
  3. Apr 24, 2018 at 3:47 PM
    #3
    JimboAnz

    JimboAnz #OldNorm

    Joined:
    Feb 3, 2014
    Member:
    #122157
    Messages:
    21,613
    Gender:
    Male
    First Name:
    Jimbo
    Charlotte (Cornelius) NC
    Vehicle:
    2020 Ford F'in Ranger
    Subd :anonymous:
     
    Cozza likes this.
  4. Apr 24, 2018 at 3:48 PM
    #4
    ThomasMore66

    ThomasMore66 We can't stop here, this is bat country!

    Joined:
    Feb 9, 2013
    Member:
    #97155
    Messages:
    7,289
    Gender:
    Male
    Dallas/Fort Worth & Durango
    Vehicle:
    Supercharged 2013 TRD Offroad 4wd
    TRD Supercharger, TRD exhaust, Leather seats, running boards removed (why it came with them I cannot imagine), Salex organizers, BAMF behind-the-grill light bar, Rigid SR-20 and SR-Q - Spots mounted behind stock grill, color-matched grill, WeatherTech FloorLiner DigitalFit floor mats, Tech Deck, Avid bolt-on slider/step converted to weld on by TW member Achirdo, Diaz Fabrication Model T, Icon Stage 4 with OME Dakar rear leaf springs, OME Driveshaft spacer, Toytec 1" Front Diff Drop, FN BFD 18"x9" GMG Wheels, BFG KO2 285-65-18 tires, Ultragauge mounted above mirror, Tuffy Box lockable storage, MattGecko rear window security bar, Relentless Fab tailgate protector, CSJumper 700 lumen flood pattern back-up LED's, modified BeeRadd under-hood lighting with two KC Cyclones; KB Voodoo cargo management system and standard rails, AllPro hi-lift jack mount, 48" hi-lift, RCI Metalworks aluminum front skid, Flyzeye 3VP-RS in glovebox and console, AFE CAI, Coupe fuse box cover, battery hold-down bracket and CAI air-box cover, Wurton pod led's installed as bed lights on Lowbrow Customs motorcycle fork brake line aluminum brackets, Pop-n-Lock PL5400, Extang Solidfold 2.0, Rechelon Retro's, Moromoto LED fogs, URD Y-pipe, Walbro 255lph fuel pump, Speedhut AFR and Boost gauges, Cravenspeed gauge holder, CMC by Tandem Automotive, 70mm throttle body, CSF radiator, Doug Thorley shorties, Vibrant 7101 cats, SOS Offroad front and rear bumpers, Smoothflow 2.5” SC pulley, Steeda SC belt tensioner, roostfactor belt wrap kit, switch Pro 9100 in custom Tandem Automotive holder, WAT trans valvebody, FIC 650cc injectors, HP Tuner.
    Wow. I like that.
     
  5. Apr 24, 2018 at 4:12 PM
    #5
    Radarninja

    Radarninja Safety 3rd

    Joined:
    Jun 10, 2017
    Member:
    #221167
    Messages:
    1,225
    Gender:
    Male
    First Name:
    Ryan
    Northern California
    Vehicle:
    06 taco
    Chromed out radiator cap
    Ho lee shit! What a great write up!
    I am contemplating this build also and this will be/ is a huge help.
    Question.
    About the crossover ujoint
    These are new to me, previously my plan was going to be the have the drive shaft extended if needed and while that’s done have a 1350 put on the end so I can use a regular ujoint that’s available everywhere.
    Are there positives and or negatives to doing this?
    Thanks in advance
     
  6. Apr 24, 2018 at 4:17 PM
    #6
    jberry813

    jberry813 [OP] Professional Fluffer Moderator

    Joined:
    Jan 21, 2011
    Member:
    #49636
    Messages:
    28,471
    Gender:
    Male
    First Name:
    Jason
    Lake Tahoe
    Vehicle:
    2012 DCSB Sport
    ...too much shit to list.
    When you get the driveshaft lengthened you can get whatever end you want put on. I will caution that although the 1350 is stronger, it doesn't have as much angle of dangle as a 1330.
    I'll let my driveshaft guy figure out what's best and go from there. That's the only outstanding thing I have to do (I think).
     
    Anderson likes this.
  7. Apr 24, 2018 at 4:21 PM
    #7
    Gply

    Gply Well-Known Member

    Joined:
    Jul 19, 2015
    Member:
    #159770
    Messages:
    4,904
    Gender:
    Male
    Bay Area, CA (east bay)
    Vehicle:
    2015 Tacoma DC TRD off-road
    More shit then I ever planned on doing
    Good shit!
     
    Bentrodder and jberry813[OP] like this.
  8. Apr 24, 2018 at 4:26 PM
    #8
    Radarninja

    Radarninja Safety 3rd

    Joined:
    Jun 10, 2017
    Member:
    #221167
    Messages:
    1,225
    Gender:
    Male
    First Name:
    Ryan
    Northern California
    Vehicle:
    06 taco
    Chromed out radiator cap
    Awesome thanks for the reply, let us know what you go with (so I can copy you):anonymous:
     
  9. Apr 24, 2018 at 4:32 PM
    #9
    Steves104x4

    Steves104x4 Well-Known Member

    Joined:
    Apr 17, 2010
    Member:
    #35468
    Messages:
    15,834
    Gender:
    Male
    First Name:
    Steve
    Buffalo NY
    Vehicle:
    2010 RC 2.7 4x4
    BUCKLE UP! It makes it harder for Aliens to pull you out of your Truck.
    This is cray, cray! :thumbsup:
     
  10. Apr 24, 2018 at 4:50 PM
    #10
    buyobuyo

    buyobuyo Read The Fucking Manual

    Joined:
    Jan 24, 2008
    Member:
    #4417
    Messages:
    6,291
    Gender:
    Male
    First Name:
    Jeremy
    Camden, AR
    Vehicle:
    08 PreRunner SR5, I4, Manual, Silver
    A thing or two...
    Nice install.

    Thoughts on high pinion vs low pinion for the 3rd member? I see that you went with low pinion, but I would have figured that high pinion would have been prefered for clearance reasons.
     
  11. Apr 24, 2018 at 4:58 PM
    #11
    blu92in99

    blu92in99 Hates everyone, equally

    Joined:
    Aug 8, 2017
    Member:
    #226282
    Messages:
    1,136
    Gender:
    Male
    Elk Grove, Ca
    Damn dude, nice set up and install! :thumbsup:
     
  12. Apr 24, 2018 at 5:20 PM
    #12
    jberry813

    jberry813 [OP] Professional Fluffer Moderator

    Joined:
    Jan 21, 2011
    Member:
    #49636
    Messages:
    28,471
    Gender:
    Male
    First Name:
    Jason
    Lake Tahoe
    Vehicle:
    2012 DCSB Sport
    ...too much shit to list.
    High pinion with a 9" is the wrong decision for what I put my truck through. The high pinion design itself is inherently weaker because it runs on the coast side of the gear and nobody in the world cuts gears that are drive side engagement. And because it's reverse cut, general consensus is expect a 20% loss in strength by comparison. It actually pushes the pinion gear away from the ring gear. Some manufactures have tried to address this by putting a thrust block behind the ring gear with "mixed" results. If it's setup properly, it should prevent gear deflection, but it takes a special kind of builder to set that up right. And because it's so high, you don't get proper lubrication on the pinion gear. You need an extended shroud inside the housing and a ring gear cup that goes to the pinon support. All these are extra variables and more shit that can go wrong. Not my cup of tea.
     
  13. Apr 24, 2018 at 5:57 PM
    #13
    Bebop

    Bebop Old fashion cowboy

    Joined:
    Feb 11, 2016
    Member:
    #177835
    Messages:
    4,407
    Gender:
    Male
    First Name:
    Nick
    Castle rock Colorado
    Vehicle:
    2012 Toyota Tacoma baja
    6inch lift sitting on bilstein coilovers. Lexus is300 studs in front to keep stock wheels, general grabber red letters, nfab front bumper.
    This rear end gives me a stiffy!!!
     
    TaKoToy likes this.
  14. Apr 24, 2018 at 6:03 PM
    #14
    buyobuyo

    buyobuyo Read The Fucking Manual

    Joined:
    Jan 24, 2008
    Member:
    #4417
    Messages:
    6,291
    Gender:
    Male
    First Name:
    Jeremy
    Camden, AR
    Vehicle:
    08 PreRunner SR5, I4, Manual, Silver
    A thing or two...
    Thanks for the reply. I've been contemplating an axle upgrade to go with my LT build and have seen both high and low pinion 3rd members offered but nothing really on which is better or why, so this is good info. A lot of stuff I've come across Googling references high pinion but pertains to front axles, so I didn't know if it was the same for rears or not.
     
    ETXTacoma likes this.
  15. Apr 24, 2018 at 6:05 PM
    #15
    jberry813

    jberry813 [OP] Professional Fluffer Moderator

    Joined:
    Jan 21, 2011
    Member:
    #49636
    Messages:
    28,471
    Gender:
    Male
    First Name:
    Jason
    Lake Tahoe
    Vehicle:
    2012 DCSB Sport
    ...too much shit to list.
    Yeah fronts are different. If you are set on a rear high pinion, definitely go with the Dana 60.
     
  16. Apr 24, 2018 at 6:09 PM
    #16
    05tacomabro

    05tacomabro will work for truck parts...

    Joined:
    Jul 14, 2015
    Member:
    #159436
    Messages:
    3,197
    Gender:
    Male
    First Name:
    Alex
    Tucson
    Vehicle:
    05 dcsb trd off road
    Icon ex. Travel co's, spc uca's, bamf lca skids, 1" body, all pro heavy duty sliders, expo springs, BAMF shackle hangers, 14" bilstein 7100, rear frame box, custom rear frame crossmember, ifs skid, transmission skid, t-case skid(modified by @jeepandrew for exhaust reroute and more beef), custom k&n intake, flowmaster, diff breather mod, stereo with nav/speakers/subs, coverking tactical ballistic seat covers, Baja utility rack, lots of bed liner, anytime fog mod and steel braided brake lines, energy suspension rad support bushings, abs kill switch, cali raised ditch lights, fsr rtt. Lots of plans, little money....
    Beautiful write up! Thank you!
     
    jberry813[QUOTED][OP] likes this.
  17. Apr 24, 2018 at 6:11 PM
    #17
    buyobuyo

    buyobuyo Read The Fucking Manual

    Joined:
    Jan 24, 2008
    Member:
    #4417
    Messages:
    6,291
    Gender:
    Male
    First Name:
    Jeremy
    Camden, AR
    Vehicle:
    08 PreRunner SR5, I4, Manual, Silver
    A thing or two...
    Not set on high or low. Just everything that I was reading mentioned high pinion because they were talking about fronts, but the added clearance sounds like a good thing. The diff skid that you have should help with that though.

    My main concern is that I'm 4 cylinder and a Prerunner, so speed tends to be my best option for getting over obstacles when I go off-road.
     
  18. Apr 24, 2018 at 6:11 PM
    #18
    t.hornstra

    t.hornstra Well-Known Member

    Joined:
    Oct 14, 2008
    Member:
    #9957
    Messages:
    5,264
    Gender:
    Male
    First Name:
    Ted
    NorCal
    Vehicle:
    White with 4 wheels
    Little this. Little that 4x4 Swap’d PreRunner
    :bowdown:
     
  19. Apr 24, 2018 at 6:27 PM
    #19
    Radarninja

    Radarninja Safety 3rd

    Joined:
    Jun 10, 2017
    Member:
    #221167
    Messages:
    1,225
    Gender:
    Male
    First Name:
    Ryan
    Northern California
    Vehicle:
    06 taco
    Chromed out radiator cap
    Good question and good answer!
     
  20. Apr 24, 2018 at 6:34 PM
    #20
    tetten

    tetten Cynical Twat Waffle

    Joined:
    Nov 2, 2014
    Member:
    #141581
    Messages:
    2,504
    First Name:
    Andy
    Socal
    Years ago Currie was selling a high 9 but stopped because they weren't holding up, even with 35" tires on light jeeps, this is according to the guy I talked to at currie. AFAIK there's only 1 company that still sells a high 9 3rd member. Unless you've got a 4x4 and intend on crawling I wouldn't bother with a HP rear. (no I'm not implying you can't crawl with a 9)
     
    jberry813[OP] likes this.

Products Discussed in

To Top