1. Welcome to Tacoma World!

    You are currently viewing as a guest! To get full-access, you need to register for a FREE account.

    As a registered member, you’ll be able to:
    • Participate in all Tacoma discussion topics
    • Communicate privately with other Tacoma owners from around the world
    • Post your own photos in our Members Gallery
    • Access all special features of the site

How do i replace the rear bumper assembly?

Discussion in '2nd Gen. Tacomas (2005-2015)' started by Vrbas, May 26, 2010.

  1. May 26, 2010 at 4:35 PM
    #1
    Vrbas

    Vrbas [OP] Well-Known Member

    Joined:
    May 5, 2010
    Member:
    #36588
    Messages:
    376
    Gender:
    Male
    Vehicle:
    2013 4x4 DCSB 6speed
    Hey, i'm wondering if there's a guide or set of directions on how to take off and put on a rear bumper for my '09 base tacoma (4x2)? I've got a punch dent in the back of mine and need to replace it, but isn't sure if it's worth paying money for a shop to do.

    Is it hard to replace myself? Should i get a shop? Any instructables?
     
  2. May 26, 2010 at 4:41 PM
    #2
    Brunes

    Brunes abides.

    Joined:
    May 31, 2008
    Member:
    #7011
    Messages:
    17,562
    Gender:
    Male
    First Name:
    Rotorhead
    Around
    Vehicle:
    08 Red/Graphite and Satin Black
    Inside: Tint, Wet Okole 1/2 Piped Red/Black Covers, Black Weathertech Digital Fit Mats, URD Short Throw w/ TWM Weighted Knob, USA Spec iPod adapter. Outside: 4300K Retro w/ Angel Eyes and Red Shrouds, 5000K Blazer Fog Light Retrofit, Debadge, Bed Locking Handle, Satin Black Rims Performance: TRD/Steigmeier Blower w/ 2.7 Pulley. 668 Injectors and 320 LPH AEM Fuel pump. URD UCON and 7th Injector. DTLT Headers, URD Y-Pipe, Wicked Flow Muffler. Suspension: Both: OME Shocks Front: 886X's and TC UCAs Rear: Dakars Armor: Relentless Front Bumper Relentless High Clearance Rear w/ Tire/Rotopax Swing Out Relentless Front, Mid, and TCase skids BAMF Diff Skid Recovery and Spares: Fullsize Spare Tire 2x2 gal Rotopax 1x1 gal Rotopax 1x1 gal Water Rotopax Warn 9.5XP-S Winch Hi-Lift Extreme 60" Ironman Off-Road Recovery Kit
    You'll have to look around there- but use the 05+ FSM and you'll be all set.
     
  3. May 26, 2010 at 6:18 PM
    #3
    TexasTacoma37

    TexasTacoma37 Well-Known Member

    Joined:
    Sep 3, 2009
    Member:
    #22227
    Messages:
    31,174
    Gender:
    Male
    Just 4 bolts. Take a look under there and you will see how easy it is to remove.
     
  4. May 26, 2010 at 6:46 PM
    #4
    PreRunner

    PreRunner Well-Known Member

    Joined:
    Feb 7, 2010
    Member:
    #30930
    Messages:
    401
    Gender:
    Male
    try 6
     
  5. May 26, 2010 at 6:48 PM
    #5
    TexasTacoma37

    TexasTacoma37 Well-Known Member

    Joined:
    Sep 3, 2009
    Member:
    #22227
    Messages:
    31,174
    Gender:
    Male
    It's 4. I just went out and double-checked.

    You would have to remove 6 if you wanted the mounting bracket to still be attached to the bumper rather than the frame.
     
  6. May 27, 2010 at 6:22 AM
    #6
    Vrbas

    Vrbas [OP] Well-Known Member

    Joined:
    May 5, 2010
    Member:
    #36588
    Messages:
    376
    Gender:
    Male
    Vehicle:
    2013 4x4 DCSB 6speed
    Alright, thanks everyone. I found the guide.

    However, i'm trying to save money here, so if i could miraculously fix it myself that'd be the best. I said it had a punch dent on the steel part just below the step covers. If i took the bumper off, do you think i could hammer it out? I'm not looking for a perfect, pretty bumper. I just wanna clean it up a little to make it look like i wasn't in a fresh wreck.
     
  7. May 27, 2010 at 10:27 AM
    #7
    Vrbas

    Vrbas [OP] Well-Known Member

    Joined:
    May 5, 2010
    Member:
    #36588
    Messages:
    376
    Gender:
    Male
    Vehicle:
    2013 4x4 DCSB 6speed
    Bump
     
  8. May 27, 2010 at 10:44 AM
    #8
    Brunes

    Brunes abides.

    Joined:
    May 31, 2008
    Member:
    #7011
    Messages:
    17,562
    Gender:
    Male
    First Name:
    Rotorhead
    Around
    Vehicle:
    08 Red/Graphite and Satin Black
    Inside: Tint, Wet Okole 1/2 Piped Red/Black Covers, Black Weathertech Digital Fit Mats, URD Short Throw w/ TWM Weighted Knob, USA Spec iPod adapter. Outside: 4300K Retro w/ Angel Eyes and Red Shrouds, 5000K Blazer Fog Light Retrofit, Debadge, Bed Locking Handle, Satin Black Rims Performance: TRD/Steigmeier Blower w/ 2.7 Pulley. 668 Injectors and 320 LPH AEM Fuel pump. URD UCON and 7th Injector. DTLT Headers, URD Y-Pipe, Wicked Flow Muffler. Suspension: Both: OME Shocks Front: 886X's and TC UCAs Rear: Dakars Armor: Relentless Front Bumper Relentless High Clearance Rear w/ Tire/Rotopax Swing Out Relentless Front, Mid, and TCase skids BAMF Diff Skid Recovery and Spares: Fullsize Spare Tire 2x2 gal Rotopax 1x1 gal Rotopax 1x1 gal Water Rotopax Warn 9.5XP-S Winch Hi-Lift Extreme 60" Ironman Off-Road Recovery Kit
    Yeah man- You should be able to do a little something with it. Get it pressed/hammered back out.

    Maybe throw some bedliner or something on it and see how that looks. Might cover up the imperfections a bit more.
     
  9. May 27, 2010 at 12:23 PM
    #9
    Vrbas

    Vrbas [OP] Well-Known Member

    Joined:
    May 5, 2010
    Member:
    #36588
    Messages:
    376
    Gender:
    Male
    Vehicle:
    2013 4x4 DCSB 6speed
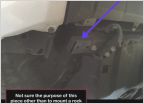
    Cool, looks like i got my work cut out for me one afternoon. Here's a pick of what i'll be working with:

    [​IMG]

    It's annoying because the bumper isn't sitting flush with the light, that's really my only complaint. So i'm going to do my best to bust it back into shape.
     
  10. May 27, 2010 at 12:28 PM
    #10
    TexasTacoma37

    TexasTacoma37 Well-Known Member

    Joined:
    Sep 3, 2009
    Member:
    #22227
    Messages:
    31,174
    Gender:
    Male
    My dent was less severe than that and I could not get it out. Good luck to you.
     
  11. May 27, 2010 at 12:31 PM
    #11
    Vrbas

    Vrbas [OP] Well-Known Member

    Joined:
    May 5, 2010
    Member:
    #36588
    Messages:
    376
    Gender:
    Male
    Vehicle:
    2013 4x4 DCSB 6speed
    Bummer, well is it even worth a DIY try?

    *spell check, dang.
     
  12. May 27, 2010 at 5:26 PM
    #12
    BlueXenon

    BlueXenon Well-Known Member

    Joined:
    Oct 29, 2008
    Member:
    #10366
    Messages:
    406
    Gender:
    Male
    Los Angeles and Newport Coast
    Vehicle:
    2009 Magnetic gray TRD sport (SOLD) 2004 Radiant Red TRD Off Road (SOLD)
    Pro Comp 6" Stage 2 lift, N-Fab nerf bars, tinted windows, debadged, 6000k xenon headlights, 18" ProComp 7089 Wheels in black with BFG AT KO 33's, SnugLid tonneau cover, Line X'ed TRD skid plate. SOLD! Waiting for the 3rd Gen!
    I wouldn't waste my time, that looks pretty bad. You are better off just replacing it with a new one.
     
  13. May 27, 2010 at 5:29 PM
    #13
    JM76

    JM76 Ride On

    Joined:
    Dec 3, 2007
    Member:
    #3695
    Messages:
    2,035
    Gender:
    Male
    First Name:
    Jon
    SC
    Vehicle:
    2016 AC SR 4x4
    bone stock save for the block lift that came on it with the open country m/t.
    after looking at the picture, you are better off replacing it. Good luck. :)
     
  14. May 27, 2010 at 5:40 PM
    #14
    Vrbas

    Vrbas [OP] Well-Known Member

    Joined:
    May 5, 2010
    Member:
    #36588
    Messages:
    376
    Gender:
    Male
    Vehicle:
    2013 4x4 DCSB 6speed
    Dang. Would it really be that hard to hammer or press out? I know it's not gonna look sexy again but i just wanna get it flush.
     
  15. May 28, 2010 at 9:36 PM
    #15
    Vrbas

    Vrbas [OP] Well-Known Member

    Joined:
    May 5, 2010
    Member:
    #36588
    Messages:
    376
    Gender:
    Male
    Vehicle:
    2013 4x4 DCSB 6speed
    bump.

    I wanna make sure there's little to no way i could get it out myself or w/ a machine before i close the case on this one.
     
  16. May 29, 2010 at 1:59 AM
    #16
    Nirvana

    Nirvana Tesla Auto

    Joined:
    Jan 2, 2010
    Member:
    #28653
    Messages:
    1,249
    Gender:
    Male
    First Name:
    Kris
    Morgan Hill, U.S.A
    Vehicle:
    2006 Off Road 4X4
    Icon ext. travel 2.5RR in front, Icon ext. travel 2.0RR in rear, BuiltRight uniball UCAs, Wheelers Superbumps, Goodridge steel braided brake lines, BruteForce front plate bumper w/ Warn M9000+synth line, American Auto Horns ACDF, Pelfrey Bussman mount+Sandman bussman fuse block (soon), 255/75R16s on painted stockers...because I'm not paying $800 to rock rash new wheels you scrubs. Shok Industries 2/0 big 4 upgrade and sound deadener.
    I'm sure you could with a good bit of effort, looks pretty beat in though. As far as getting it flush with the light...best of luck on that one. The previous owner of mine got hit on the passenger side bumper and it's torqued beyond my repair abilities. My rear bumper seems to be a magnet for dents so I kind of stopped caring though.
     
  17. May 30, 2010 at 1:27 AM
    #17
    09638

    09638 SCRAPER

    Joined:
    Nov 27, 2009
    Member:
    #26588
    Messages:
    106
    Gender:
    Male
    oahu,hawaii
    Vehicle:
    11 trd sport sr5 prerunner
    2% tint, 20% entire windshield tint, led bulbs, hids, debadged, grey plate covers, shaved antenna, alpine in dash, rockford t2 and amps, rockford highs and mids, 35x12.50x20 toyo mt's, 20x12 fuel octane's deep, 1.5 inch wheel spacers, camburg UCA's, 6" lift w/4" blocks & AAL, 3" body lift, open hood scoop, BHLM, painted emblem, K&N filters, weather tech mats. Next Mod: resevoir rear shocks, Vinyl camo wrap when I'm bored of the grey...
    thats not fixable, even if you tried your best to pound it out it would still look like crap. you'll never be able to get it to line up with the tail light like it was before.

    What you need to do is only buy the actual steel bumper with nothing attached to it. Its around 270-280 from the dealership. If you go take a look under your bumper there are lots of brackets and steel "bracing" to protect the truck in the event of a crash. all those parts add up to lots of cash. Once you get the new bumper take off the old one and place them side-by-side. then swap all the brackets/steel bracing from the smashed bumper to the new one. you can also swap over the plastic pieces on the top of the bumper and below the license plate, and the license plate lights(make sure you get the orange clips that they screw into). Some of the brackets on the right side may be bent from the impact, if they are its important you replace them with new ones for safety and so the bumper mounts straight.

    its not very hard to swap it out, took me less than a hour. If you want to you could use this as an excuse to paint your new bumper the same color as your truck, would look better than the flat black.
     

Products Discussed in

To Top